> ## Documentation Index
> Fetch the complete documentation index at: https://docs.tenderly.co/llms.txt
> Use this file to discover all available pages before exploring further.
# Alert Destinations
> जब आपके Tenderly alerts ट्रिगर हों तो notifications प्राप्त करने के लिए email, Slack, और webhooks जैसे alert destinations कॉन्फ़िगर करें।
जब वांछित event आपके Alert को ट्रिगर करता है, तो Tenderly event के बारे में डेटा एक निर्दिष्ट Alert Destination पर भेजेगा। Destination इस डेटा का उपयोग आपको email notification, Discord या Slack संदेश भेजने के लिए, या इसे किसी अन्य Tenderly system जैसे Web3 Actions या Webhook पर भेजने के लिए करेगा।
आप कई Alerts के लिए एकल Destination सेट कर सकते हैं, और एक Alert कई Destinations पर डेटा भेज सकता है।
### Alert Destination scope
कुछ Destinations तक पहुँच scope द्वारा सीमित है:
* **Account-scoped:** एक ही Destination का उपयोग आपके Tenderly account के भीतर बनाए गए सभी projects में किया जा सकता है। इसमें email, Slack, Telegram, Discord, Sentry, और PagerDuty शामिल हैं।
* [**account-scoped Destinations कैसे बनाएँ**](/monitoring/alerts/destinations/account-scoped) जानें।
* **Project-scoped:** किसी विशिष्ट project के भीतर बनाए गए Alert Types के लिए ही उपयोग किया जा सकता है। इसमें Web3 Actions और Webhooks शामिल हैं।
* [**project-scoped Destinations कैसे बनाएँ**](/monitoring/alerts/destinations/project-scoped) जानें।
यदि आप किसी Destination को edit या delete करते हैं, तो यह परिवर्तन सभी projects और सक्रिय Alert Types में परिलक्षित होगा।
### Alert Destination कैसे बनाएँ
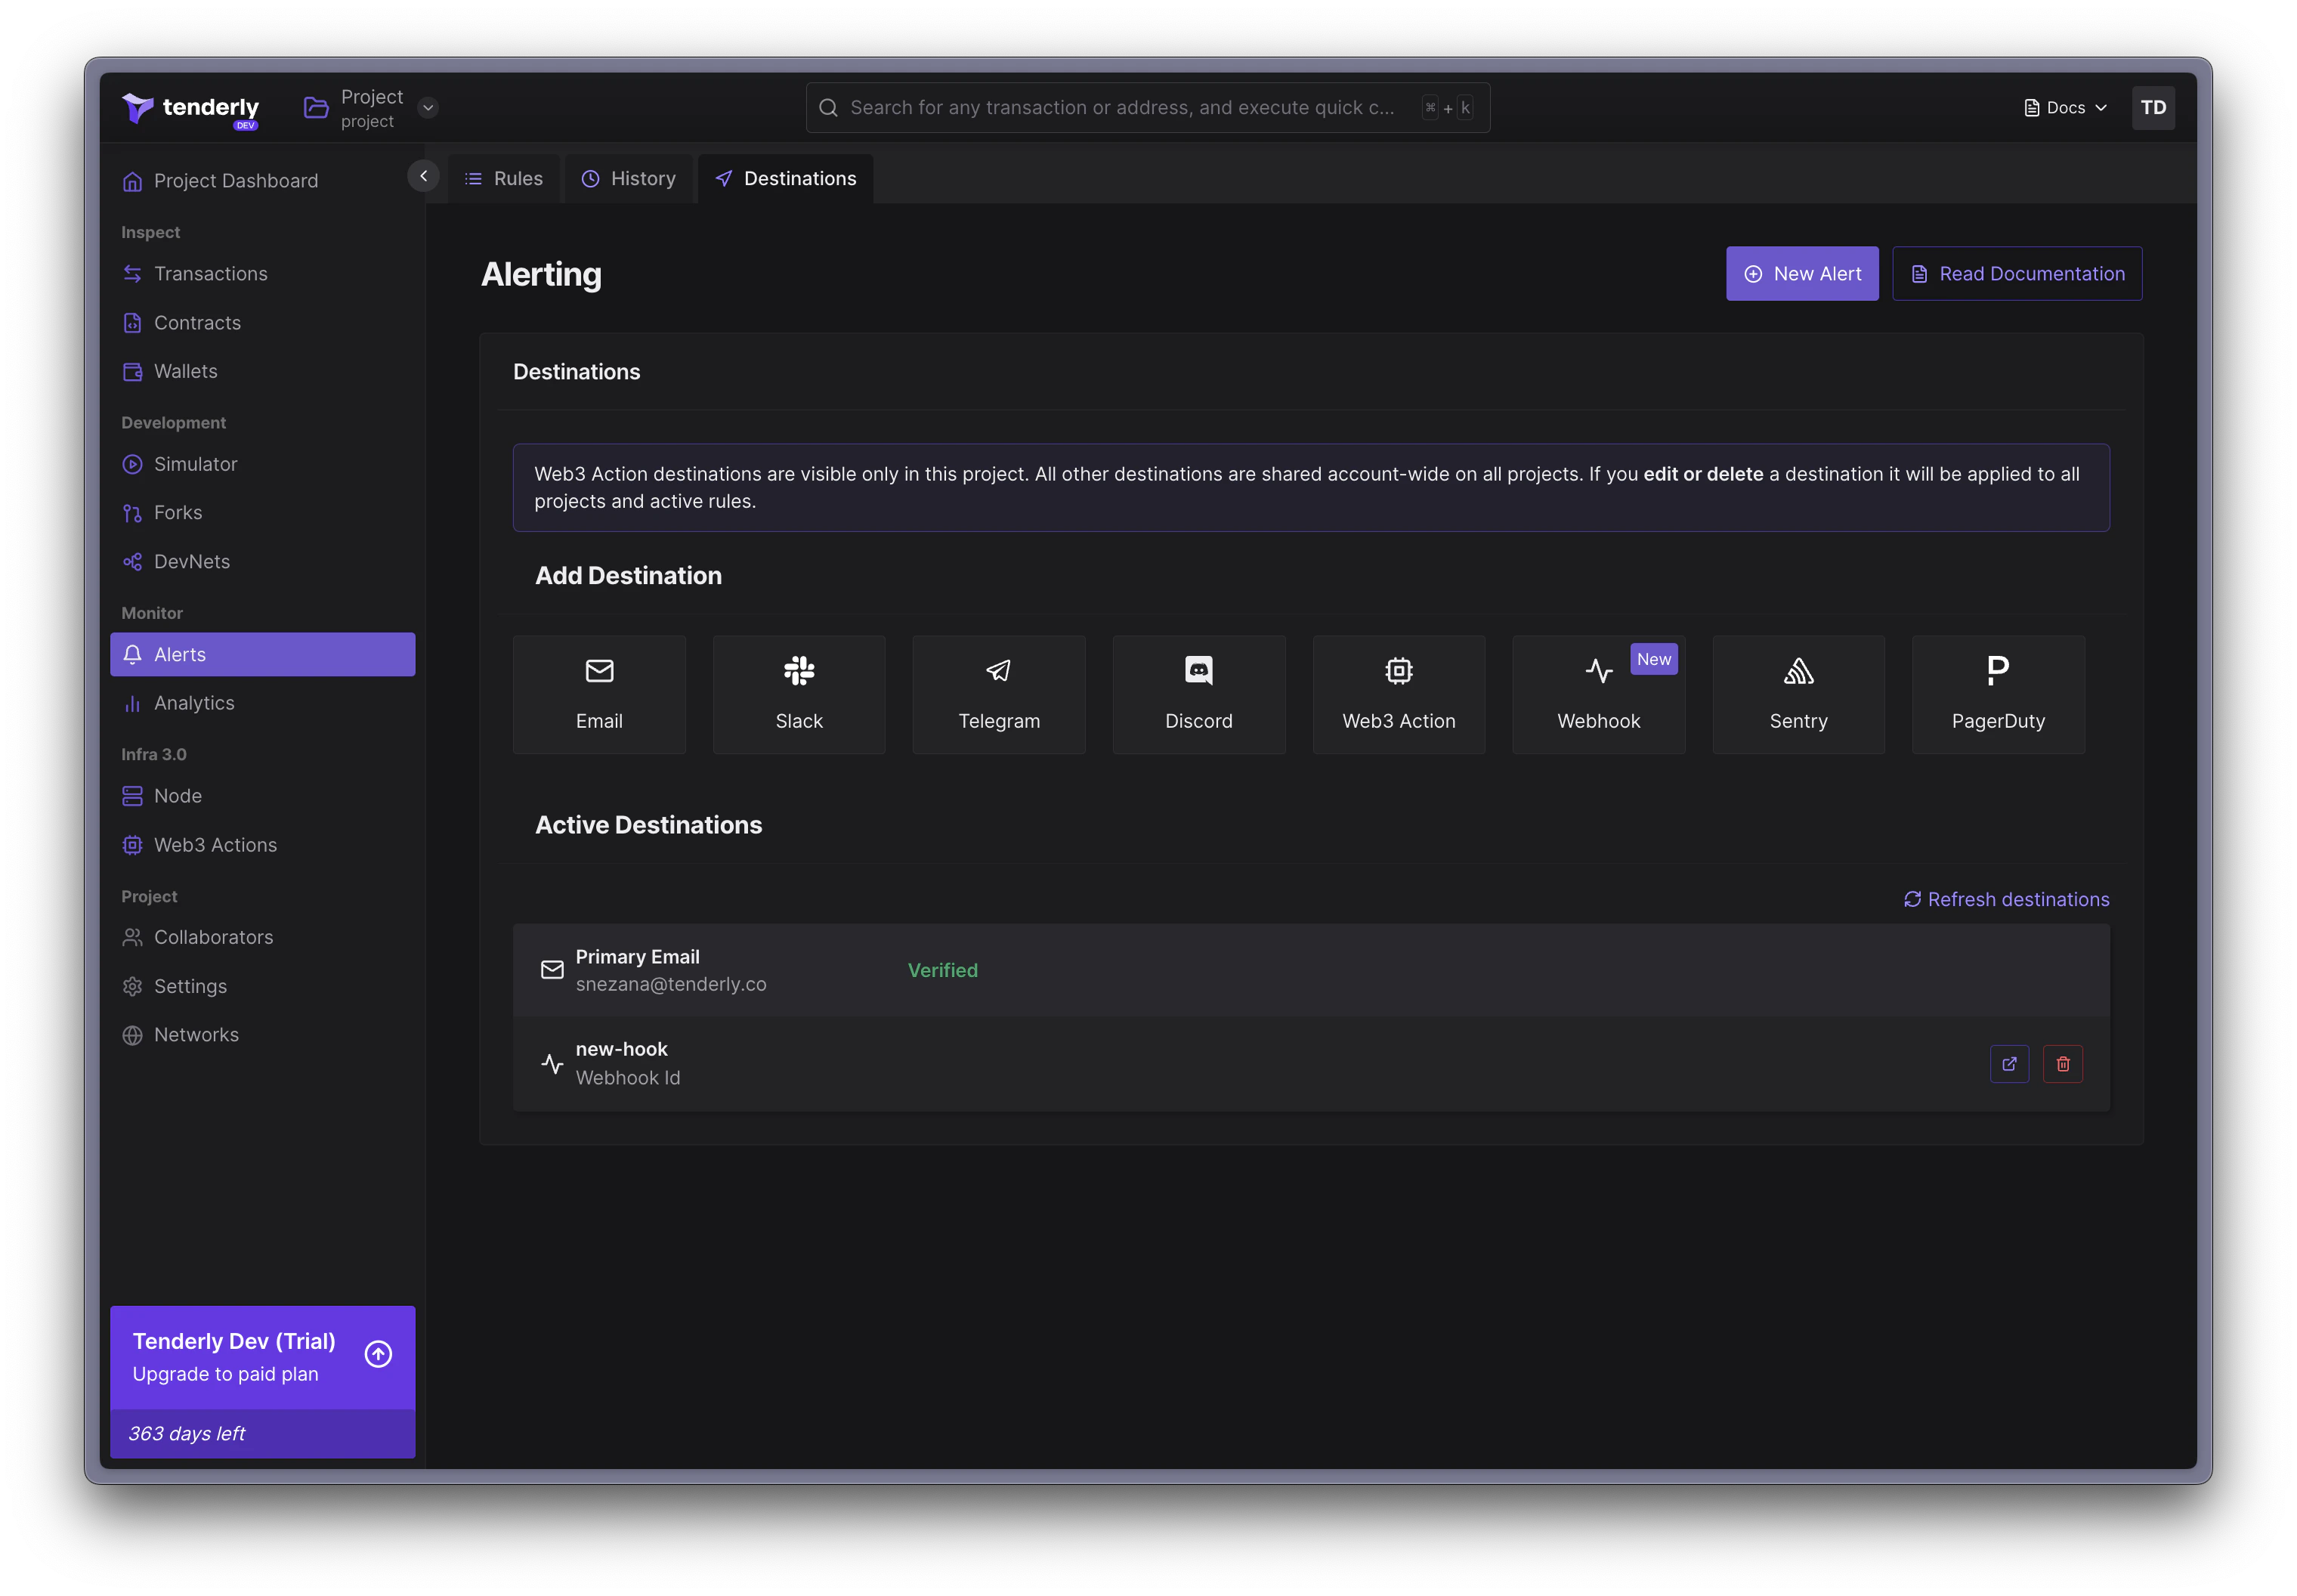 1. बाईं ओर के मेनू से **Alerts पर जाएँ**।
2. शीर्ष पेज मेनू से **Destinations पर क्लिक करें**।
3. अपनी आवश्यकताओं के अनुसार **Destination चुनें**।
4. प्रकार के आधार पर **Destination कॉन्फ़िगर करें** और इसे enable करें।
5. आपके द्वारा बनाए गए Destinations को देखने और प्रबंधित करने के लिए **Active Destinations** अनुभाग देखें।
जब आप पहली बार Destination बनाते हैं, तो यह इस पेज पर दिखाई देगा, और यह सभी मौजूदा और भविष्य के Alerts में उपयोग के लिए उपलब्ध होगा।
आप व्यक्तिगत Alerts को कॉन्फ़िगर करने की प्रक्रिया में भी नए Destinations बना सकते हैं।
1. बाईं ओर के मेनू से **Alerts पर जाएँ**।
2. शीर्ष पेज मेनू से **Destinations पर क्लिक करें**।
3. अपनी आवश्यकताओं के अनुसार **Destination चुनें**।
4. प्रकार के आधार पर **Destination कॉन्फ़िगर करें** और इसे enable करें।
5. आपके द्वारा बनाए गए Destinations को देखने और प्रबंधित करने के लिए **Active Destinations** अनुभाग देखें।
जब आप पहली बार Destination बनाते हैं, तो यह इस पेज पर दिखाई देगा, और यह सभी मौजूदा और भविष्य के Alerts में उपयोग के लिए उपलब्ध होगा।
आप व्यक्तिगत Alerts को कॉन्फ़िगर करने की प्रक्रिया में भी नए Destinations बना सकते हैं।