> ## Documentation Index
> Fetch the complete documentation index at: https://docs.tenderly.co/llms.txt
> Use this file to discover all available pages before exploring further.
# Project-Scoped
> यह पेज आपको प्रत्येक project-scoped Alert Destination बनाने के तरीके के बारे में मार्गदर्शन करता है।
Project-scoped Destinations केवल उसी project के भीतर सुलभ हैं जिसमें उन्हें बनाया गया था।
### Web3 Actions
इस प्रकार के alert destination का मतलब है कि आपकी action का उपयोग [**alert के लिए destination**](/monitoring/web3-actions/references/notifications) के रूप में किया जाएगा।
```yaml title="example.yaml" showLineNumbers theme={"theme":{"light":"catppuccin-latte","dark":"catppuccin-mocha"}}
trigger:
type: alert
alert: {}
```
एक ही action का उपयोग कई alerts के लिए destination के रूप में किया जा सकता है।
अधिक जानकारी के लिए, [इस और सामान्य रूप से Web3 Actions के बारे में अधिक पढ़ें](/monitoring/web3-actions/introduction)।
### Webhooks
यह alert destination alert ट्रिगर होने पर आपके webhook को निष्पादित करने की अनुमति देता है। आपके webhook को एक signed payload प्राप्त होगा, जिसमें वह transaction object होगा जिसने alert को ट्रिगर किया।
Webhook को alert destination के रूप में जोड़ने के बाद, आप इसे अन्य alerts के लिए destination के रूप में उपयोग कर सकते हैं।
#### webhook की आवश्यकताएँ:
* इसे webhook URI के साथ एक **GET** method **अवश्य** उजागर करना चाहिए, जो तुरंत `HTTP 200` लौटाता है। Tenderly यह सत्यापित करने के लिए इस method से एक request करता है कि webhook पहुंच योग्य है।
* इसे उसी webhook URI के साथ एक **POST** method **अवश्य** उजागर करना चाहिए। Webhook को नीचे वर्णित payload प्राप्त होगा।
* जब तक कोई `HTTP 200` **5 सेकंड** के भीतर प्रतिक्रिया नहीं देता है, Tenderly इसे विफल webhook निष्पादन मानता है।
* webhook URL को HTTPS का उपयोग करना चाहिए।
Webhook को **5 सेकंड** की समय-सीमा के भीतर प्रतिक्रिया देनी चाहिए। यदि कोई प्रतिक्रिया नहीं है, तो निष्पादन विफल माना जाता है।
Tenderly सभी निष्पादनों का ट्रैक रखता है। Webhook निष्पादन के कई statuses हो सकते हैं:
* **Success** - इंगित करता है कि webhook सफलतापूर्वक निष्पादित किया गया था और event को निर्दिष्ट URL पर वितरित किया गया था
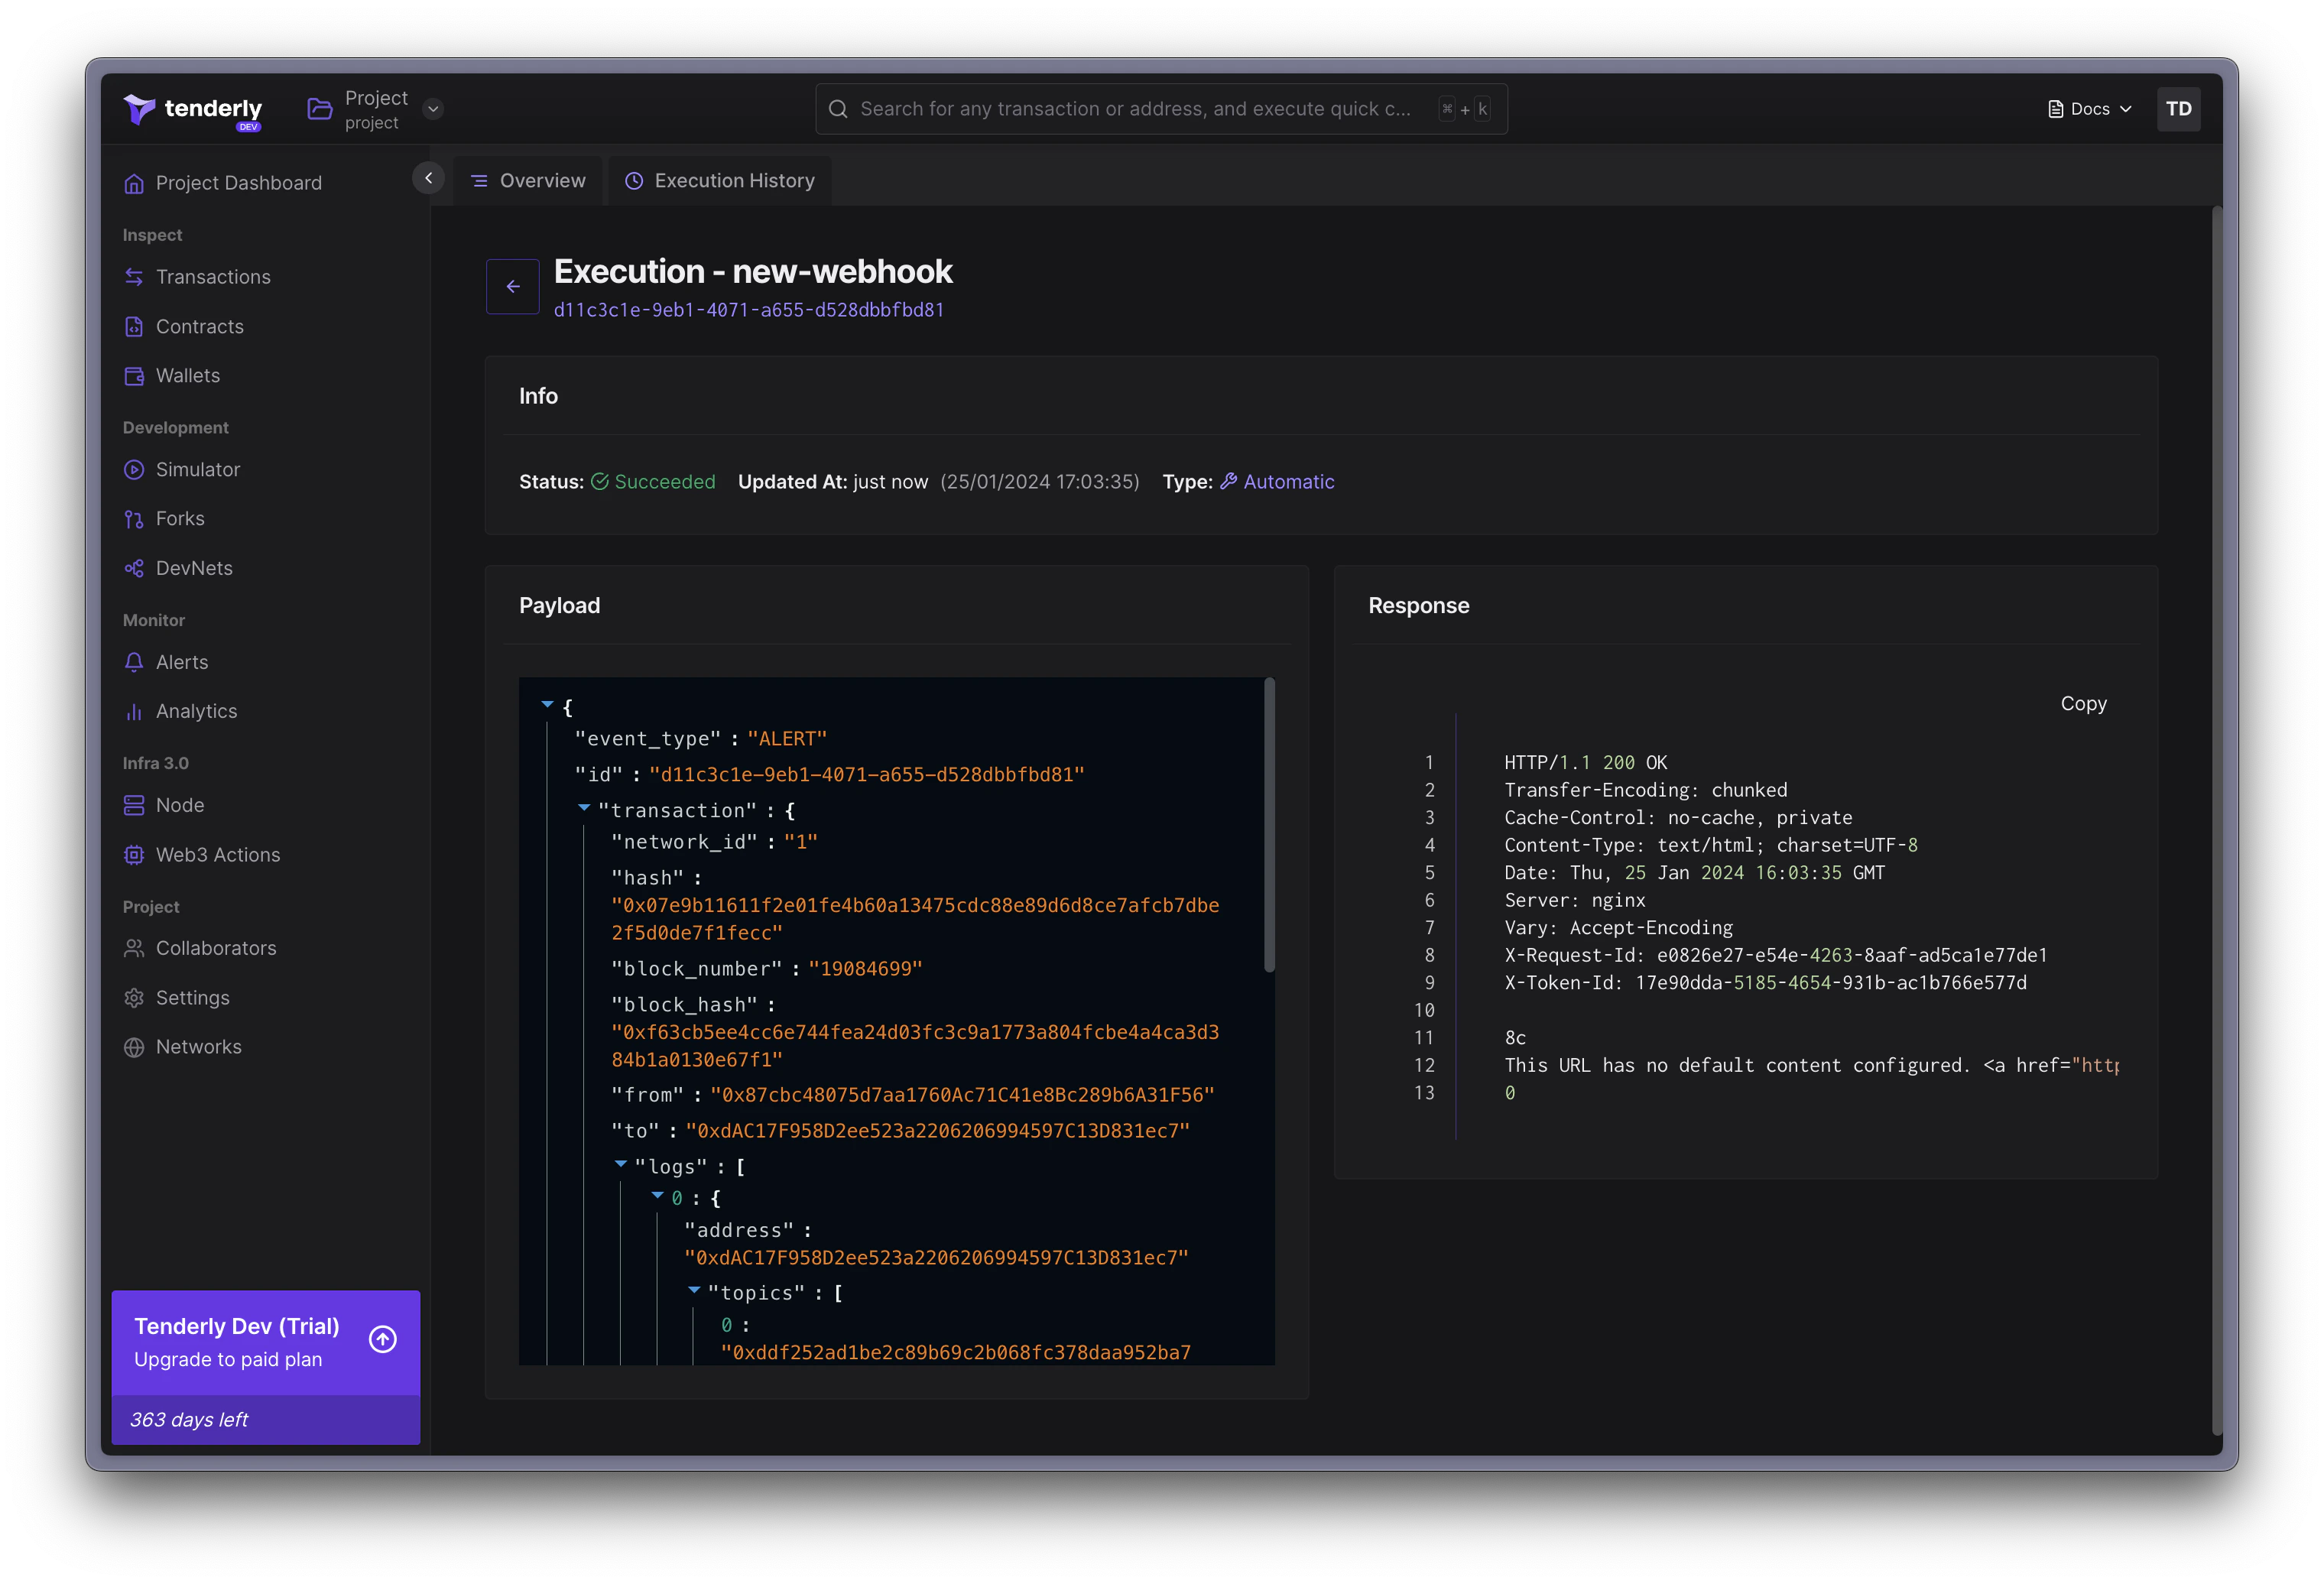
* **Failed** - इंगित करता है कि किसी error के कारण webhook को निष्पादित नहीं किया जा सका, जैसे कि connectivity समस्या, URL के साथ समस्या, या कुछ और (यह देखने के लिए कि error का कारण क्या था, response content जांचें या हमारे support से संपर्क करें)
* **Pending** - इंगित करता है कि webhook निष्पादित होने की प्रक्रिया में है और अभी तक पूरा नहीं हुआ है
* **Retry** - इंगित करता है कि webhook निष्पादन विफल हो गया लेकिन Success या Failed status में बदलने तक 5 से अधिक बार पुनः प्रयास नहीं किया जाएगा
* **Skipped** - इंगित करता है कि webhook निष्पादित नहीं किया गया था क्योंकि यह disabled था
#### Webhook payload
webhook को alerting event का प्रतिनिधित्व करने वाला payload प्राप्त होगा। payload में तीन fields होते हैं:
* **id**: `String` - सभी delivered alert events में अद्वितीय ID (UUID)।
* **event\_type**: `TEST` | `ALERT` - webhook event type का प्रकार।
* **transaction**: `Object` - एक un-decoded transaction का प्रतिनिधित्व करने वाला object जिसने alert और webhook निष्पादन को ट्रिगर किया।
Webhook को alert destination के रूप में जोड़ने पर, इसे `TEST` alert event type के साथ invoke किया जाएगा।
यह सुनिश्चित करने के लिए `id` field का उपयोग करें कि आपका webhook प्रत्येक alert event को ठीक एक बार process करता है, process किए गए IDs का ट्रैक रखकर।
#### Webhook को सुरक्षित करना
आप signature validation method का उपयोग करके अपने webhooks की सुरक्षा बढ़ा सकते हैं। इस तरह, आप निष्पादन के साथ आगे बढ़ने से पहले सत्यापित कर सकते हैं कि webhook की request Tenderly से उत्पन्न हुई है।
`x-tenderly-signature` header में एक cryptographic signature होता है। webhook request signature इस क्रम में concatenated signing secret, request payload, और timestamp का एक HMAC SHA256 hash है।
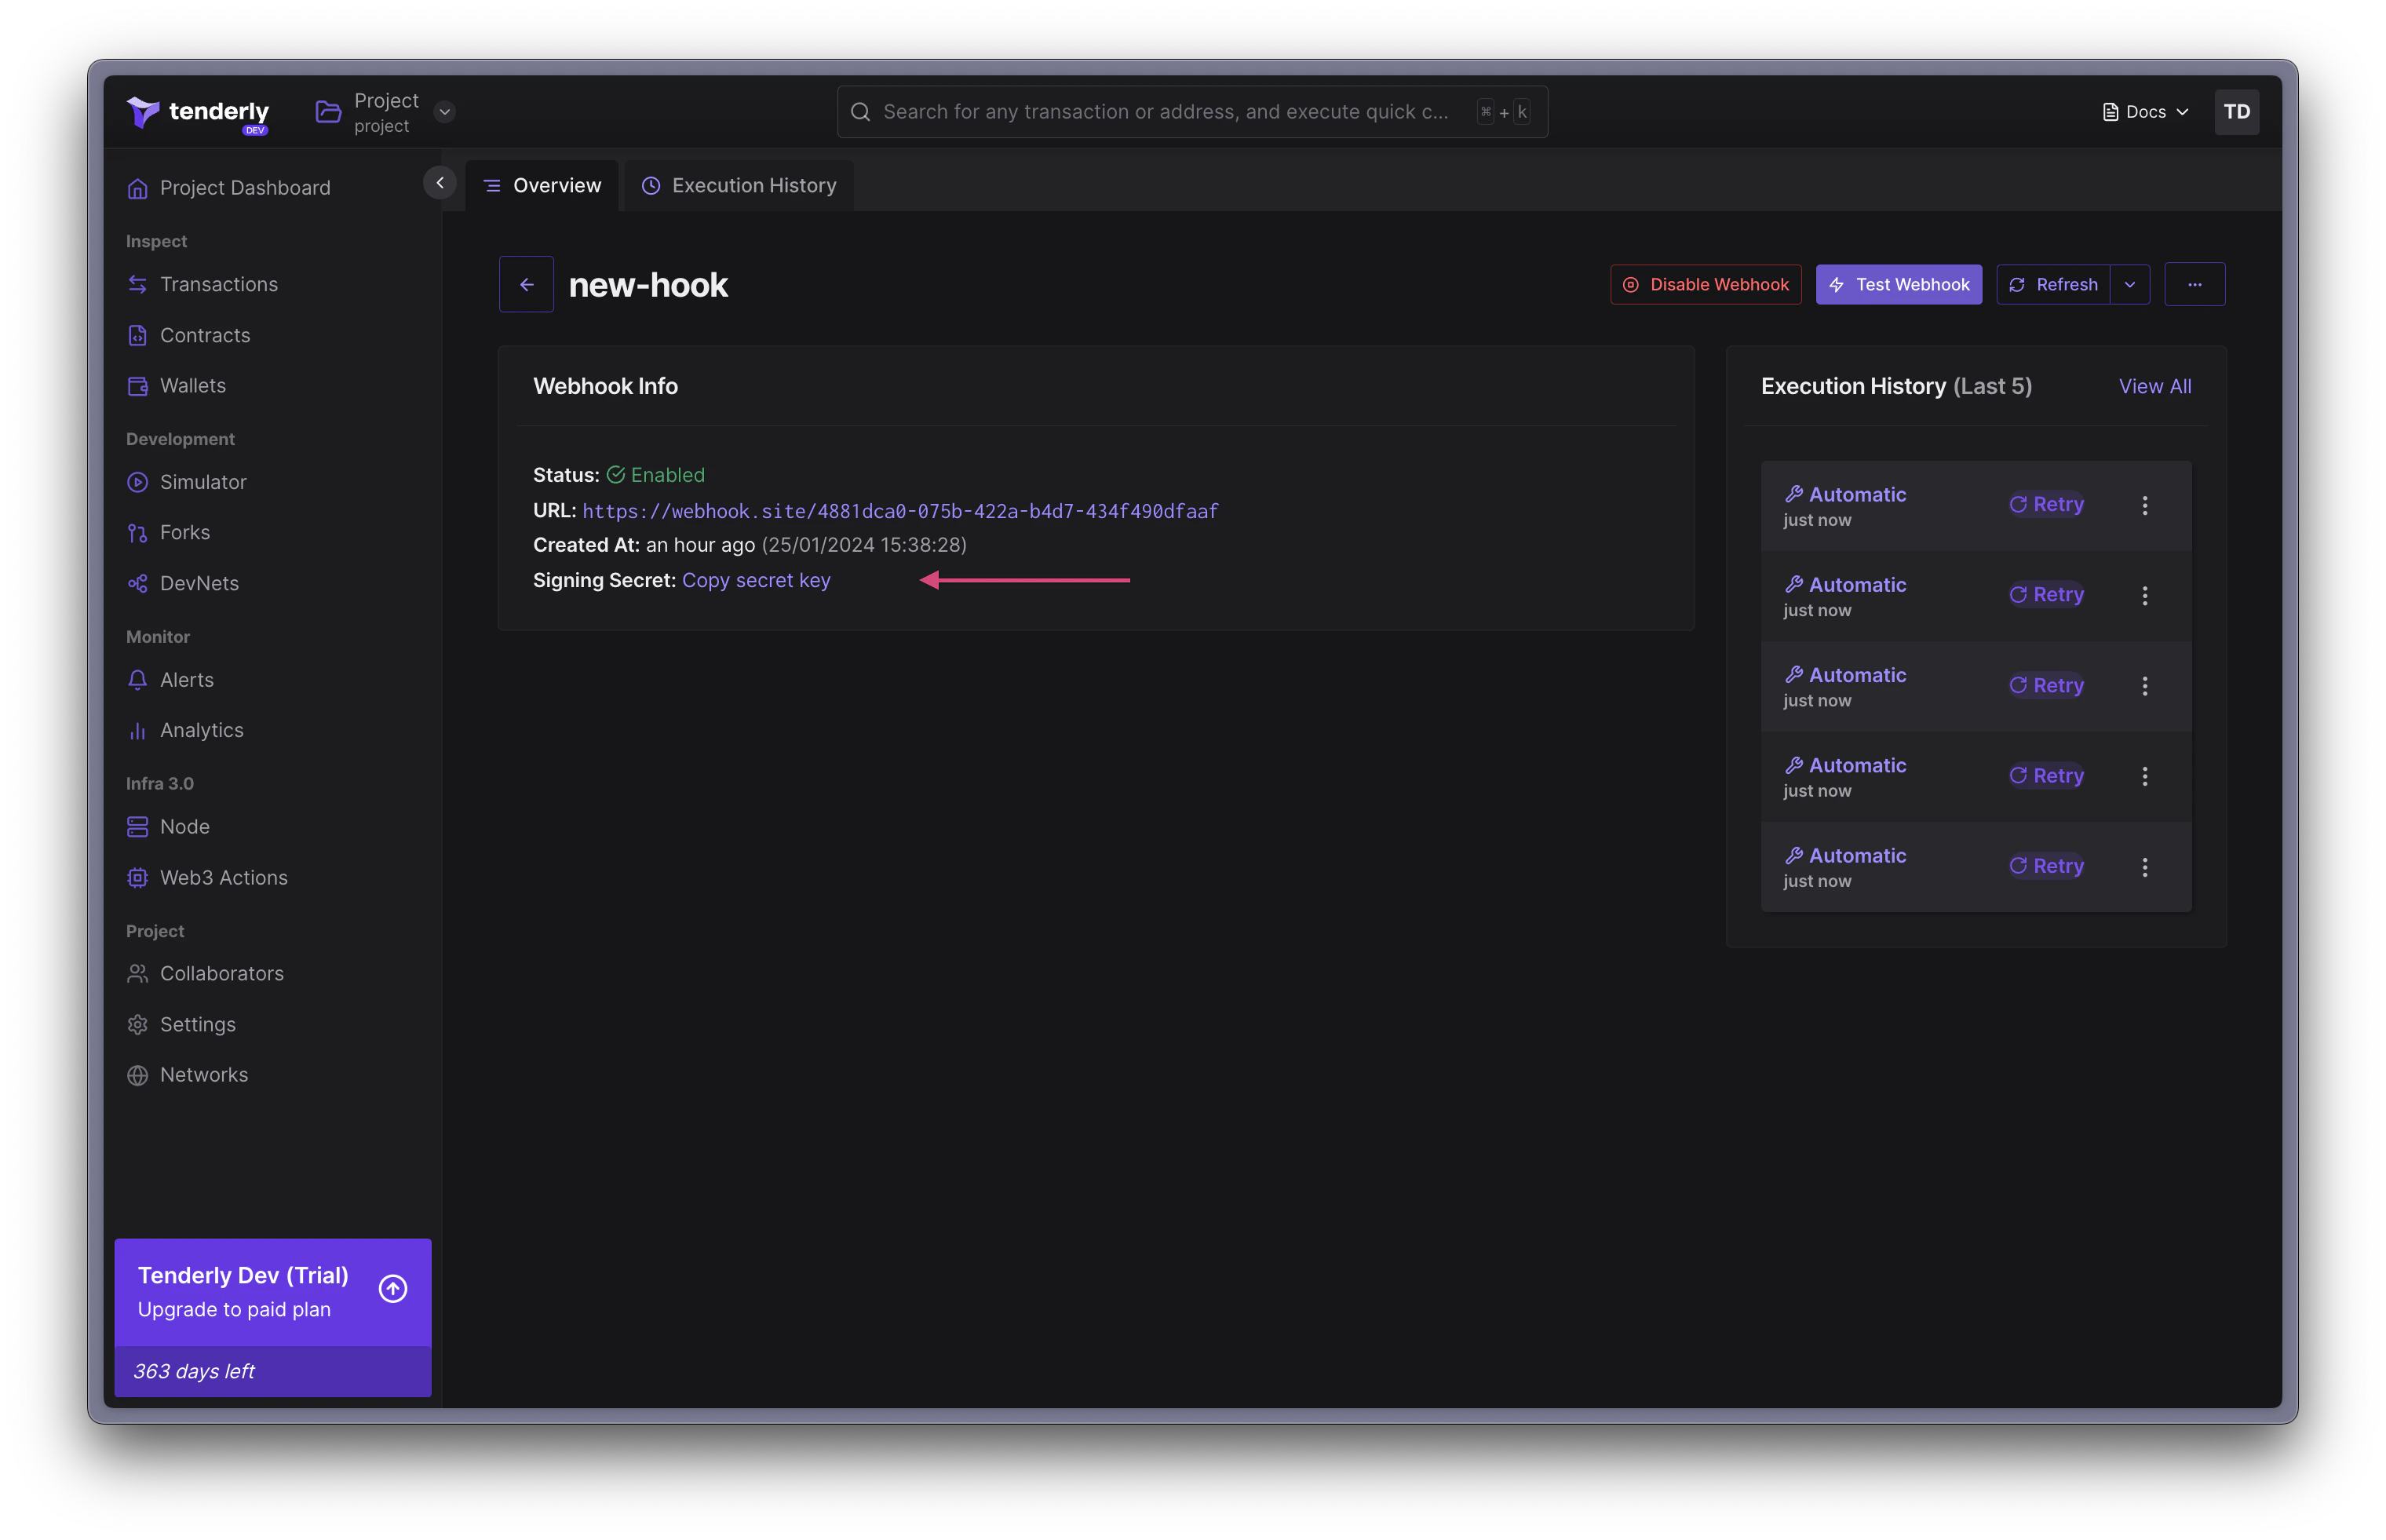
Signing Secret प्रत्येक webhook destination के लिए अद्वितीय है। Tenderly इस secret को उत्पन्न करता है और इसका उपयोग payload के लिए signature उत्पन्न करने के लिए करता है। इसे सुरक्षित स्थान पर रखें।
**चरण 1.** Secret Signing Secret प्राप्त करें।
 **चरण 2.** प्राप्त signature को validate करें
प्राप्त signature को validate करने के लिए, इस क्रम में concatenate करें:
1. signing secret,
2. संपूर्ण webhook request payload,
3. timestamp (payload का)।
अंत में, concatenated मान पर SHA 256 hash निष्पादित करें।
```go title="example.go" showLineNumbers theme={"theme":{"light":"catppuccin-latte","dark":"catppuccin-mocha"}}
func isValidSignature(
signature string,
payload []byte,
timestamp string,
) bool {
h := hmac.New(sha256.New, []byte(signingKey))
h.Write(payload)
h.Write([]byte(timestamp))
digest := hex.EncodeToString(h.Sum(nil))
return digest == signature
}
```
```javascript title="example.js" showLineNumbers showLineNumbers theme={"theme":{"light":"catppuccin-latte","dark":"catppuccin-mocha"}}
function isValidSignature(signature, payload, timestamp) {
// Create a HMAC SHA256 hash using the signing key
const hmac = crypto.createHmac("sha256", signingKey);
// Update the hash with the request body using utf8
hmac.update(payload.toString(), 'utf8');
// Update the hash with the request timestamp
hmac.update(timestamp);
const digest = hmac.digest("hex");
return crypto.timingSafeEqual(Buffer.from(signature), Buffer.from(digest))
}
```
```python title="example.py" showLineNumbers theme={"theme":{"light":"catppuccin-latte","dark":"catppuccin-mocha"}}
def isValidSignature(signature: string, payload: bytes, timestamp: string):
h = hmac.new(str.encode(signingKey), payload, hashlib.sha256)
h.update(str.encode(timestamp))
digest = h.hexdigest()
return hmac.compare_digest(signature, digest)
```
#### Webhook निष्पादनों का Debugging
webhook की खराबी के debugging का समर्थन करने के लिए, आप किसी भी network से मौजूदा transactions के आधार पर manually `TEST` events भेज सकते हैं
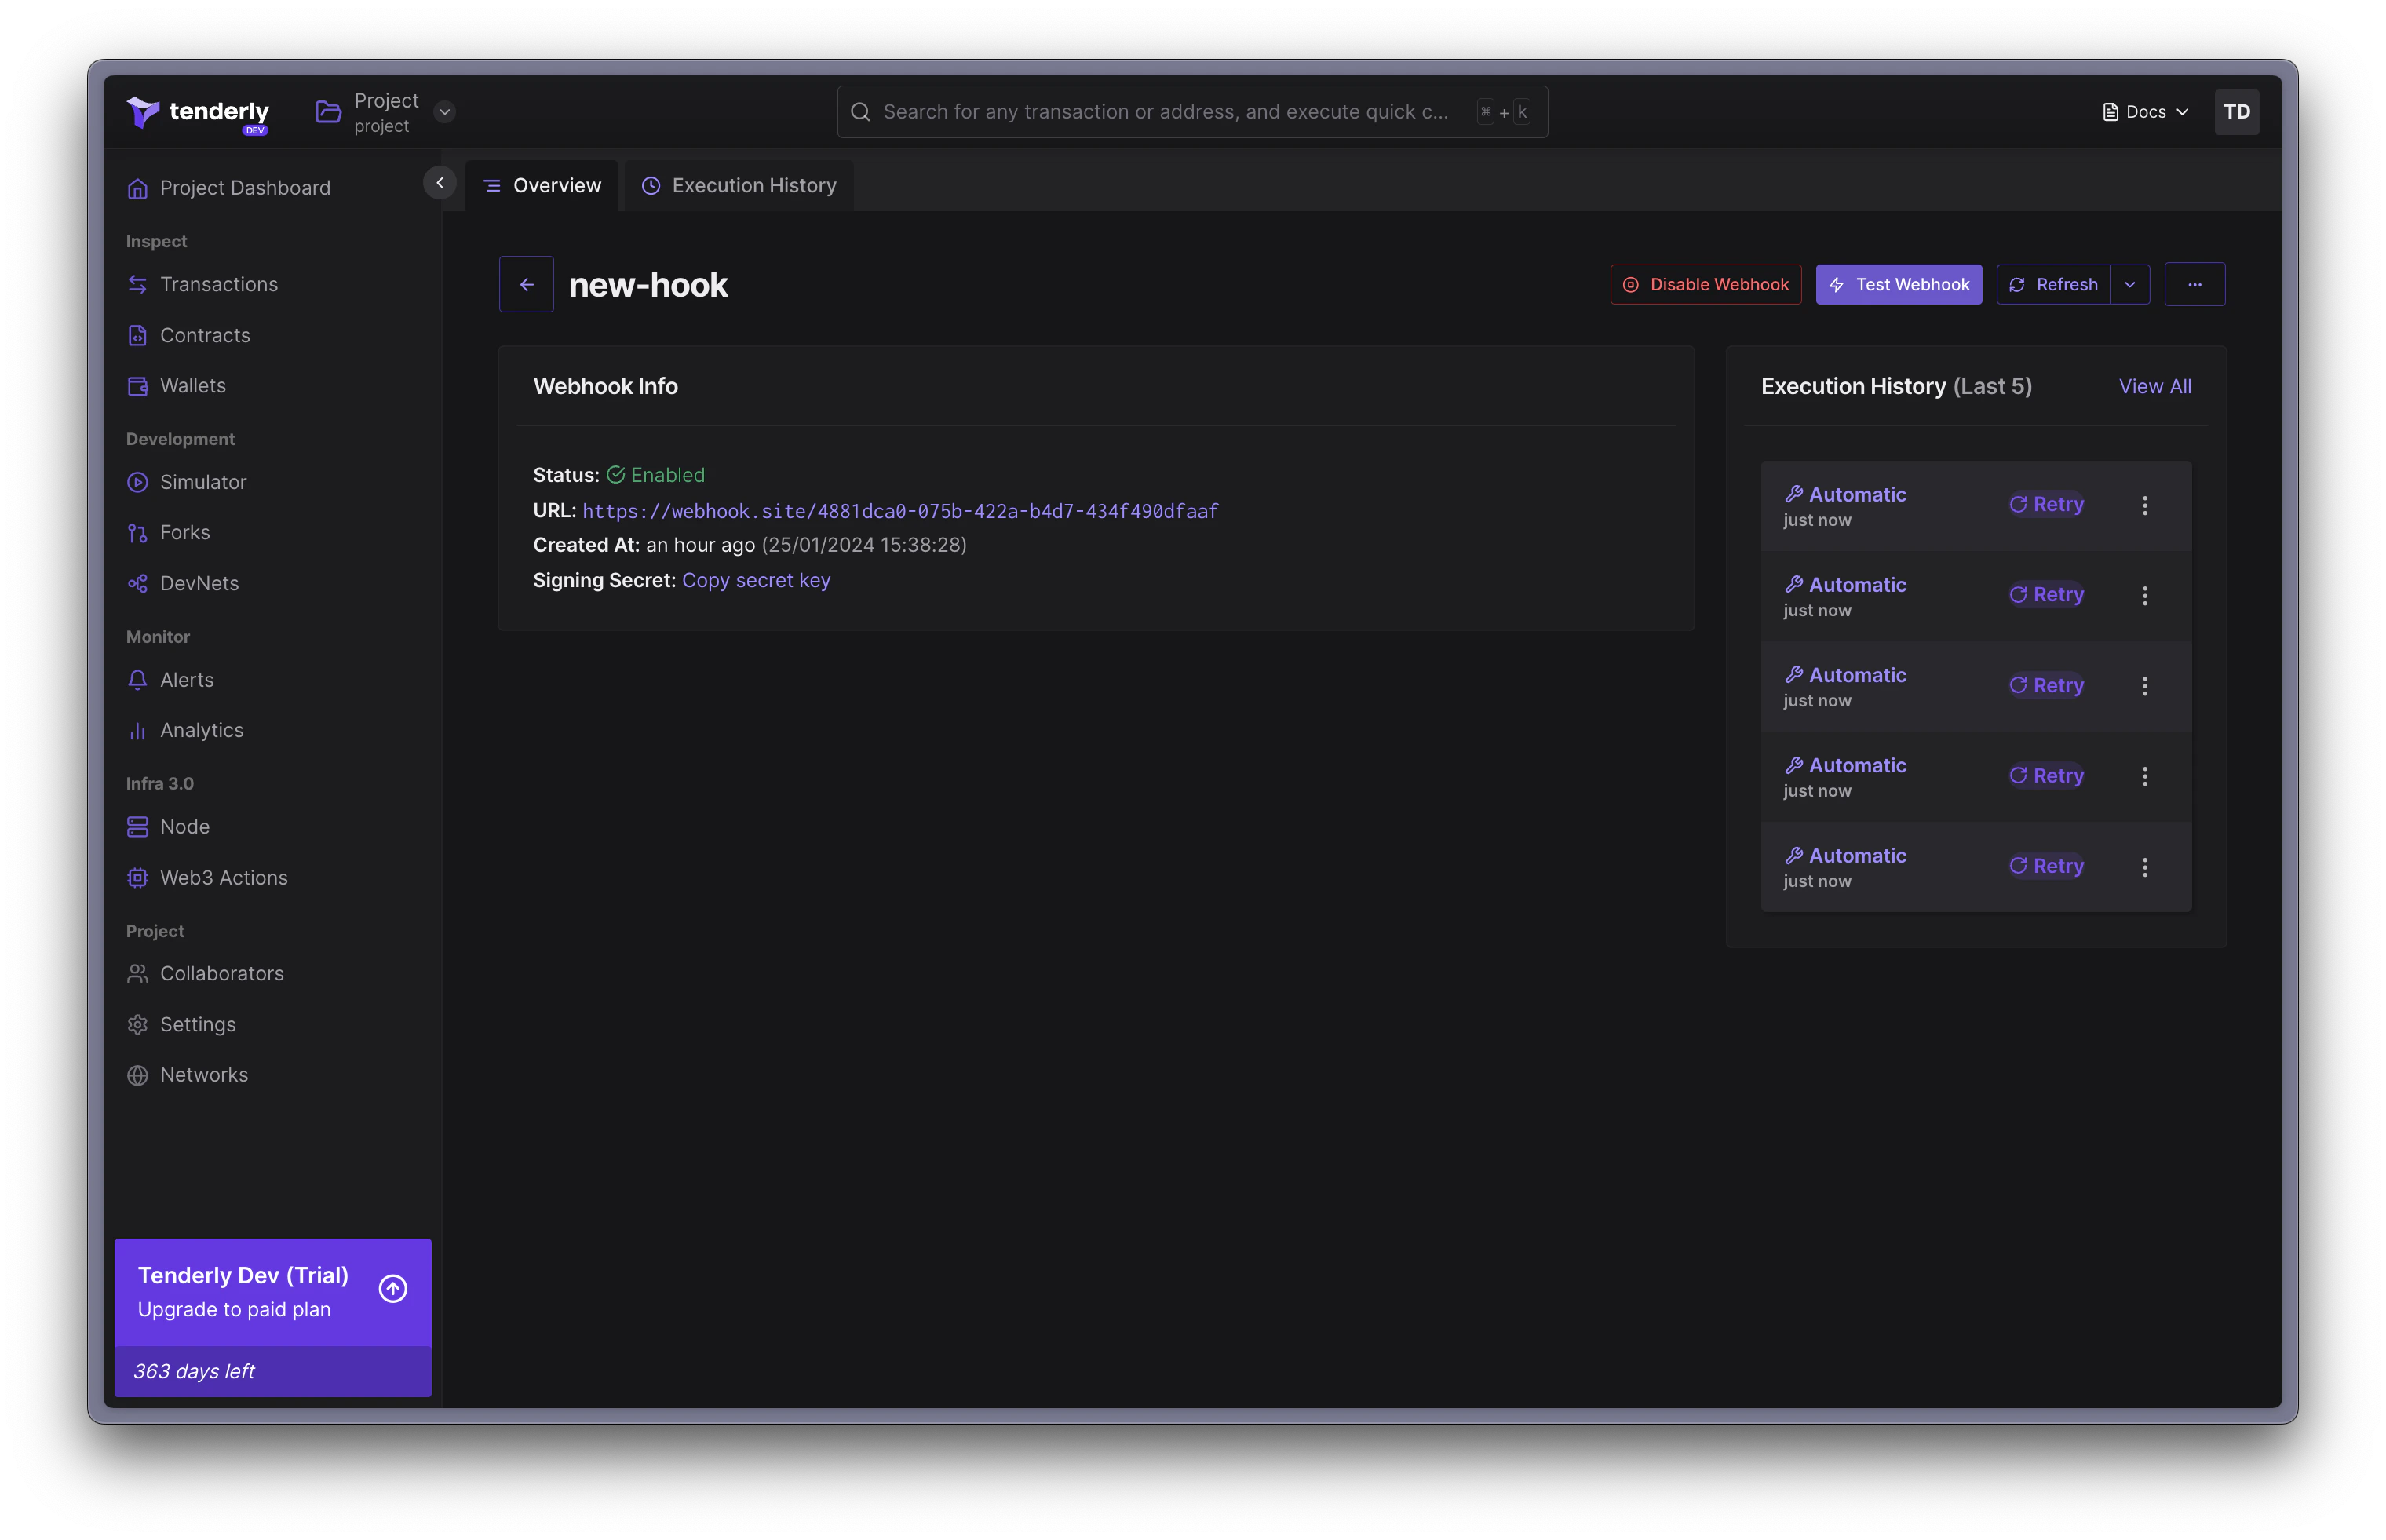
**चरण 1.** webhooks पेज के navigation bar में "**Test Webhook**" पर क्लिक करें।
**चरण 2.** प्राप्त signature को validate करें
प्राप्त signature को validate करने के लिए, इस क्रम में concatenate करें:
1. signing secret,
2. संपूर्ण webhook request payload,
3. timestamp (payload का)।
अंत में, concatenated मान पर SHA 256 hash निष्पादित करें।
```go title="example.go" showLineNumbers theme={"theme":{"light":"catppuccin-latte","dark":"catppuccin-mocha"}}
func isValidSignature(
signature string,
payload []byte,
timestamp string,
) bool {
h := hmac.New(sha256.New, []byte(signingKey))
h.Write(payload)
h.Write([]byte(timestamp))
digest := hex.EncodeToString(h.Sum(nil))
return digest == signature
}
```
```javascript title="example.js" showLineNumbers showLineNumbers theme={"theme":{"light":"catppuccin-latte","dark":"catppuccin-mocha"}}
function isValidSignature(signature, payload, timestamp) {
// Create a HMAC SHA256 hash using the signing key
const hmac = crypto.createHmac("sha256", signingKey);
// Update the hash with the request body using utf8
hmac.update(payload.toString(), 'utf8');
// Update the hash with the request timestamp
hmac.update(timestamp);
const digest = hmac.digest("hex");
return crypto.timingSafeEqual(Buffer.from(signature), Buffer.from(digest))
}
```
```python title="example.py" showLineNumbers theme={"theme":{"light":"catppuccin-latte","dark":"catppuccin-mocha"}}
def isValidSignature(signature: string, payload: bytes, timestamp: string):
h = hmac.new(str.encode(signingKey), payload, hashlib.sha256)
h.update(str.encode(timestamp))
digest = h.hexdigest()
return hmac.compare_digest(signature, digest)
```
#### Webhook निष्पादनों का Debugging
webhook की खराबी के debugging का समर्थन करने के लिए, आप किसी भी network से मौजूदा transactions के आधार पर manually `TEST` events भेज सकते हैं
**चरण 1.** webhooks पेज के navigation bar में "**Test Webhook**" पर क्लिक करें।
 **चरण 2.** एक transaction का hash पेस्ट करें जो आपके alert के trigger से मेल खाता है
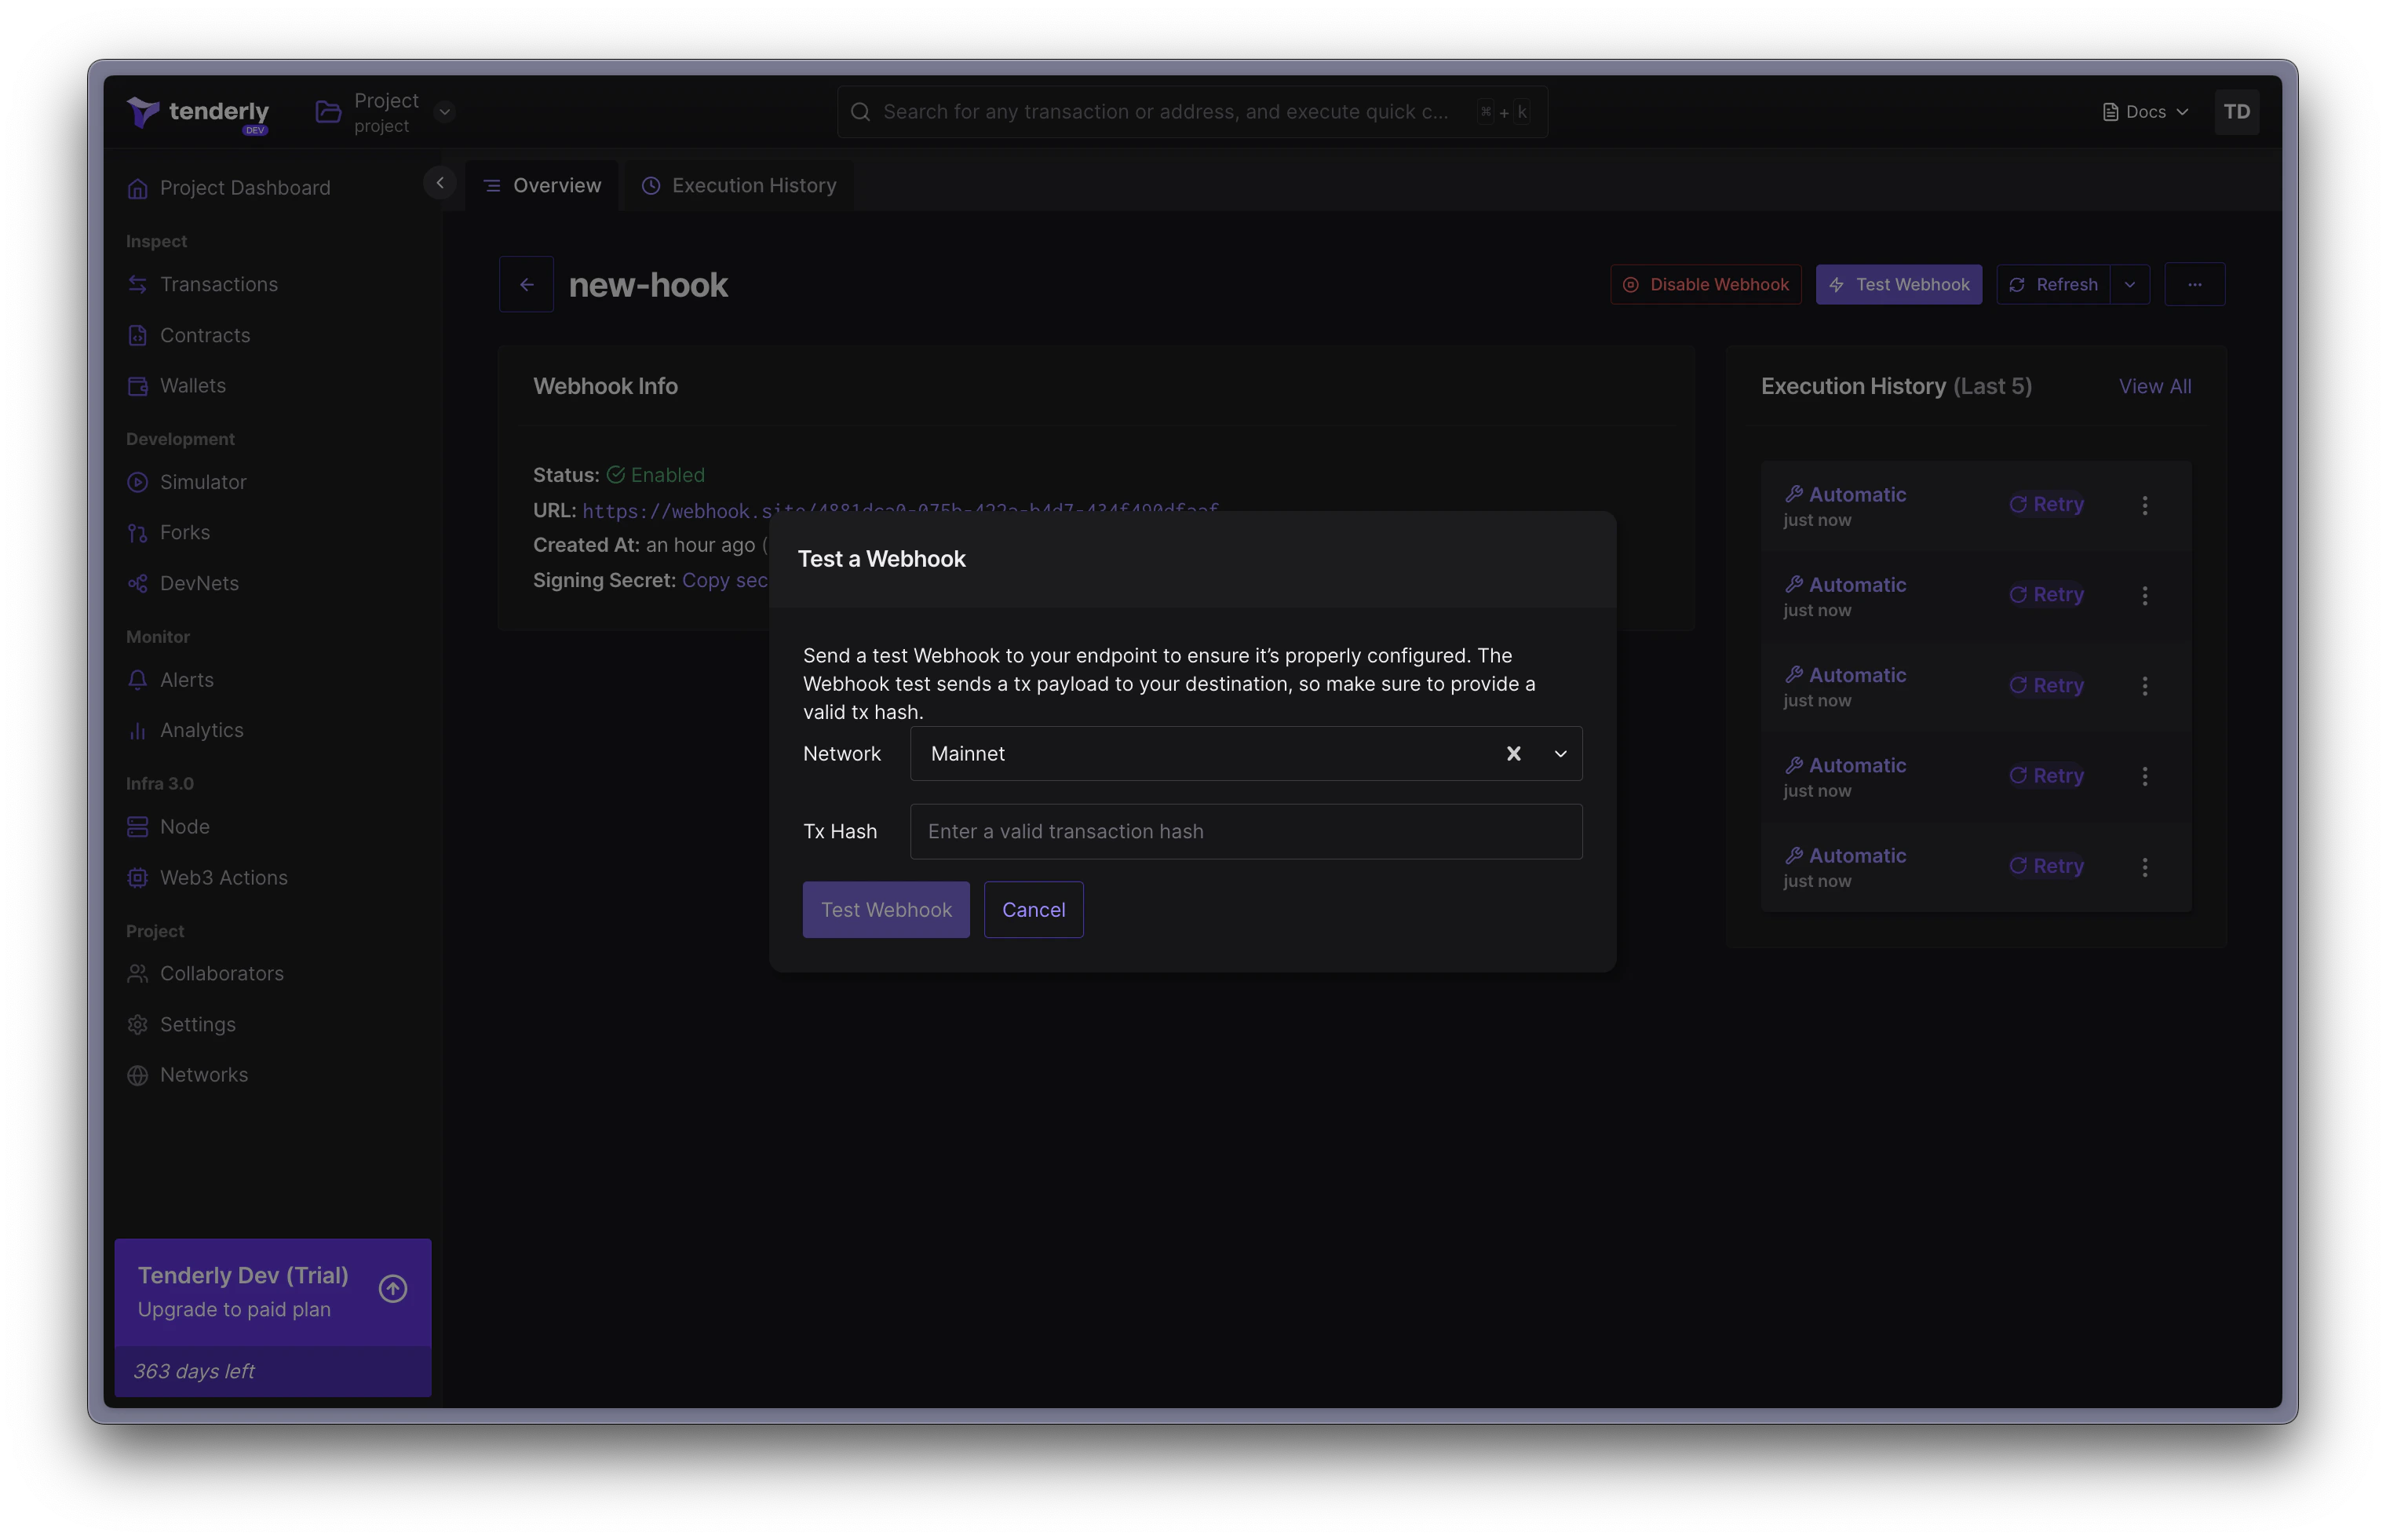 **चरण 3.** पुष्टि करने और test event भेजने के लिए "**Test Webhook**" पर क्लिक करें।
आपका webhook आपके द्वारा पेस्ट किए गए hash के अनुरूप transaction के साथ, और `TEST` के **event\_type** के साथ invoke किया जाएगा। आपको उस निष्पादन का overview प्रस्तुत किया जाएगा।
**चरण 3.** पुष्टि करने और test event भेजने के लिए "**Test Webhook**" पर क्लिक करें।
आपका webhook आपके द्वारा पेस्ट किए गए hash के अनुरूप transaction के साथ, और `TEST` के **event\_type** के साथ invoke किया जाएगा। आपको उस निष्पादन का overview प्रस्तुत किया जाएगा।