> ## Documentation Index
> Fetch the complete documentation index at: https://docs.tenderly.co/llms.txt
> Use this file to discover all available pages before exploring further.
# Multichain Virtual Environments
> एक Virtual Environment जो साझा पहचान, अनुमानित RPC URLs, Virtual Chain IDs, और एकीकृत cross-chain timeline के साथ कई networks में फैला हुआ है।
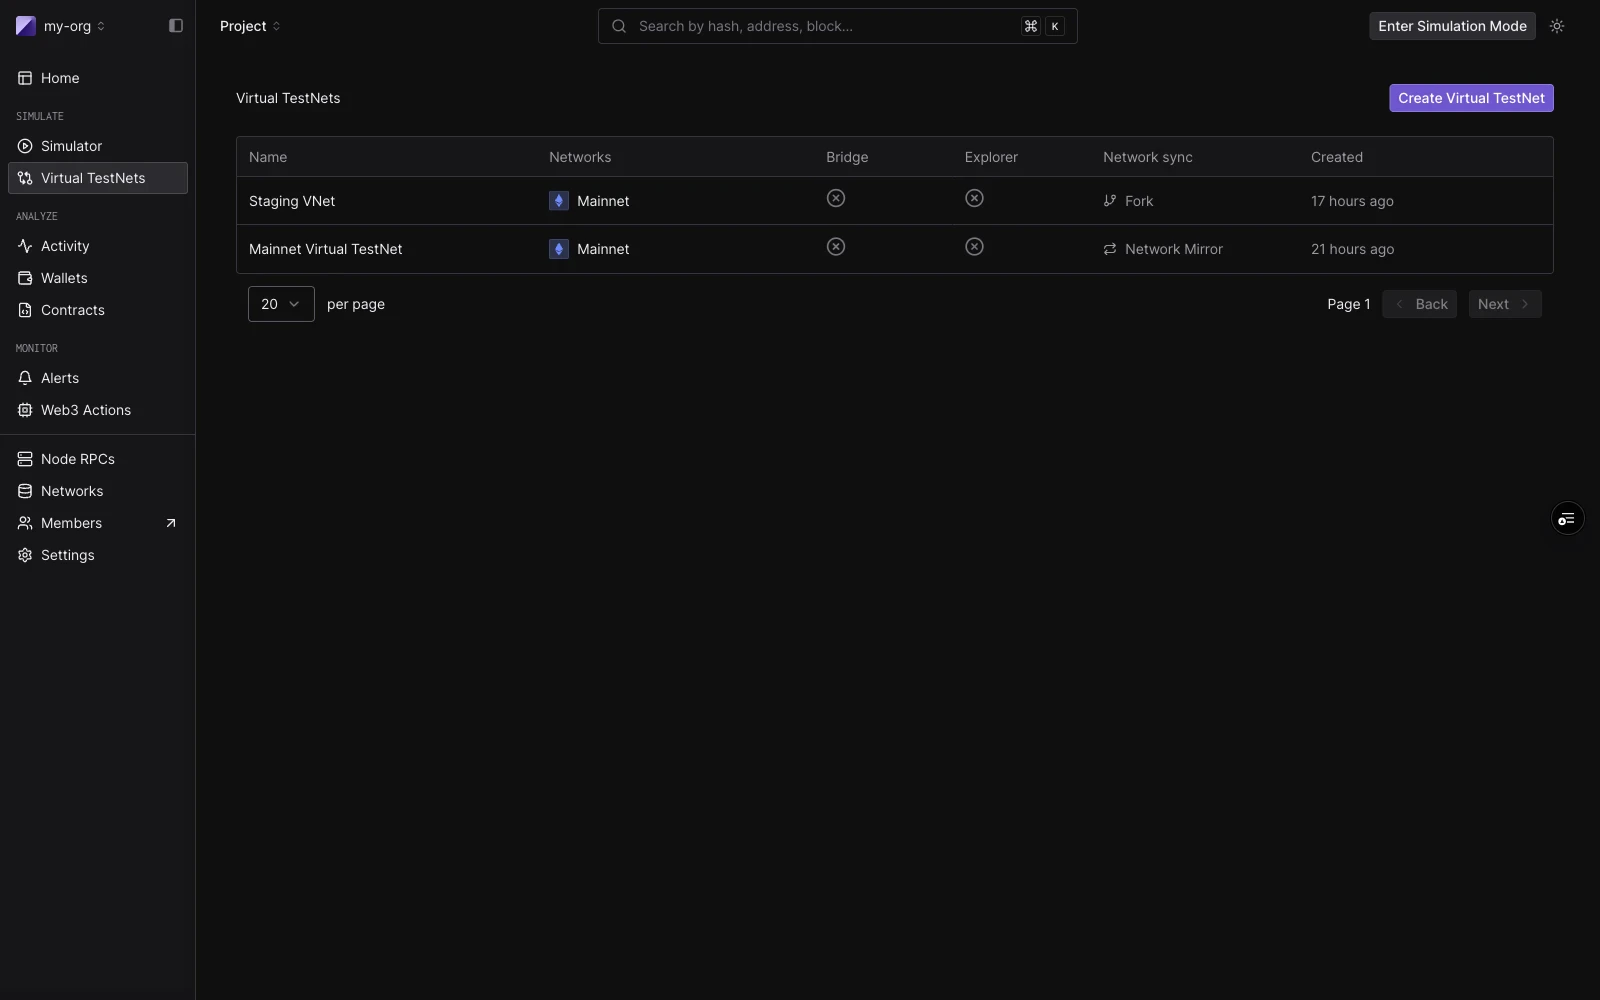
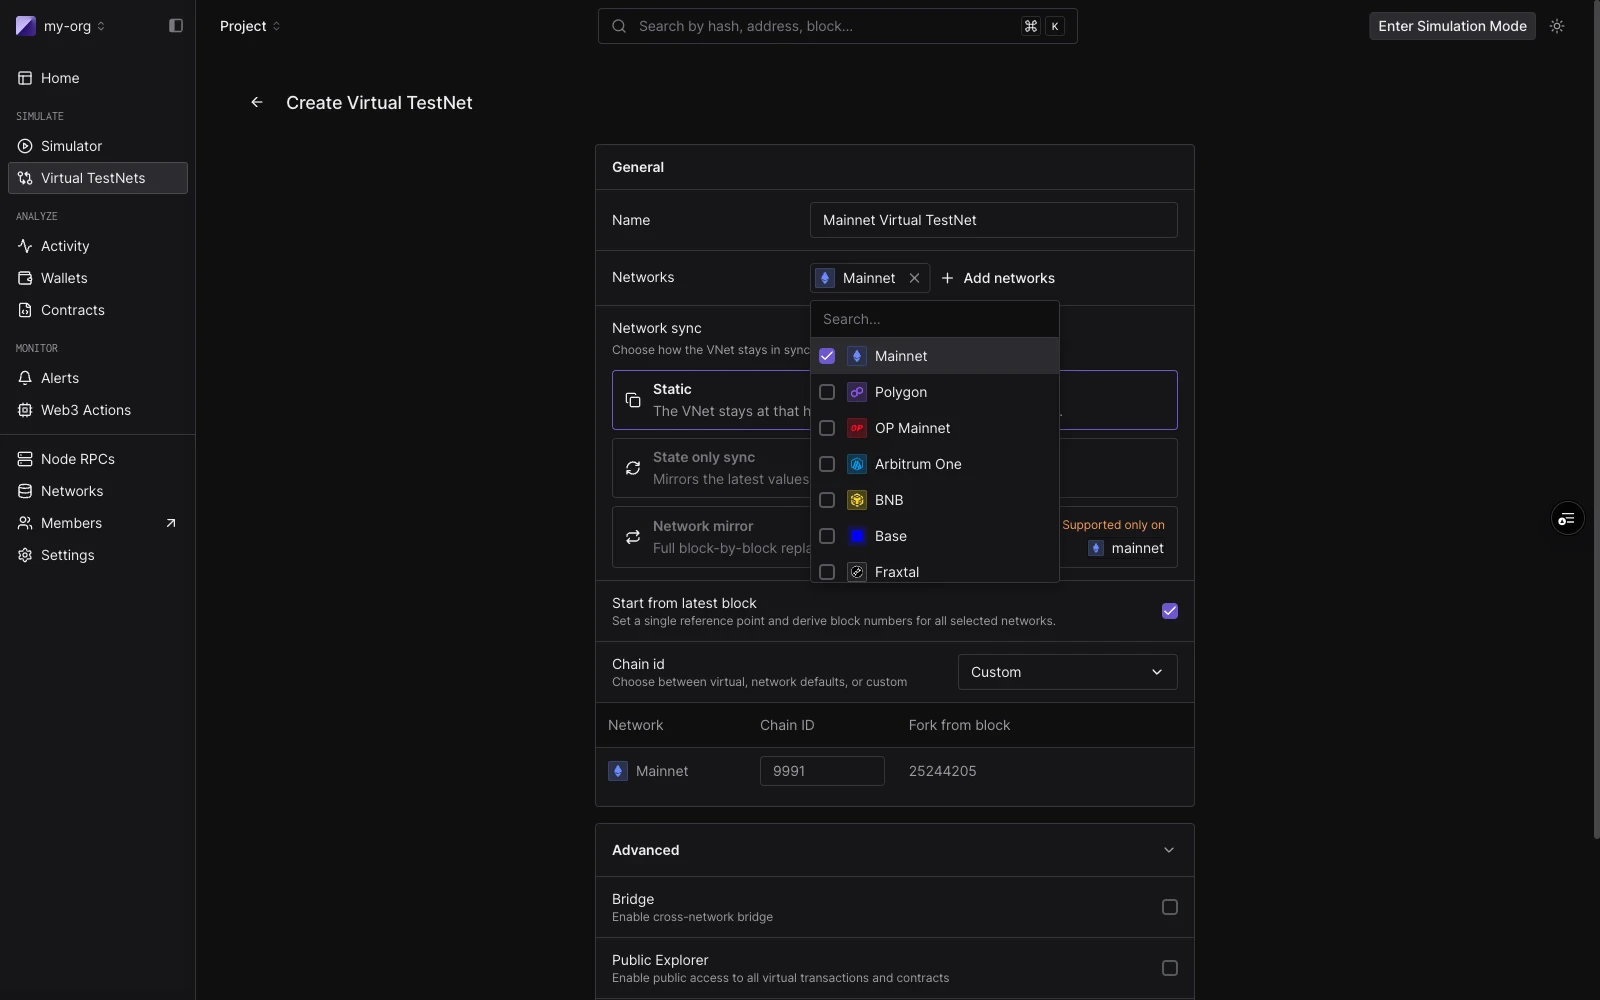
एक Multichain Virtual Environment एक single testing environment है जिसमें एक से अधिक blockchain network होते हैं। आप एक Virtual Environment के साथ Ethereum mainnet, Arbitrum, Optimism, Base, या 100+ अन्य समर्थित EVM networks में से किसी को भी जोड़ सकते हैं, फिर उन सभी को एक साझा पहचान के तहत काम कर सकते हैं। प्रत्येक network अपने स्वयं के RPC endpoints, explorer view, और faucet रखता है, लेकिन वे एक ही संसाधन में एक साथ रहते हैं जिसे आप एक इकाई के रूप में बनाते, fund करते, और नष्ट करते हैं।
एक Multichain Virtual Environment अलग-अलग per-network Virtual Environments चलाने के ऊपर जो जोड़ता है वह है chains के बीच जागरूकता। [Bridge Module](/virtual-environments/multichain/bridges) एक network पर cross-chain messages का पता लगा सकता है और उन्हें उसी Virtual Environment में दूसरे network पर relay कर सकता है, और dashboard आपको पूरे environment में transactions की एक timeline दिखाता है।
Multichain Virtual Environments और Bridge Module उन plans पर उपलब्ध हैं जिनमें multichain क्षमताएं शामिल हैं। इन्हें अपने account पर सक्षम करने के लिए [हमसे संपर्क करें](https://tenderly.co/contact-us)।
 ## सामान्य उपयोग
* एक environment से कई chains में एक साथ contracts deploy और test करें।
* Mainnet, Arbitrum, और Optimism में Cross-chain protocol testing, bridge transactions end-to-end चलने के साथ।
* LayerZero, CCIP, CCTP और Across के विरुद्ध Bridge integration validation, happy paths के लिए instant relay और failure modes के लिए manual controls के साथ।
* replay attacks, oracle configurations, और light-client implementations के लिए Security testing।
* CI/CD pipelines जो हर push पर कई chains में deploy और regression-test करते हैं।
* Staging environments जहाँ एक dApp real funds के बिना multichain backend के विरुद्ध चलता है।
बनाने के लिए [quickstart](/virtual-environments/multichain/quickstart) देखें, या bridge relay model के लिए [Bridges](/virtual-environments/multichain/bridges) देखें।
## Multichain Virtual Environment कैसे व्यवस्थित है
एक Multichain Virtual Environment एक environment है जिसमें एक या अधिक networks जुड़े होते हैं। Virtual Environment की एक सुसंगत पहचान (नाम और slug) होती है। एक network जोड़ने या हटाने से दूसरे नहीं बदलते।
```bash theme={"theme":{"light":"catppuccin-latte","dark":"catppuccin-mocha"}}
Organization
> Project
> Virtual Environment
> Network: Ethereum
> Network: Arbitrum
> Network: Optimism
> Enabled Features
> Block Explorer (ON)
> Bridges (ON)
> State Sync (OFF)
```
आप एक ही Virtual Environment में production chains और testnets मिला सकते हैं, Tenderly द्वारा समर्थित 100+ EVM networks में से किसी से भी draw कर सकते हैं। creation flow में Production chains पहले दिखाई देते हैं। पूरी सूची के लिए [supported networks](/platform/supported-networks) देखें।
## सामान्य उपयोग
* एक environment से कई chains में एक साथ contracts deploy और test करें।
* Mainnet, Arbitrum, और Optimism में Cross-chain protocol testing, bridge transactions end-to-end चलने के साथ।
* LayerZero, CCIP, CCTP और Across के विरुद्ध Bridge integration validation, happy paths के लिए instant relay और failure modes के लिए manual controls के साथ।
* replay attacks, oracle configurations, और light-client implementations के लिए Security testing।
* CI/CD pipelines जो हर push पर कई chains में deploy और regression-test करते हैं।
* Staging environments जहाँ एक dApp real funds के बिना multichain backend के विरुद्ध चलता है।
बनाने के लिए [quickstart](/virtual-environments/multichain/quickstart) देखें, या bridge relay model के लिए [Bridges](/virtual-environments/multichain/bridges) देखें।
## Multichain Virtual Environment कैसे व्यवस्थित है
एक Multichain Virtual Environment एक environment है जिसमें एक या अधिक networks जुड़े होते हैं। Virtual Environment की एक सुसंगत पहचान (नाम और slug) होती है। एक network जोड़ने या हटाने से दूसरे नहीं बदलते।
```bash theme={"theme":{"light":"catppuccin-latte","dark":"catppuccin-mocha"}}
Organization
> Project
> Virtual Environment
> Network: Ethereum
> Network: Arbitrum
> Network: Optimism
> Enabled Features
> Block Explorer (ON)
> Bridges (ON)
> State Sync (OFF)
```
आप एक ही Virtual Environment में production chains और testnets मिला सकते हैं, Tenderly द्वारा समर्थित 100+ EVM networks में से किसी से भी draw कर सकते हैं। creation flow में Production chains पहले दिखाई देते हैं। पूरी सूची के लिए [supported networks](/platform/supported-networks) देखें।
 ## RPC URLs
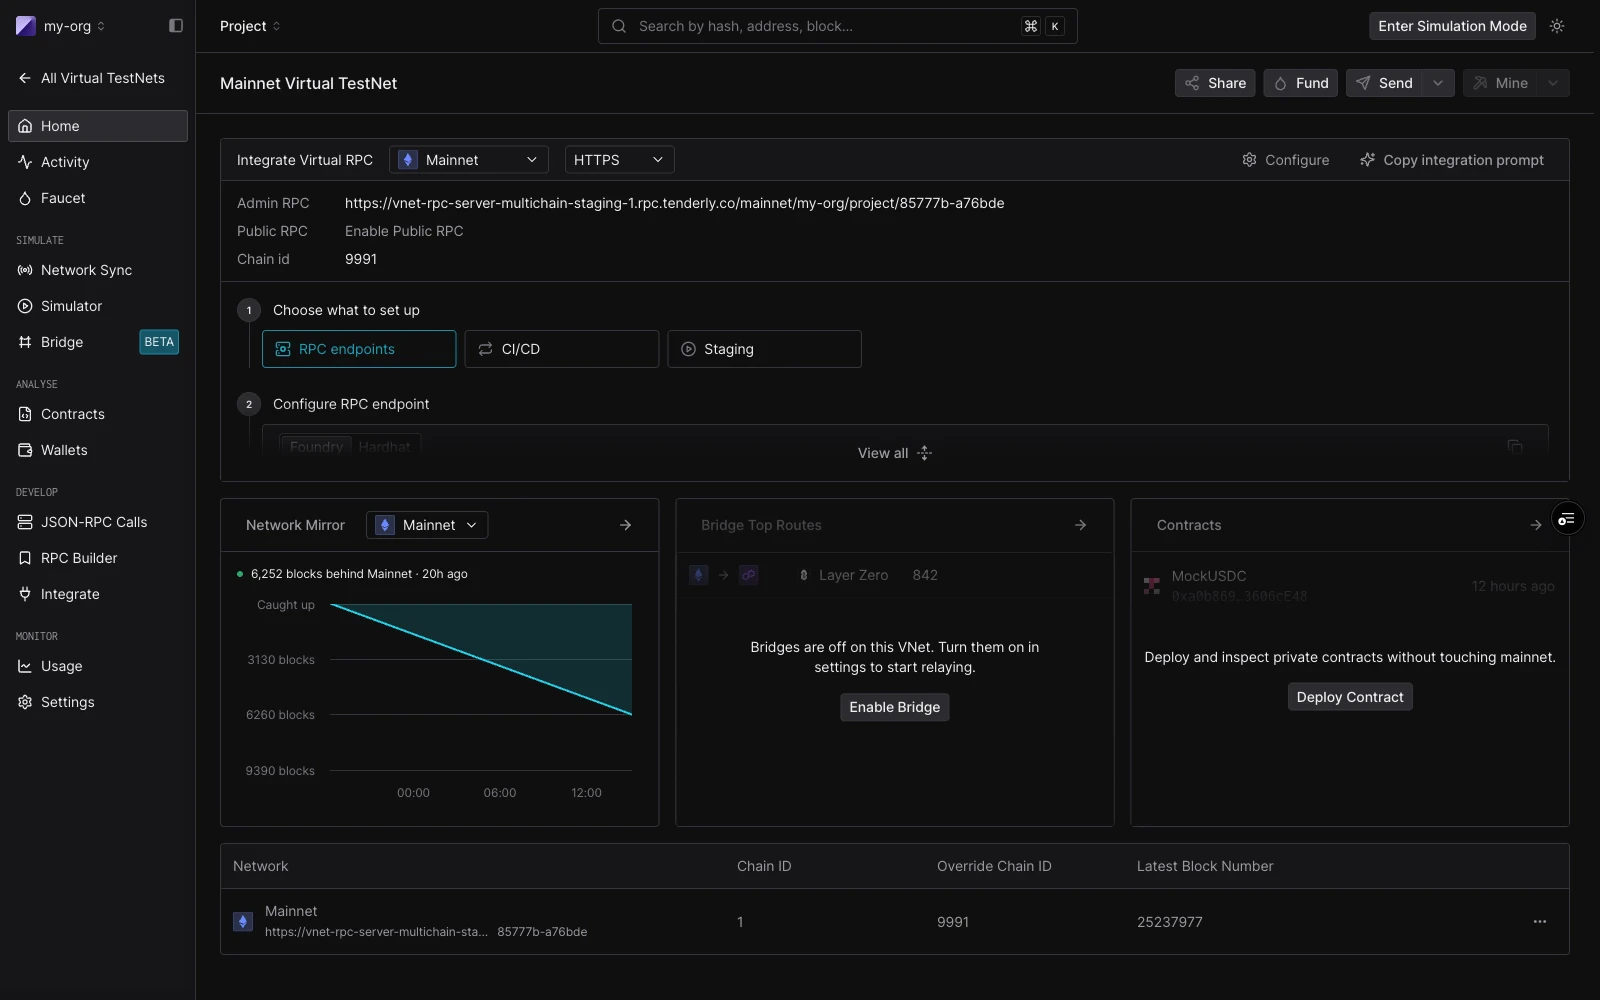
आपके Virtual Environment में प्रत्येक network को एक अनुमानित RPC URL मिलता है। URL में organization slug, project slug, और एक Virtual Environment slug (creation पर assigned एक random 6-character string जिसे बदला नहीं जा सकता) शामिल है:
```bash theme={"theme":{"light":"catppuccin-latte","dark":"catppuccin-mocha"}}
https://virtual...rpc.tenderly.co///
```
यदि आपका org `acme-protocol` है, आपका project `my-project` है, और आपका Virtual Environment slug `a1b2c3` है:
```bash theme={"theme":{"light":"catppuccin-latte","dark":"catppuccin-mocha"}}
Ethereum: https://virtual.mainnet.eu.rpc.tenderly.co/acme-protocol/my-project/a1b2c3
Arbitrum: https://virtual.arbitrum.eu.rpc.tenderly.co/acme-protocol/my-project/a1b2c3
Optimism: https://virtual.optimism.eu.rpc.tenderly.co/acme-protocol/my-project/a1b2c3
Base: https://virtual.base.eu.rpc.tenderly.co/acme-protocol/my-project/a1b2c3
```
प्रत्येक network endpoint एक ही pattern का पालन करता है, इसलिए दिए गए Virtual Environment के लिए सभी URLs एक ही org, project, और environment slug साझा करते हैं।
## RPC URLs
आपके Virtual Environment में प्रत्येक network को एक अनुमानित RPC URL मिलता है। URL में organization slug, project slug, और एक Virtual Environment slug (creation पर assigned एक random 6-character string जिसे बदला नहीं जा सकता) शामिल है:
```bash theme={"theme":{"light":"catppuccin-latte","dark":"catppuccin-mocha"}}
https://virtual...rpc.tenderly.co///
```
यदि आपका org `acme-protocol` है, आपका project `my-project` है, और आपका Virtual Environment slug `a1b2c3` है:
```bash theme={"theme":{"light":"catppuccin-latte","dark":"catppuccin-mocha"}}
Ethereum: https://virtual.mainnet.eu.rpc.tenderly.co/acme-protocol/my-project/a1b2c3
Arbitrum: https://virtual.arbitrum.eu.rpc.tenderly.co/acme-protocol/my-project/a1b2c3
Optimism: https://virtual.optimism.eu.rpc.tenderly.co/acme-protocol/my-project/a1b2c3
Base: https://virtual.base.eu.rpc.tenderly.co/acme-protocol/my-project/a1b2c3
```
प्रत्येक network endpoint एक ही pattern का पालन करता है, इसलिए दिए गए Virtual Environment के लिए सभी URLs एक ही org, project, और environment slug साझा करते हैं।
 ## Virtual Chain IDs
डिफ़ॉल्ट रूप से, Multichain Virtual Environment में प्रत्येक network एक Virtual Chain ID का उपयोग करता है। यह real chain ID के साथ `999xx` prefix जोड़ता है। यह आपके Virtual Environment और real network के बीच accidental replay को रोकता है: आपके virtual mainnet के लिए signed एक transaction real Ethereum पर validate नहीं होगा, और इसके विपरीत।
आप creation समय पर इसे override कर सकते हैं यदि आपके setup को इसकी आवश्यकता है, उदाहरण के लिए जब एक contract एक विशिष्ट `chainid` मान की verify करता है। per-network आधार पर, real chain ID, या एक custom का उपयोग करने के लिए चुनें।
## समर्थित networks
Multichain Virtual Environments उन्हीं 100+ EVM networks पर काम करते हैं जो बाकी Tenderly समर्थित हैं। पूरी सूची के लिए [supported networks](/platform/supported-networks) page देखें, जिसमें यह भी शामिल है कि कौन से products किस network पर उपलब्ध हैं।
Bridge protocol कवरेज overall network कवरेज से संकीर्ण है। किन protocols के कौन से chains पर live हैं, इसके लिए [Bridges](/virtual-environments/multichain/bridges#supported-networks) देखें।
## यह अन्य Virtual Environment features के साथ कैसे काम करता है
[State Sync](/virtual-environments/state-sync) per-environment है। State Sync सक्षम करना पूरे Virtual Environment पर लागू होता है: यह सभी जुड़े networks के लिए live mainnet state को track करता है जब तक कि एक Virtual Environment transaction एक storage slot को संशोधित नहीं करती।
[Network Mirror Mode](/virtual-environments/network-mirror-mode) single-network है। Mirror Mode को Multichain Virtual Environment के साथ जोड़ना वर्तमान में समर्थित नहीं है।
प्रत्येक network का अपना Admin RPC होता है। चीटकोड्स per network लागू होते हैं। Ethereum leg पर `tenderly_setBalance` Base leg पर balances को प्रभावित नहीं करेगा।
प्रत्येक network का अपना block time होता है। Virtual Environment networks में clocks को synchronize नहीं करता। आप [Admin RPC](/virtual-environments/admin-rpc) time methods का उपयोग करके per network time को नियंत्रित करते हैं।
## प्रोग्रामेटिक पहुँच
आप dashboard में जो कुछ भी कर सकते हैं वह [Tenderly REST API](/virtual-environments/rest-api) और CLI के माध्यम से भी उपलब्ध है। `tenderly-virtual-testnet-setup` GitHub Action CI/CD pipelines के लिए समानांतर Virtual Environments की provisioning को स्वचालित करता है, जो तब उपयोगी है जब आप प्रति pull request एक ताज़ा multichain environment चाहते हैं।
## अगले कदम
एक Multichain Virtual Environment बनाएं, इसे Foundry या Hardhat में wire करें, accounts को fund करें, और अपना पहला cross-chain transaction चलाएं।
Bridge Module कैसे networks के बीच LayerZero, CCIP, CCTP और Across messages को relay करता है, dashboards और failure testing के लिए manual controls के साथ।
## Virtual Chain IDs
डिफ़ॉल्ट रूप से, Multichain Virtual Environment में प्रत्येक network एक Virtual Chain ID का उपयोग करता है। यह real chain ID के साथ `999xx` prefix जोड़ता है। यह आपके Virtual Environment और real network के बीच accidental replay को रोकता है: आपके virtual mainnet के लिए signed एक transaction real Ethereum पर validate नहीं होगा, और इसके विपरीत।
आप creation समय पर इसे override कर सकते हैं यदि आपके setup को इसकी आवश्यकता है, उदाहरण के लिए जब एक contract एक विशिष्ट `chainid` मान की verify करता है। per-network आधार पर, real chain ID, या एक custom का उपयोग करने के लिए चुनें।
## समर्थित networks
Multichain Virtual Environments उन्हीं 100+ EVM networks पर काम करते हैं जो बाकी Tenderly समर्थित हैं। पूरी सूची के लिए [supported networks](/platform/supported-networks) page देखें, जिसमें यह भी शामिल है कि कौन से products किस network पर उपलब्ध हैं।
Bridge protocol कवरेज overall network कवरेज से संकीर्ण है। किन protocols के कौन से chains पर live हैं, इसके लिए [Bridges](/virtual-environments/multichain/bridges#supported-networks) देखें।
## यह अन्य Virtual Environment features के साथ कैसे काम करता है
[State Sync](/virtual-environments/state-sync) per-environment है। State Sync सक्षम करना पूरे Virtual Environment पर लागू होता है: यह सभी जुड़े networks के लिए live mainnet state को track करता है जब तक कि एक Virtual Environment transaction एक storage slot को संशोधित नहीं करती।
[Network Mirror Mode](/virtual-environments/network-mirror-mode) single-network है। Mirror Mode को Multichain Virtual Environment के साथ जोड़ना वर्तमान में समर्थित नहीं है।
प्रत्येक network का अपना Admin RPC होता है। चीटकोड्स per network लागू होते हैं। Ethereum leg पर `tenderly_setBalance` Base leg पर balances को प्रभावित नहीं करेगा।
प्रत्येक network का अपना block time होता है। Virtual Environment networks में clocks को synchronize नहीं करता। आप [Admin RPC](/virtual-environments/admin-rpc) time methods का उपयोग करके per network time को नियंत्रित करते हैं।
## प्रोग्रामेटिक पहुँच
आप dashboard में जो कुछ भी कर सकते हैं वह [Tenderly REST API](/virtual-environments/rest-api) और CLI के माध्यम से भी उपलब्ध है। `tenderly-virtual-testnet-setup` GitHub Action CI/CD pipelines के लिए समानांतर Virtual Environments की provisioning को स्वचालित करता है, जो तब उपयोगी है जब आप प्रति pull request एक ताज़ा multichain environment चाहते हैं।
## अगले कदम
एक Multichain Virtual Environment बनाएं, इसे Foundry या Hardhat में wire करें, accounts को fund करें, और अपना पहला cross-chain transaction चलाएं।
Bridge Module कैसे networks के बीच LayerZero, CCIP, CCTP और Across messages को relay करता है, dashboards और failure testing के लिए manual controls के साथ।