> ## Documentation Index
> Fetch the complete documentation index at: https://docs.tenderly.co/llms.txt
> Use this file to discover all available pages before exploring further.
# Alert Destinations
> 配置 Email、Slack 和 webhook 等告警目标,以便在 Tenderly 告警触发时接收通知。
当所需事件触发您的 Alert 时,Tenderly 会将事件相关数据发送到指定的 Alert Destination。该 Destination 会利用这些数据向您发送邮件通知、Discord 或 Slack 消息,或将数据发送给其他 Tenderly 系统,例如 Web3 Actions 或 Webhook。
您可以为多个 Alerts 设置同一个 Destination,同时单个 Alert 也可以将数据发送到多个
Destination。
### Alert Destination 作用域
对某些 Destination 的访问受作用域限制:
* **账户级作用域:** 同一个 Destination 可在您的 Tenderly 账户下创建的所有项目中使用。包括 Email、Slack、Telegram、Discord、Sentry 和 PagerDuty。
* 了解 [**如何创建账户级作用域的 Destinations**](/monitoring/alerts/destinations/account-scoped)。
* **项目级作用域:** 只能用于在特定项目中创建的 Alert Types。包括 Web3 Actions 和 Webhook。
* 了解 [**如何创建项目级作用域的 Destinations**](/monitoring/alerts/destinations/project-scoped)。
如果您编辑或删除某个 Destination,此更改将反映在所有项目和活动的
Alert Types 中。
### 如何创建 Alert Destination
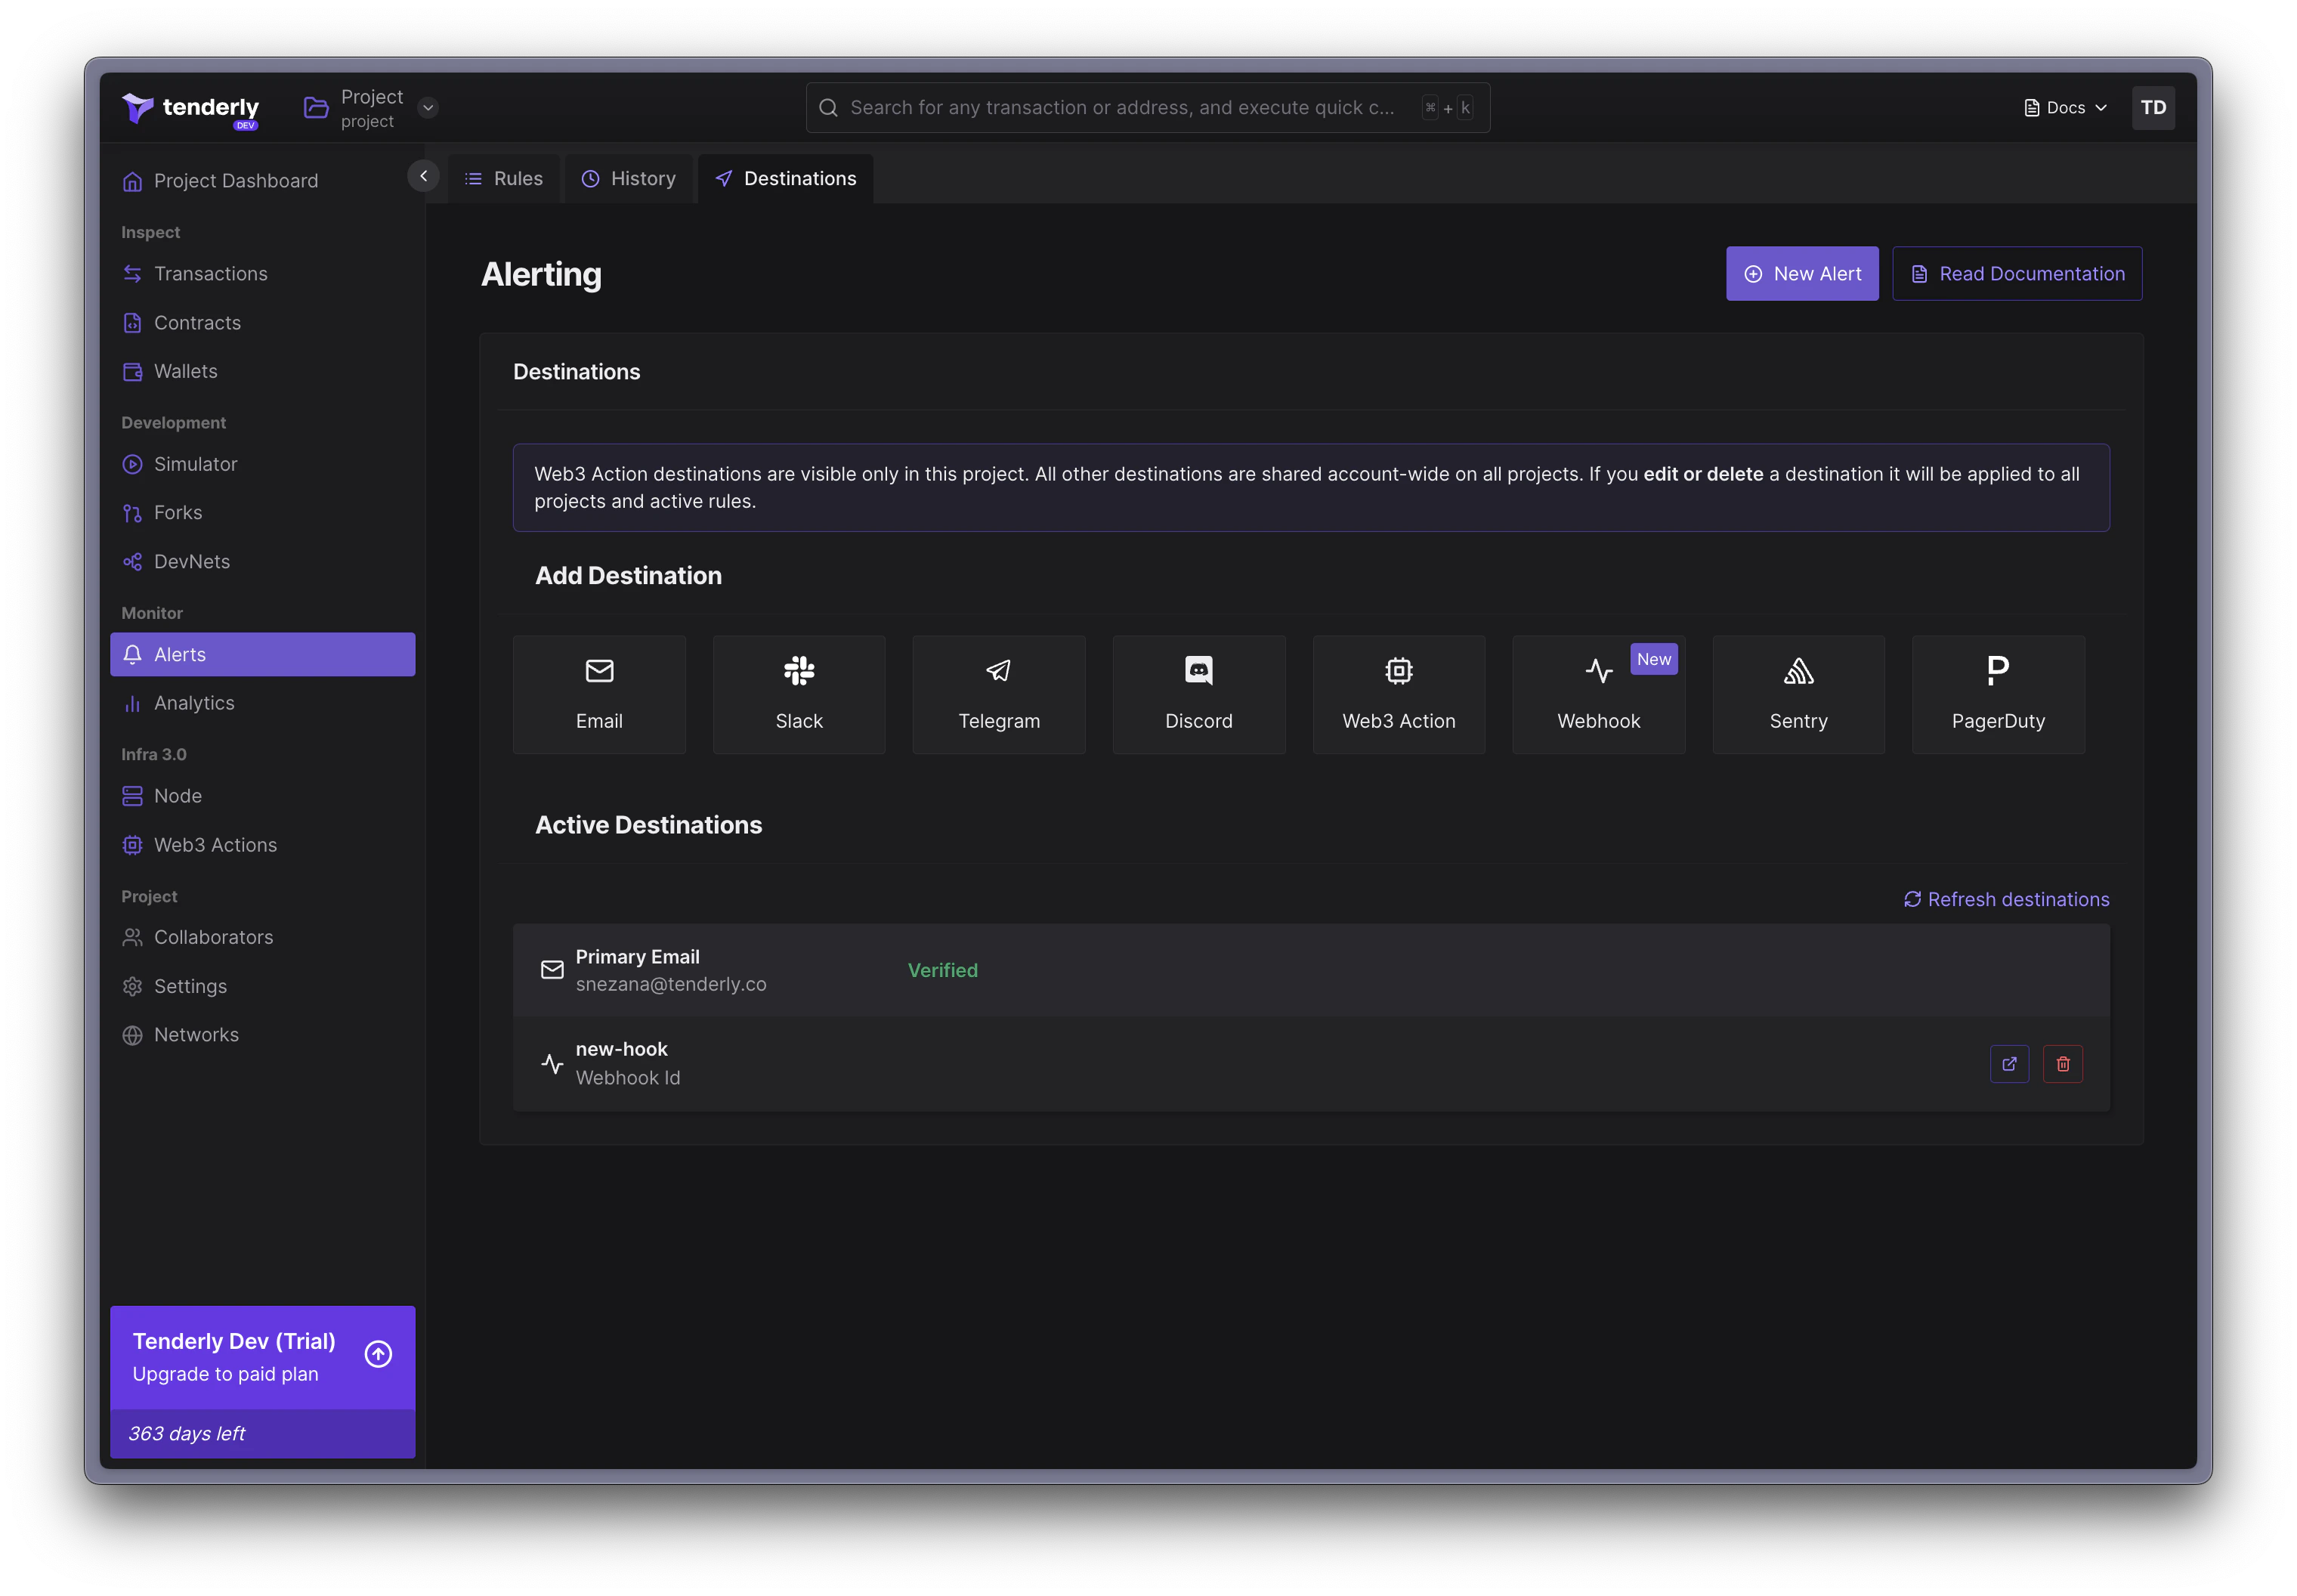 1. 从左侧菜单 **前往 Alerts**。
2. 在顶部页面菜单中 **点击 Destinations**。
3. **选择** 符合您需求的 **Destination**。
4. 根据类型 **配置 Destination** 并启用它。
5. **查看 Active Destinations** 部分,管理已创建的 Destinations。
首次创建 Destination 时,它会显示在该页面上,并可用于所有现有和未来的 Alerts。
您也可以在配置单个 Alert 的过程中创建新的 Destinations。
1. 从左侧菜单 **前往 Alerts**。
2. 在顶部页面菜单中 **点击 Destinations**。
3. **选择** 符合您需求的 **Destination**。
4. 根据类型 **配置 Destination** 并启用它。
5. **查看 Active Destinations** 部分,管理已创建的 Destinations。
首次创建 Destination 时,它会显示在该页面上,并可用于所有现有和未来的 Alerts。
您也可以在配置单个 Alert 的过程中创建新的 Destinations。