Works on: public networks (mainnets and testnets). To verify a contract on a Virtual Environment, see Deploy and verify contracts.
Prerequisites
To verify a contract, you need to provide:- The source code
- The exact compiler settings used to compile the deployed version
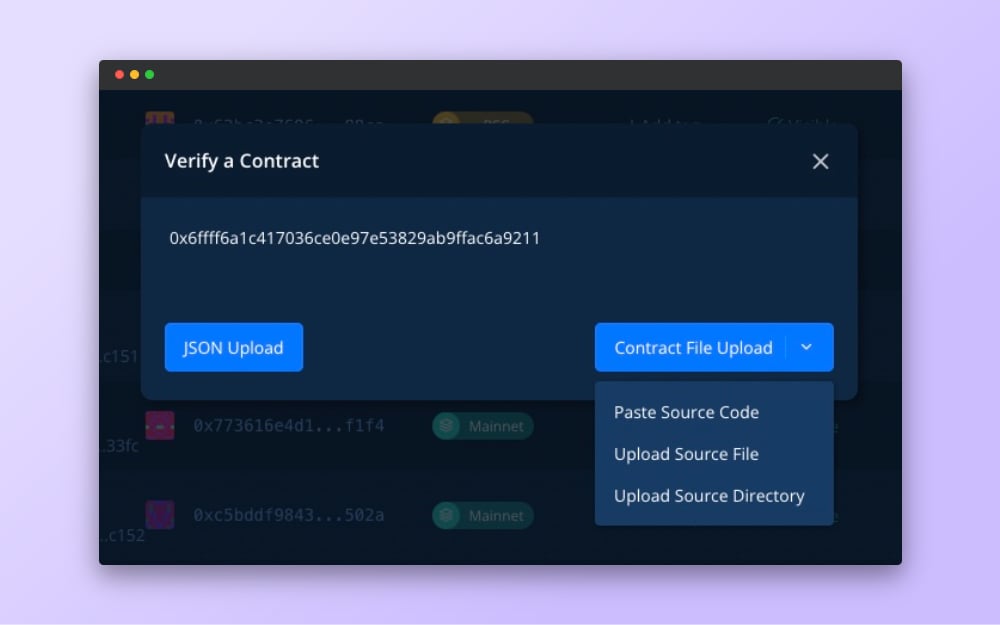
- By uploading a JSON file containing contract metadata generated by the compiler
- By pasting the source code directly
- By uploading the source file from your file system
- By uploading the entire directory with all your smart contracts. This makes it easy to verify contracts that have imports from other files.
Public and private verification
When verifying Smart Contracts, you have to choose between two modes: private and public.- Public (within Tenderly): The verified contract and its source code are available to all Tenderly users. You’re comfortable with sharing your contract with users outside your project. You want to enable the callers of your contract to use the monitoring tools.
- Private (within Tenderly): The verified contract is visible only to the team/collaborators. Suitable during contract development.
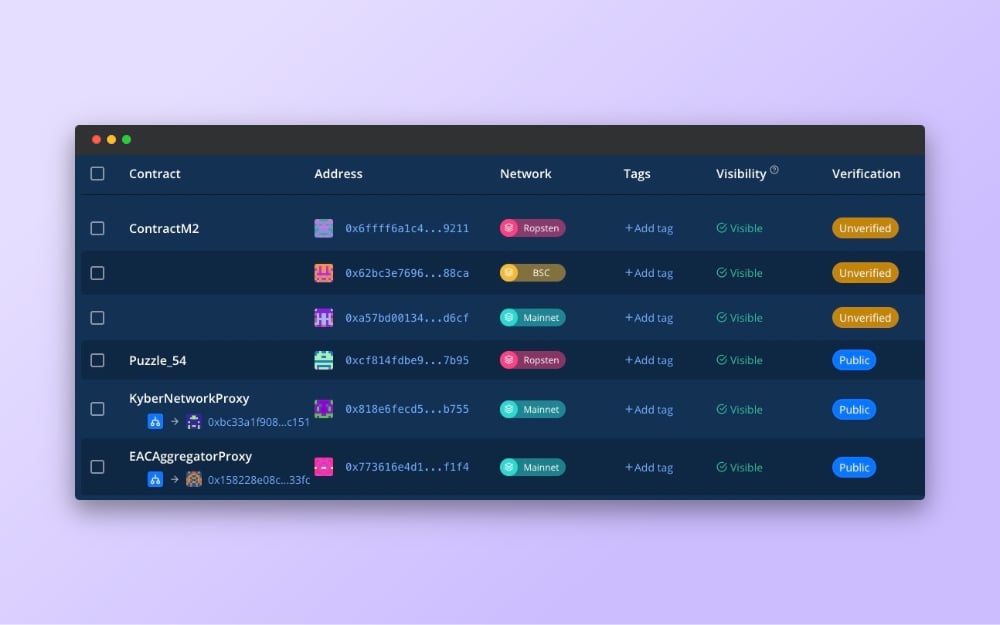
The Verification column in the Contracts tab indicates if your contract is verified at all, privately or publicly.
Dashboard contract verification guide
After you’ve added an unverified contract to a Tenderly project, here are the steps to verify it using the Dashboard.In the Dashboard, find your unverified contract in the Contracts list and click the Verify button next to the verification status.
If the upload contains several contracts, pick the one matching the address shown in the previous step. Toggle Make Private for private verification.
Fill in the compiler version, optimizer settings (enabled / runs), EVM version, and library address pairs if your contract uses linked libraries. Any mismatch with the deployed bytecode will fail verification.
How to verify smart contracts in bulk
If you add several unverified contracts to your project, it’s possible to verify them in bulk. Follow these steps:Click the Verify All Contracts in the Contract section.
This will open a modal that lists all the unverified contracts in your project.
Click Add Source next to each contract and supply the upload, compiler settings, and visibility toggle as in the single-contract flow above.