Verifying Contracts on a Tenderly Fork
You can deploy Smart Contracts to Forks and send transactions to those contracts later on. To use Tenderly tools for the transactions simulated on a Fork, it’s necessary to verify the contracts. The process of verification on a Fork doesn’t differ much from verifying contracts on public networks.
Keep in mind that the contracts verified on a Fork are valid only within the context of the Fork, so there’s no concept of private or public verification on a Fork.
Add a Tenderly Fork as a network to the Hardhat configuration
Next, you need to further configure the Hardhat and Tenderly plugin when verifying a contract on a Fork. The additional configuration will specify the Tenderly Fork as a network so Ethers can use it for blockchain operations at a later point.
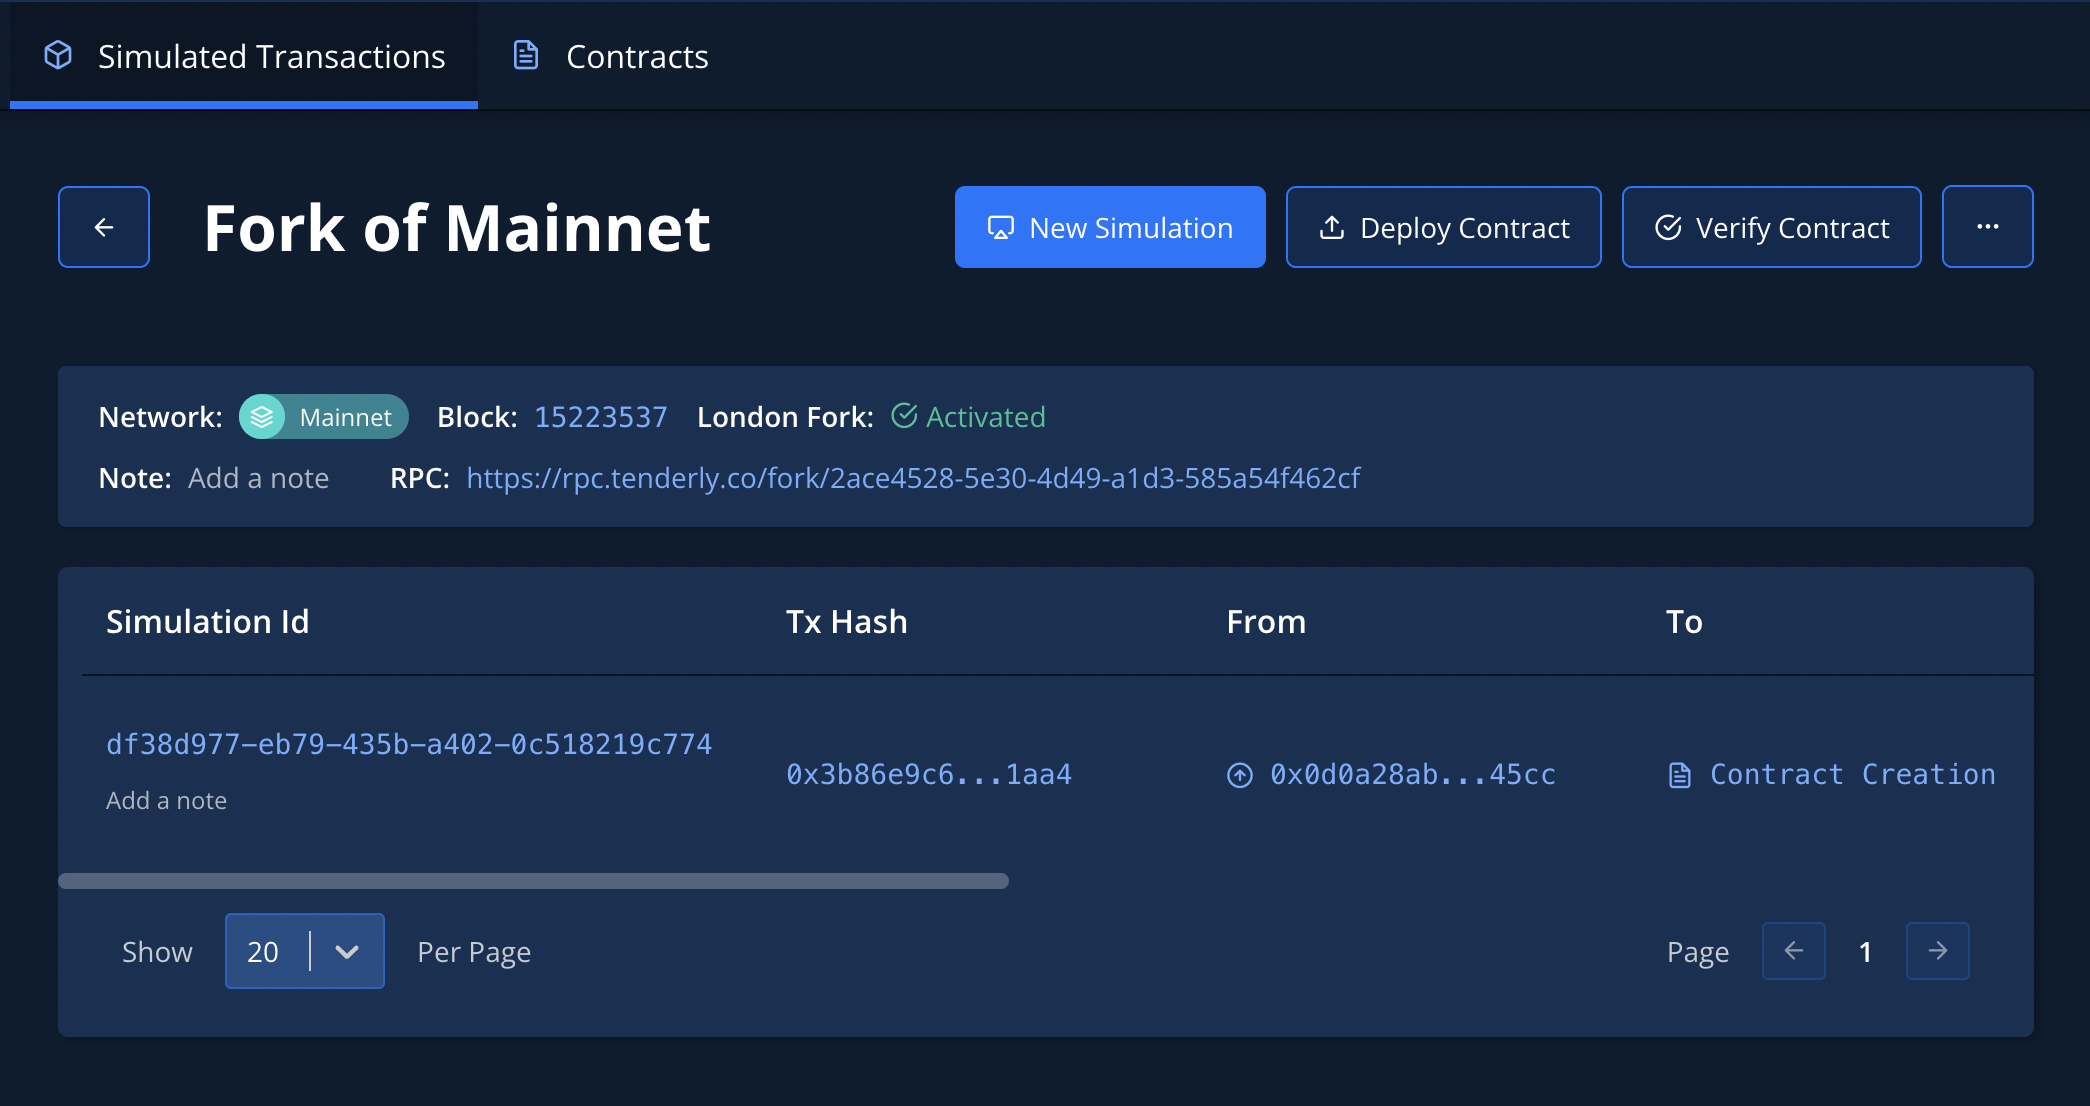
Follow this guide to obtain Fork JSON-RPC URL from the dashboard.
To achieve this, add the following tenderly property of networks to the Hardhat config:
// File: hardhat.config.ts
// --snip--
const config: HardhatUserConfig = {
  solidity: "0.8.9",
  networks: {
  //  --snip--
  tenderly: {
     url: "https://rpc.tenderly.co/fork/2aeae177-a3e8-492f-9861-1c9aa8856235",
   },
  //  --snip--
  }
};

export default config;
Pro Tip: You can set multiple Tenderly networks in the networks property.
Based on the URL, the plugin will detect if the network is a Fork, and will verify appropriately. You can use arbitrary names.
For example:
networks: {
  my_tenderly_fork: {
    url: "https://rpc.tenderly.co/fork/...",
    chainId: 1,
  },
  tenderly_base: {
    url: "https://virtual.base.rpc.tenderly.co/...",
    chainId: 8453
  },
  myOtherTdlyNetwork: {
    url: "https://virtual.optimism.rpc.tenderly.co/...",
    chainId: 10
  }
}
Here’s an overview of the configuration parameters used in the example above:
| Property | Description |
|---|---|
| url | The JSON-RPC URL of your Fork. You can get it from the Fork page in the Dashboard. It follows the structure https://rpc.tenderly.co/fork/{forkId}, where forkId is a unique UUID identifier of the Tenderly Fork. |
Automatic & simple manual verification on a Tenderly Fork
Both automatic and simple manual verification run automatically if the configuration is accurate. You don’t need to make any adjustments to the deployment code.
Note: You need to pass --network tenderly so Hardhat uses your Fork as the network.
Use the following script to run this type of deployment and verification:
# Runs automatic verification

hardhat run scripts/greeter/automatic.ts --network tenderly


# Runs manual simple

hardhat run scripts/greeter/manual-simple.ts --network tenderly
Next, go back to your Fork in the Tenderly Dashboard. You should see a “Contract Creation” transaction, corresponding to the contract deployment. Click “Contracts” and you should see that the Greeter contract is verified.
Advanced manual verification on a Tenderly Fork
The advanced manual verification of contracts on a Fork is analogous to the advanced manual verification on a public network, with a few additional settings.
The key difference: You have to use tenderly.verifyForkAPI instead of tenderly.verifyApi. .
Note: You can verify a contract you previously deployed on a Fork. The verification requires only the address of the deployed contract.
Here’s a script that deploys the Greeter contract on a Tenderly Fork and verifies it immediately.
// File: scripts/greeter/manual-advanced-fork.ts
import { readFileSync } from 'fs';
import { ethers, tenderly } from 'hardhat';
import * as dotenv from 'dotenv';

dotenv.config();

const FORK_RPC_URL = process.env.TENDERLY_FORK_RPC_URL || '';
const FORK_ID = FORK_RPC_URL.split('/').pop() || '';

export async function main() {
  let greeter = await ethers.deployContract('Greeter', ['Hello, Manual Hardhat on Fork !']);

  await greeter.waitForDeployment();

  const greeterAddress = await greeter.getAddress();
  console.log('Manual Advanced (fork): {Greeter} deployed to', greeterAddress);

  tenderly.verifyForkAPI(
    {
      config: {
        compiler_version: '0.8.17',
        evm_version: 'default',
        optimizations_count: 200,
        optimizations_used: false,
      },
      root: '',
      contracts: [
        {
          contractName: 'Greeter',
          source: readFileSync('contracts/Greeter.sol', 'utf-8').toString(),
          sourcePath: 'contracts/whatever/Greeter.sol',
          networks: {
            // important: key is the Fork ID (UUID-like string)
            [FORK_ID]: {
              address: greeterAddress,
              links: {},
            },
          },
        },
        {
          contractName: 'console',
          source: readFileSync('node_modules/hardhat/console.sol', 'utf-8').toString(),
          sourcePath: 'hardhat/console.sol',
          networks: {},
          compiler: {
            name: 'solc',
            version: '0.8.17',
          },
        },
      ],
    },
    process.env.TENDERLY_PROJECT_SLUG || '',
    process.env.TENDERLY_USERNAME || '',
    FORK_ID,
  );
}

main().catch(error => {
  console.error(error);
  process.exitCode = 1;
});Note: In the networks segment of the configuration, we used computed property
names,
so the value of FORK_ID becomes a property in the networks object.
To execute this script, place the proper values for TENDERLY_PROJECT_SLUG, TENDERLY_USERNAME, and TENDERLY_FORK_RPC_URL.
TENDERLY_PRIVATE_VERIFICATION=true \
TENDERLY_PROJECT_SLUG=myProject \
TENDERLY_USERNAME=myUsername \
TENDERLY_FORK_RPC_URL=https://rpc.tenderly.co/fork/a0837e5f-2821-423d-b929-52a42c1cc24f \
npx hardhat run scripts/greeter/manual-advanced-fork.ts --network tenderly
If you’re keeping these values in an externalized configuration using the dotenv package, place TENDERLY_PROJECT_SLUG, TENDERLY_USERNAME, and TENDERLY_FORK_RPC_URL in the .env file. This simplifies the command to:
TENDERLY_PRIVATE_VERIFICATION=true \
npx hardhat run scripts/greeter/manual-advanced-fork.ts --network tenderly
Here’s a summary of the arguments of verifyForkAPI:
| Parameter | Description |
|---|---|
| verificationRequest | A specification of the config, root, and contracts |
| username | Username can be your own and the username of the organization. Which one, it depends on who is the owner of the project you are trying to verify your contracts on. If the project belongs to the organization you are part of, It should be filled with |
| projectSlug | The slug of the project enclosing the Fork |
| forkId | The Fork ID: a unique UUID identifier of the Tenderly Fork. You can find it in the JSON-RPC URL shown in the Dashboard (https://rpc.tenderly.co/fork/{forkId}). |
Configuring verificationRequest
The verificationRequest consists of the following parts:
- The config refers to the Solidity compiler configuration.
- The root is set to an empty string (
root: "") so the contract is verified for the entire Fork. To make a contract valid starting with a particular Simulated transaction in the Fork, set it to the Simulation ID (UUID assigned by Tenderly). - The contracts entail a list of contracts and libraries you’re verifying. Below is an explanation of the parameter in more detail.
The list of contracts
The contracts property of the configuration is used to specify all the contracts you’re verifying and all the Solidity libraries referenced by the contracts, in a single function call.
Here’s a breakdown of the contracts property of the advanced verification configuration:
| Parameter | Type | Description |
|---|---|---|
| contractName | string | The name of the contract, as it will appear in the Tenderly dashboard. It doesn’t have to correspond to the actual name of the Smart Contract. |
| source | string | The source code of your Smart Contract(s). |
| sourcePath | string | For Smart Contracts, this is a relative path to the Smart Contract, relative to the |
| networks | Object | The set of networks where the contract is deployed. For Libraries that aren’t deployed, pass an empty object {}. |
| networks.key | int | The ID of a network where contract is deployed (e.g., Mainnet is 1, Polygon is 137) |
| networks.key.address | string | The address of a contract deployed on a specific network. |
| networks.key.links | Object | A link is a way to specify libraries used by the contract. It’s also referred to as linkReference or linkRef. |
The contracts property is a list of all the contracts you’re verifying and the libraries they’re using. The main difference is that the key of each entry in the networks property has to be the Fork ID, like on the line 8 in the listing below:
// --snip--
{
   contractName: "Greeter",
   source: readFileSync("contracts/Greeter.sol", "utf-8").toString(),
   sourcePath: "contracts/whatever/Greeter.sol",
   networks: {
     // important: key is the Fork ID (UUID-like string)
     [FORK_ID]: { // using ES6 computed properties
         address: greeterAddress,
         links: {},
     },
   },
},
// --snip–