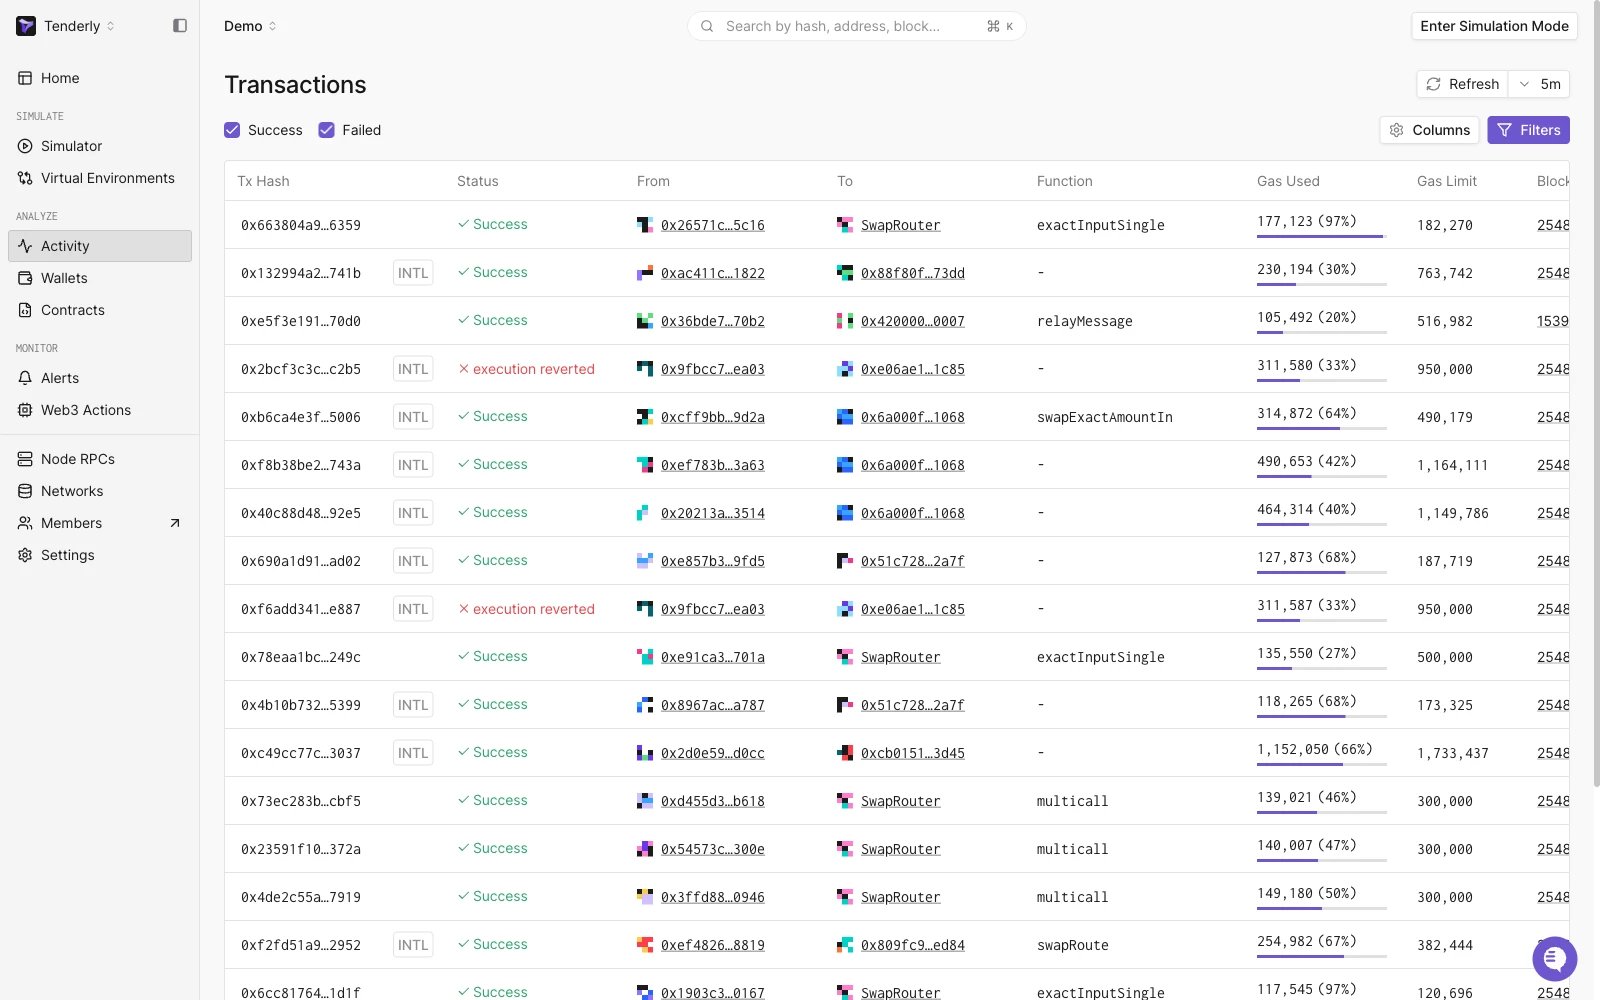
Once you add a contract or wallet from any supported network, all the transactions coming from those assets will be displayed in the Dashboard. This makes it easy to keep track of everything in one place. You can also use filters to sort and find the transactions that are most important to you, which can be helpful both during development and monitoring. To see all your project’s transactions, open Activity in the sidebar. The Transactions list shows the transactions of every contract and wallet in the project. Use the Success and Failed checkboxes above the list to show or hide transactions by outcome, and Filters to narrow the list further. Click on the Filters button to access the filtering and sorting options. Transaction Filtering Overview Transactions can be filtered by their:
  • Status (success, pending, failed)
  • Type (internal and direct)
  • Contract addresses involved
  • Function called
  • Network (94 networks supported)
  • Date or date range
  • Tag, matching any tag you’ve added to a contract or wallet
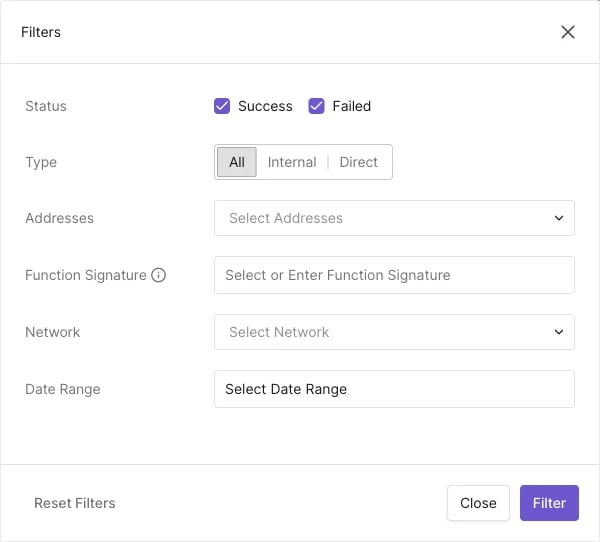
Detailed Transaction Filtering

Refresh the list

Click Refresh to reload the list. The dropdown next to it sets how often the list reloads automatically: Off, 5m, 15m, 30m, 1h, 2h, or 1d.

Choose the columns

Click Columns to open Configure Columns and toggle which columns the list shows: Network, Transaction Hash, Status, From, To, Function, ETH Value, Gas Used, Gas Limit, Block No., Transaction Index, When, and Timestamp (UTC). Network and ETH Value are off by default.
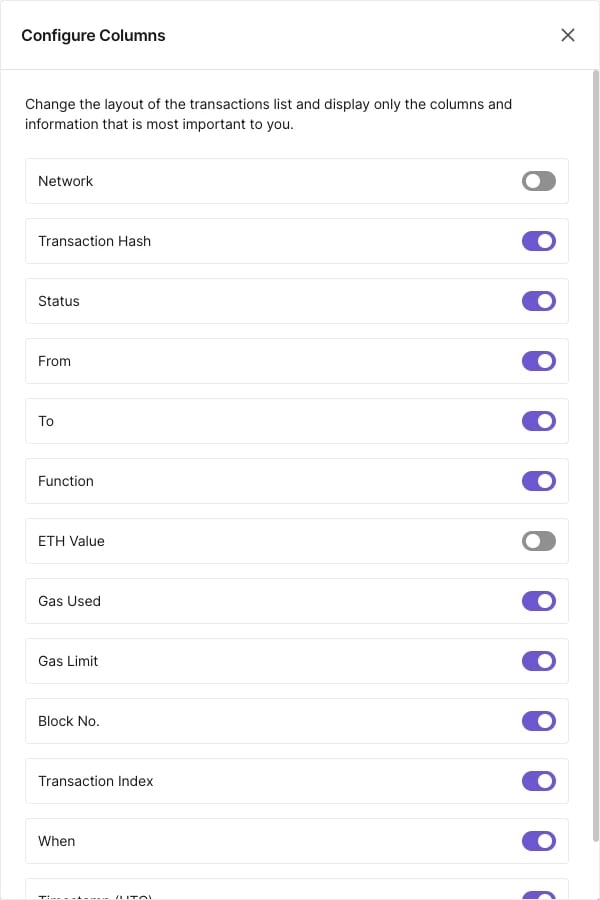
Configure Columns dialog with a toggle for each column of the transactions list: Network and ETH Value are off, and Transaction Hash, Status, From, To, Function, Gas Used, Gas Limit, Block No., Transaction Index, and When are on

Configure Columns dialog.