Simulation UI With State Overrides
State overrides allow you to specify custom values for smart contract state variables and impose custom conditions before running a simulation. This allows for experimentation and understanding of smart contract behavior and usage.
Example: minting 2 DAI
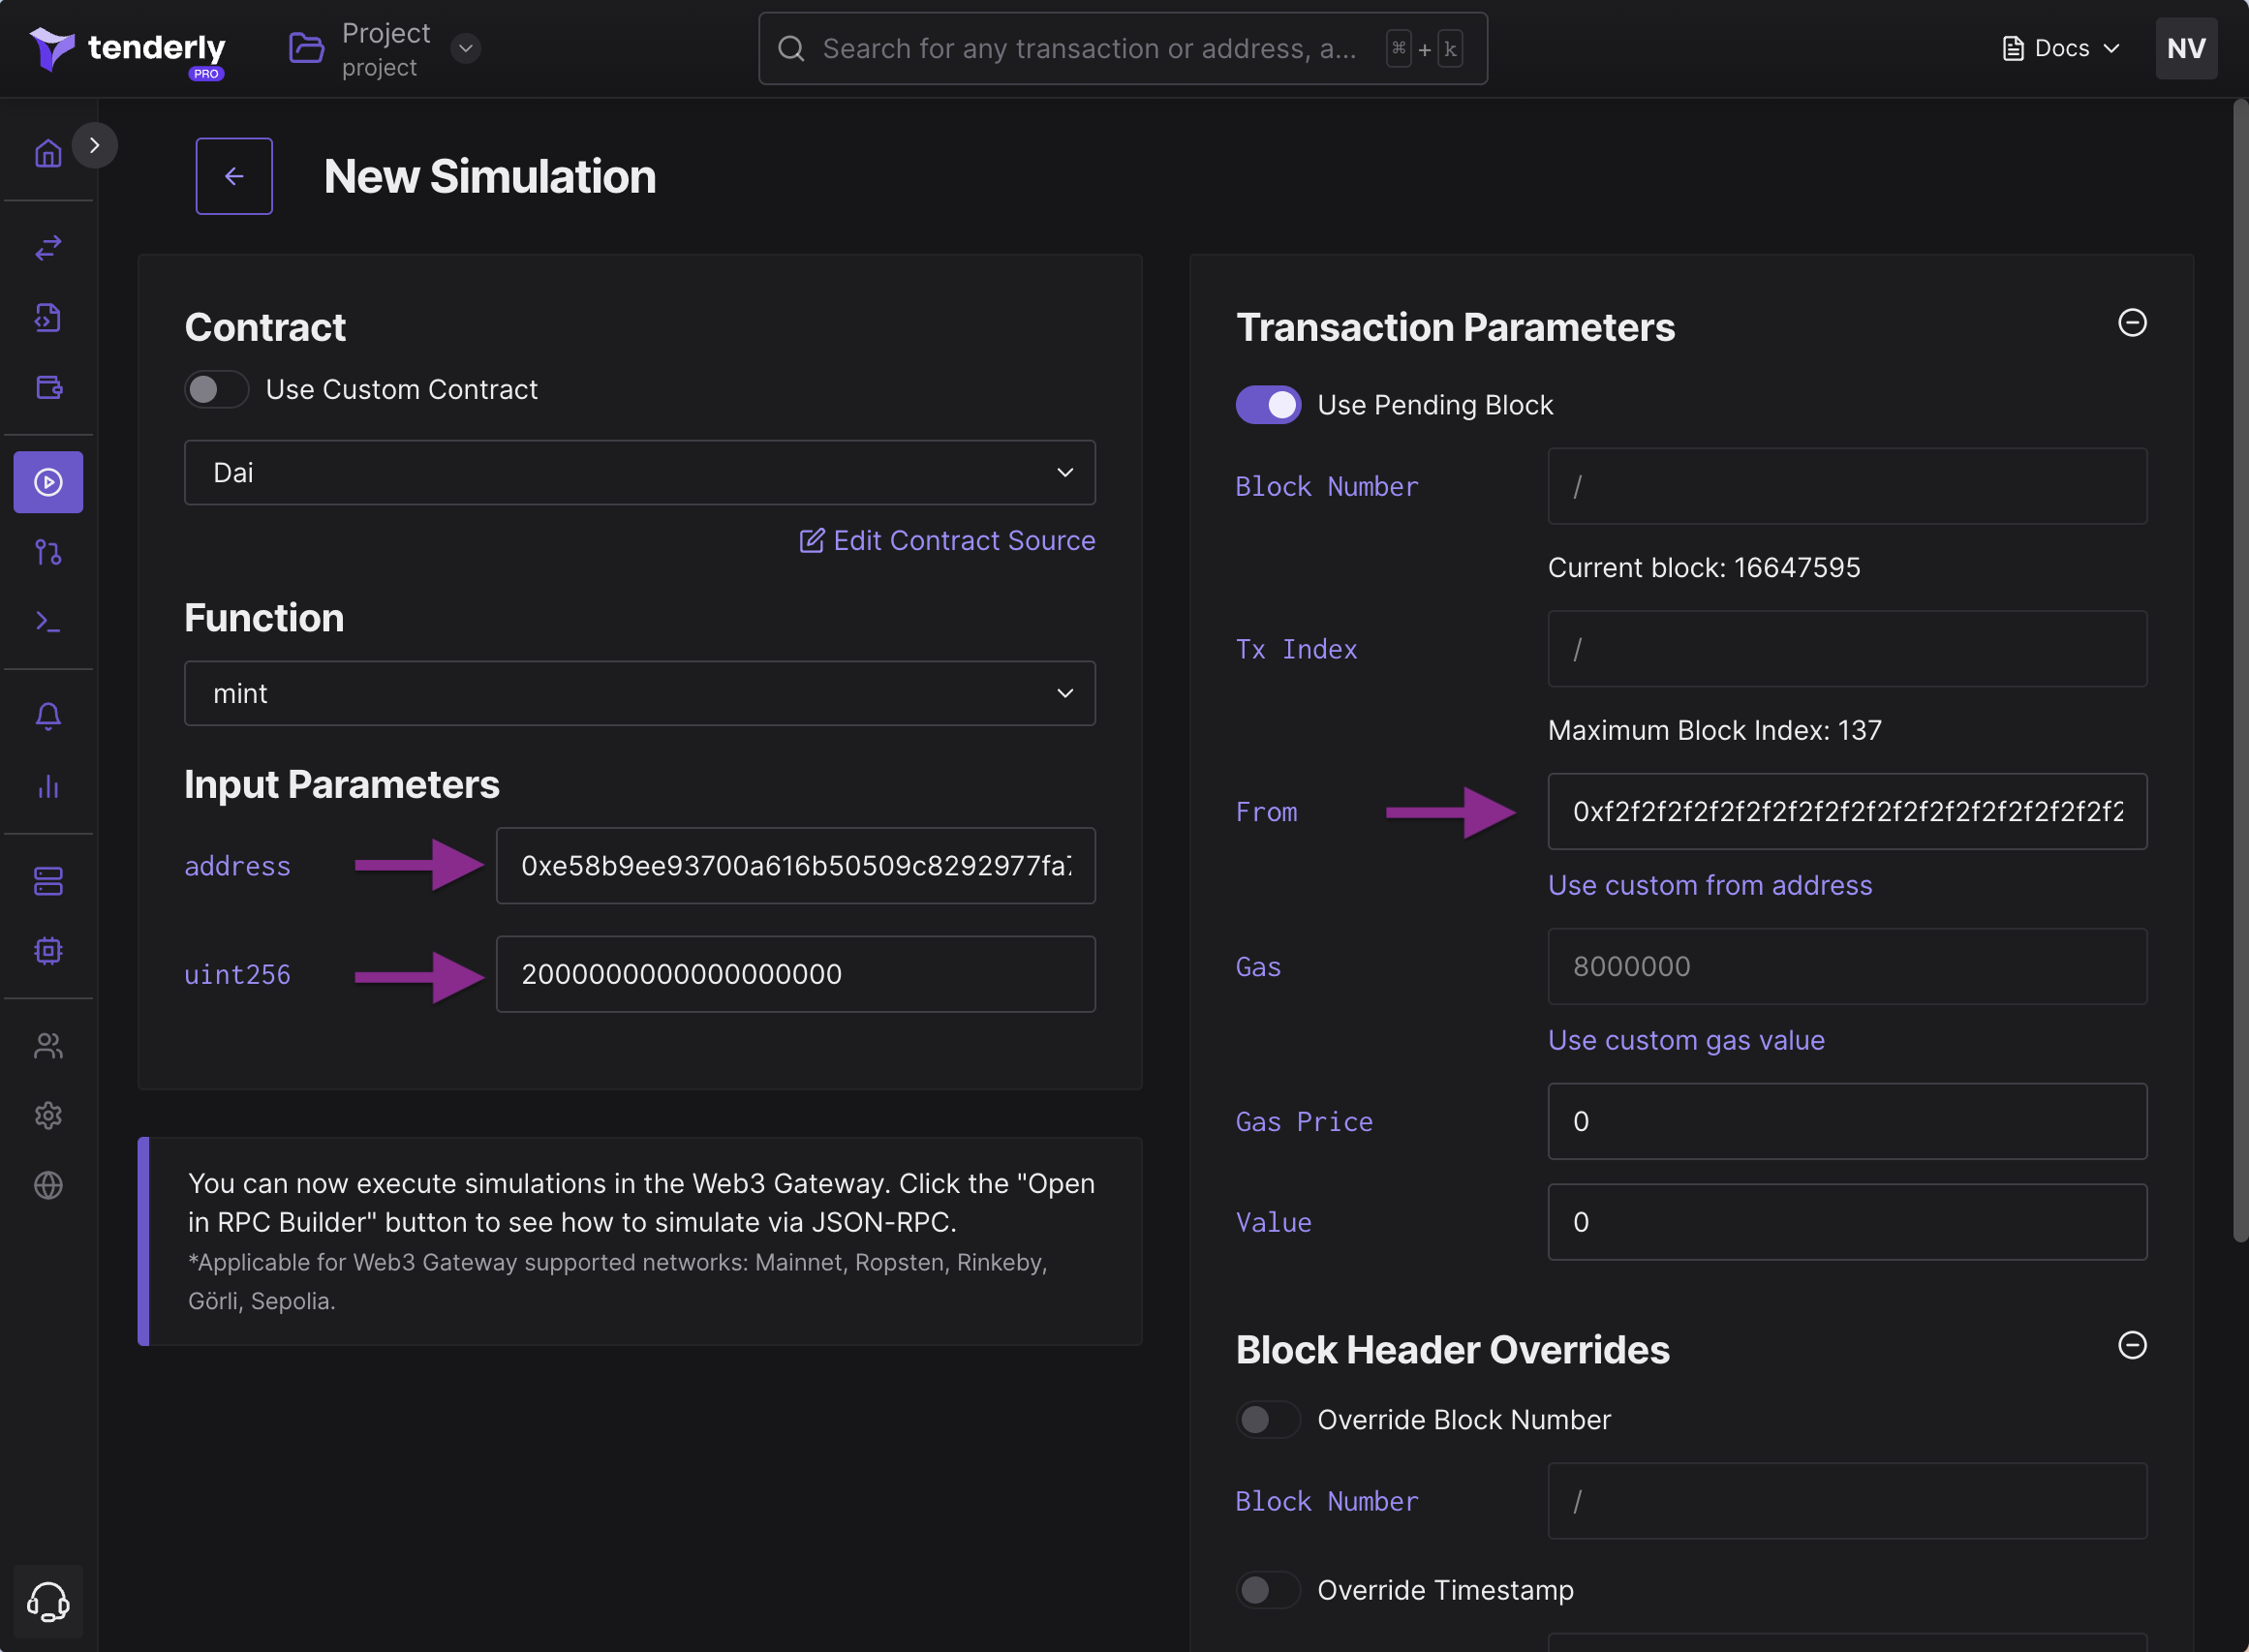
We’ll simulate minting 2 DAI (2000000000000000000 wei) for the owner 0xe58b9ee93700a616b50509c8292977fa7a0f8ce1. We’ll use the address 0xf2f2f2f2f2f2f2f2f2f2f2f2f2f2f2f2f2f2f2f2 as the minter. Since this isn’t an actual ward on Mainnet DAI, we have to use state overrides to make it a ward during this simulation.
If you check the source of the Dai contract, you’ll see the wards mapping from an address to a number. Essentially, for minting to work, we have to plant 0xf2...f2 as a ward, which is the state override we must do.
wards[0xf2f2f2f2f2f2f2f2f2f2f2f2f2f2f2f2f2f2f2f2] = 1
The example covers the following steps:
Step 0: Go to Contracts on your left and click Add Contracts to add the Dai contract to your project. Then, paste 0x6b175474e89094c44da98b954eedeac495271d0f to the contract address field and select the Mainnet as the network from the dropdown.
Step 1: Go to Simulations in the navigation menu on your left.
Step 2: Choose Dai from the contract dropdown menu.
Step 3: Select mint as the function from the corresponding dropdown menu.
Step 4: Paste 0xe58b9ee93700a616b50509c8292977fa7a0f8ce1 to the usr field and 2000000000000000000 to the ward field.
Step 5: Paste 0xf2f2f2f2f2f2f2f2f2f2f2f2f2f2f2f2f2f2f2f2 to the from field.
Step 6: Scroll down to State Overrides, click Add State Override, and pick Dai from the dropdown.
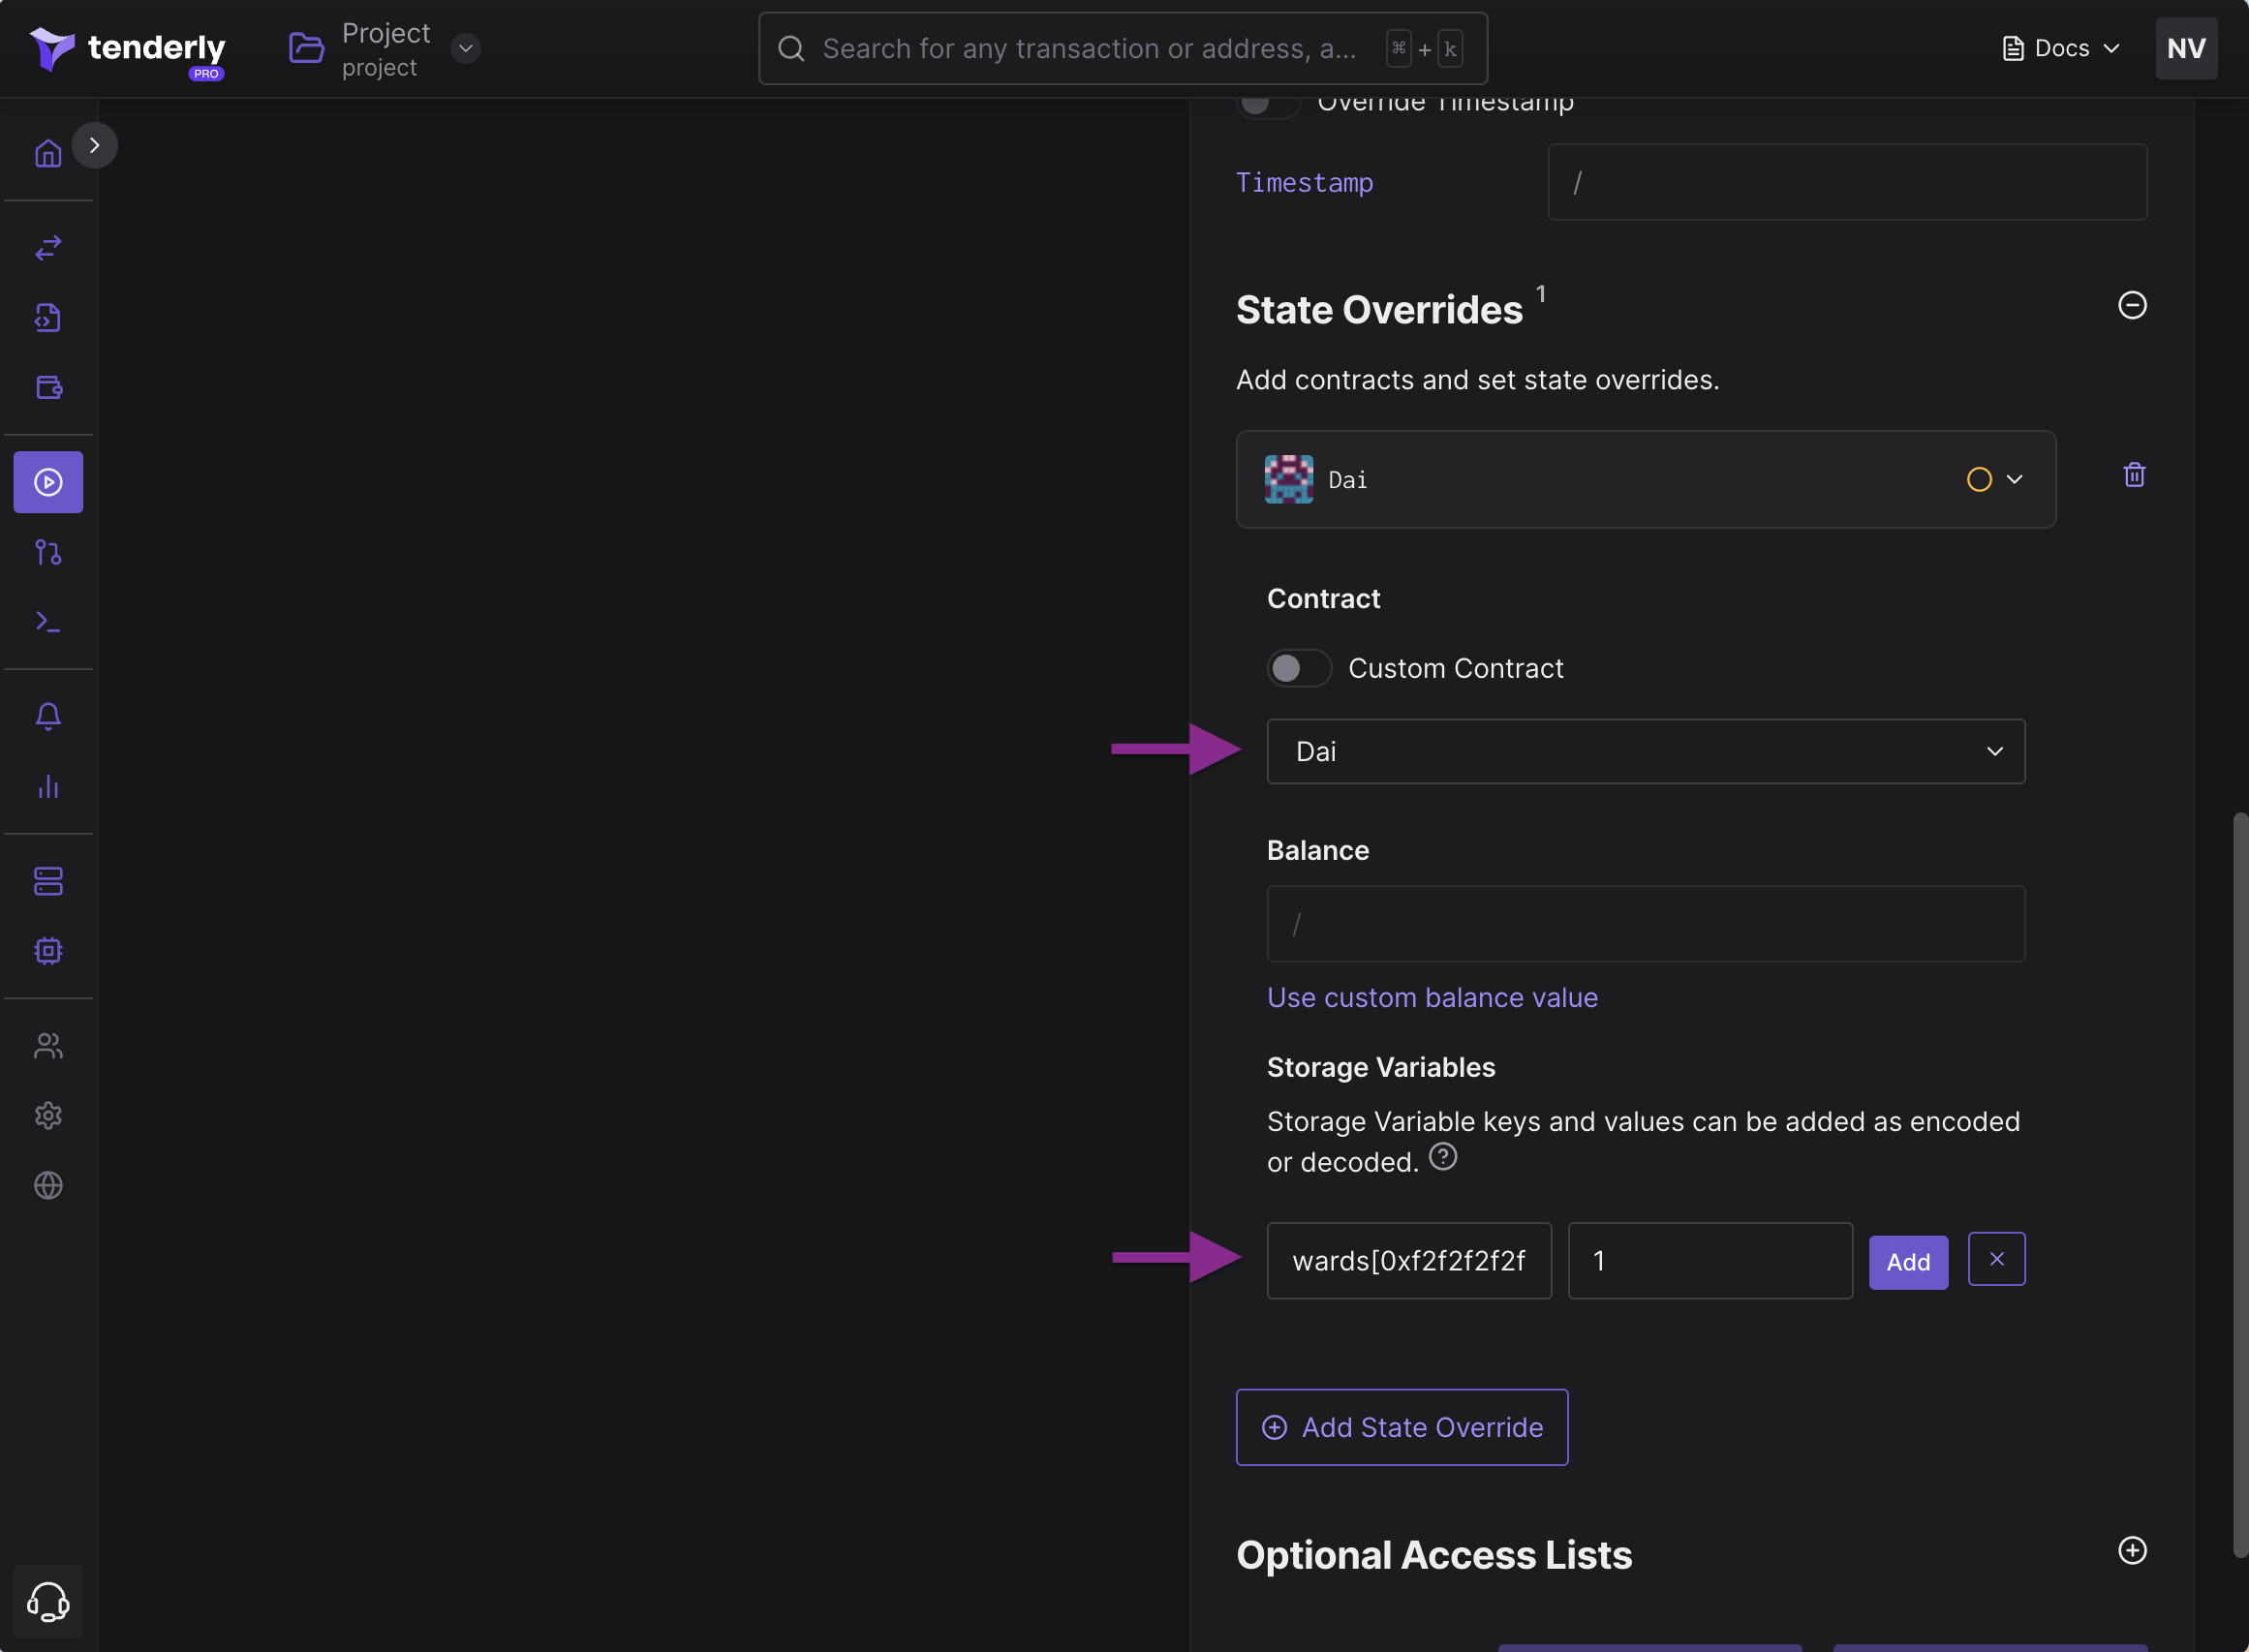
Specifying wards[0xf2…f2]=1 state override
Step 7: In the Storage Variables section, click Add More, pick wards[], and replace it with wards[0xf2f2f2f2f2f2f2f2f2f2f2f2f2f2f2f2f2f2f2f2].
Step 8: Set the value field to 1 and click Add.
Step 9: Scroll down and click Simulate.
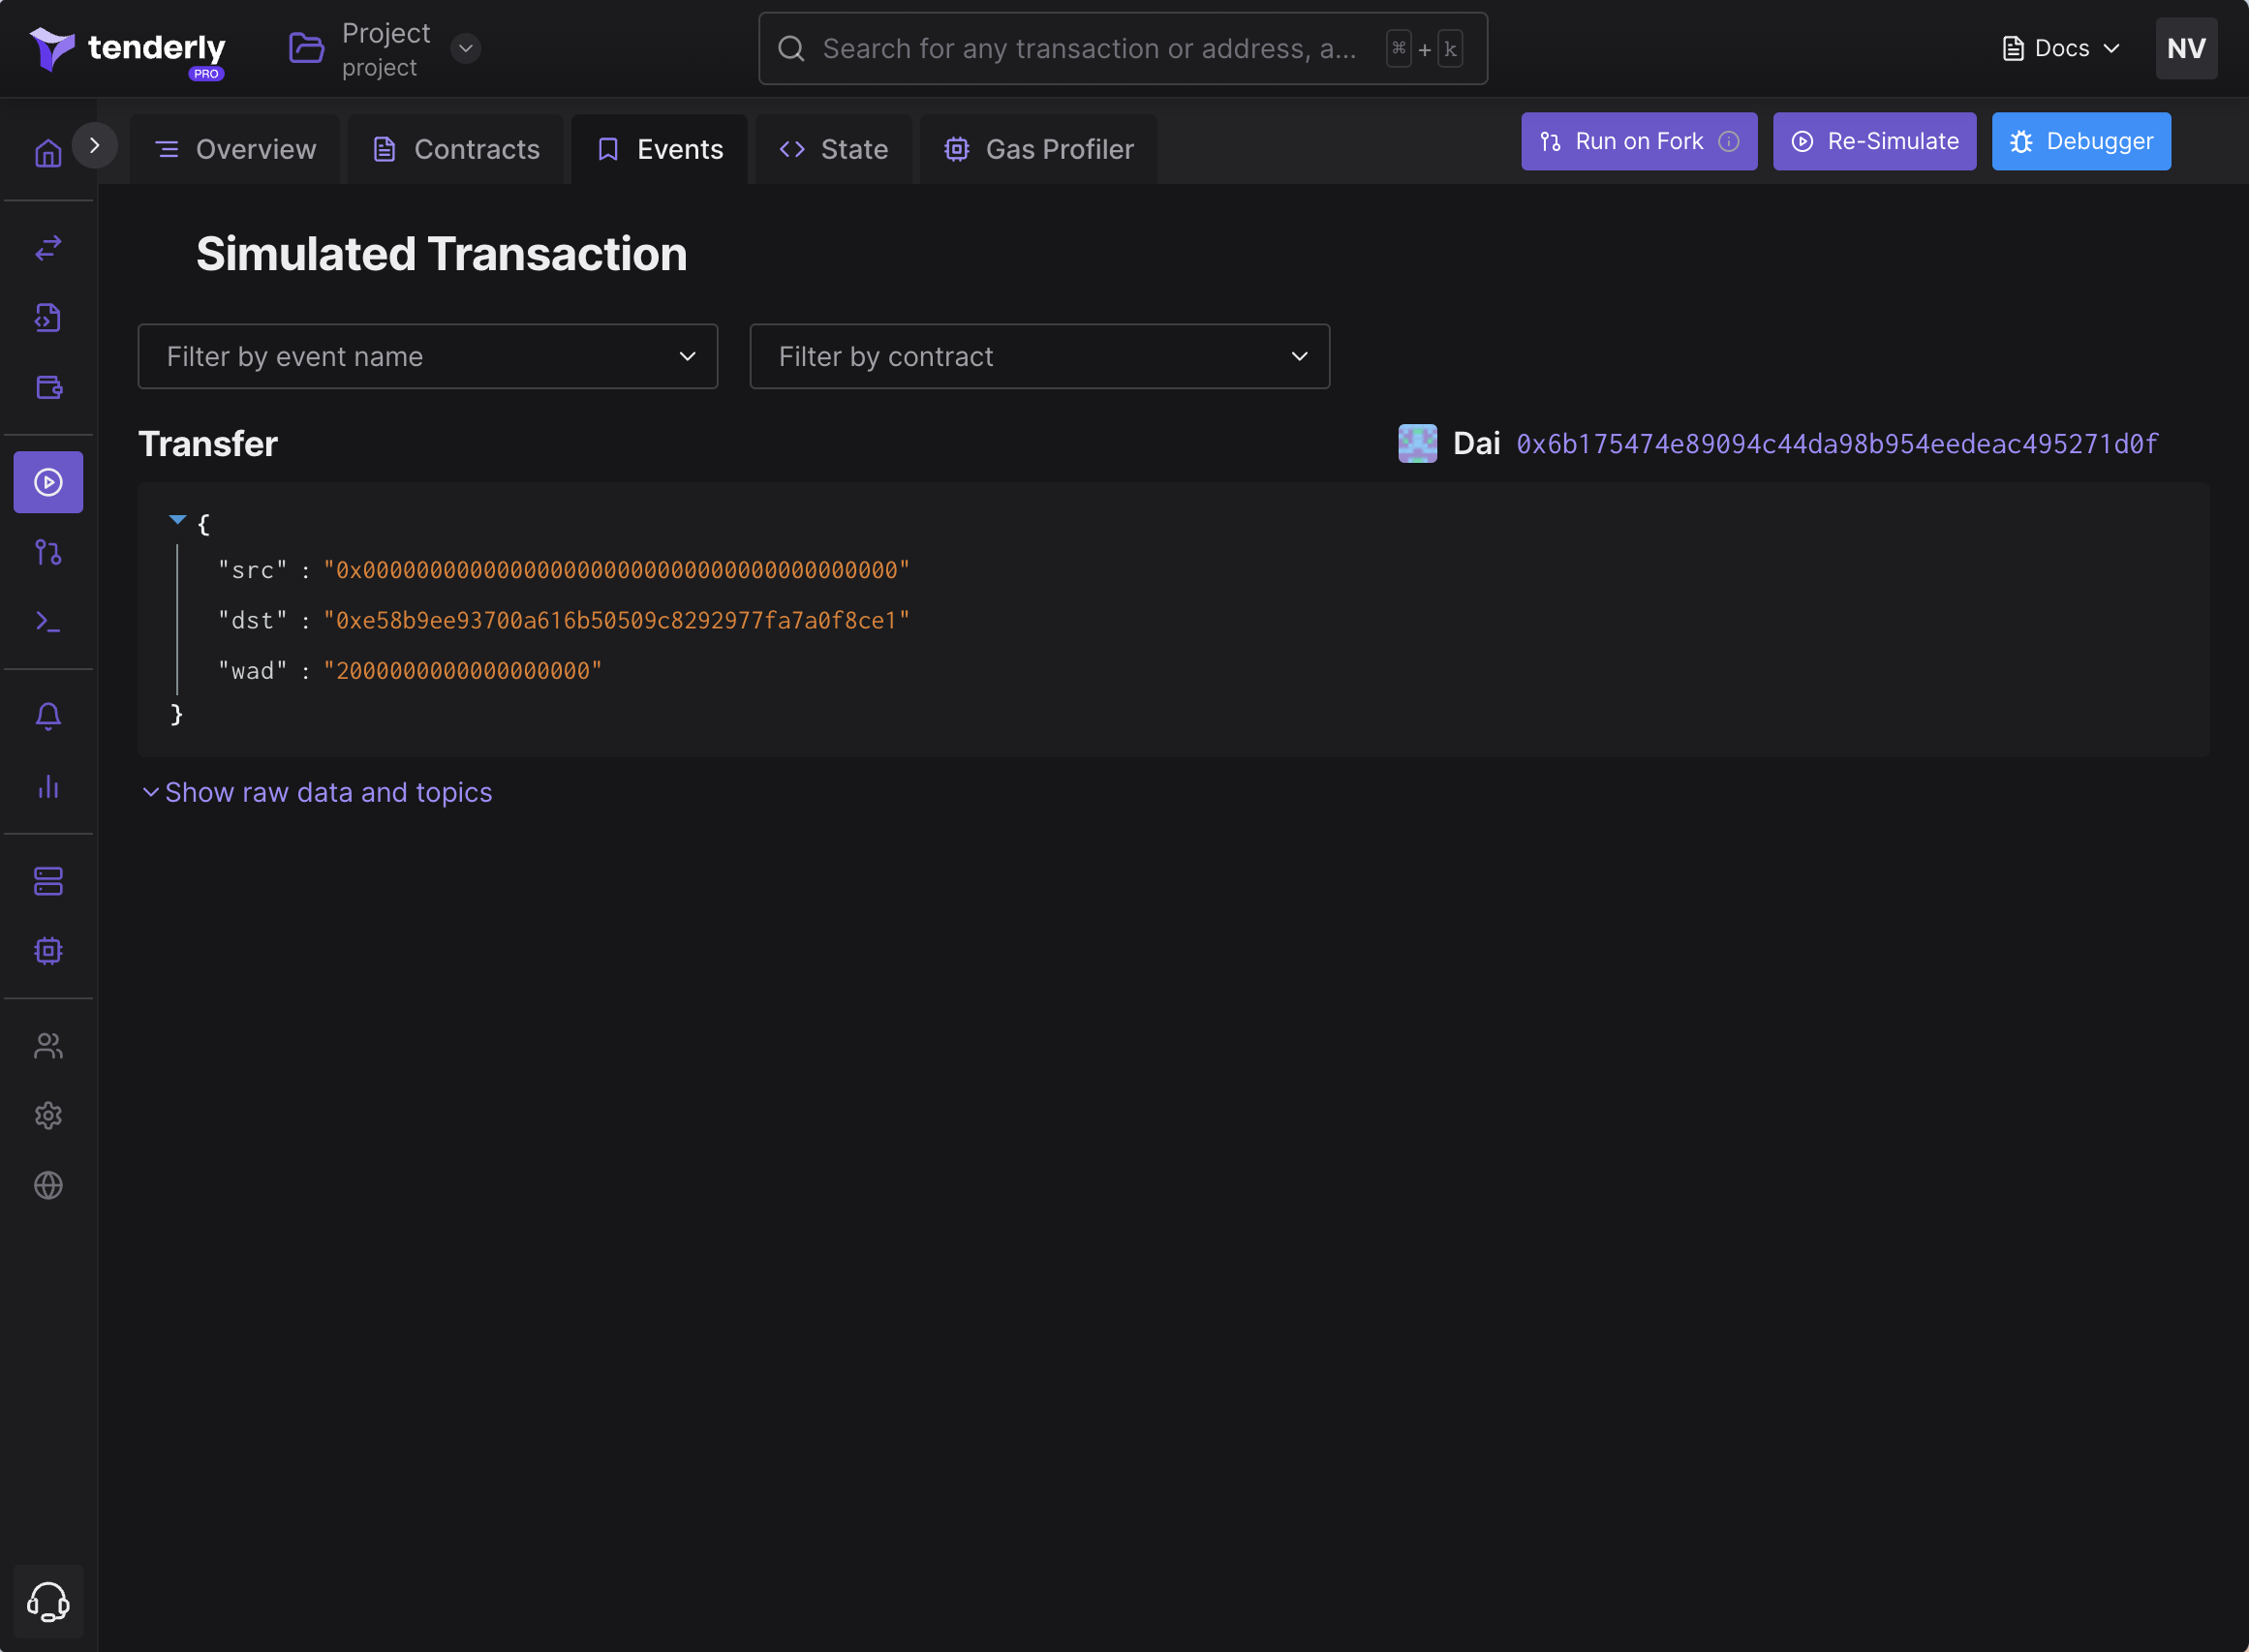
Step 10. Navigate to the Events tab to see the Transfer event.
Step 11: Go to the State Changes tab to verify that the balanceOf mapping has changed for the owner 0xe5..e1.
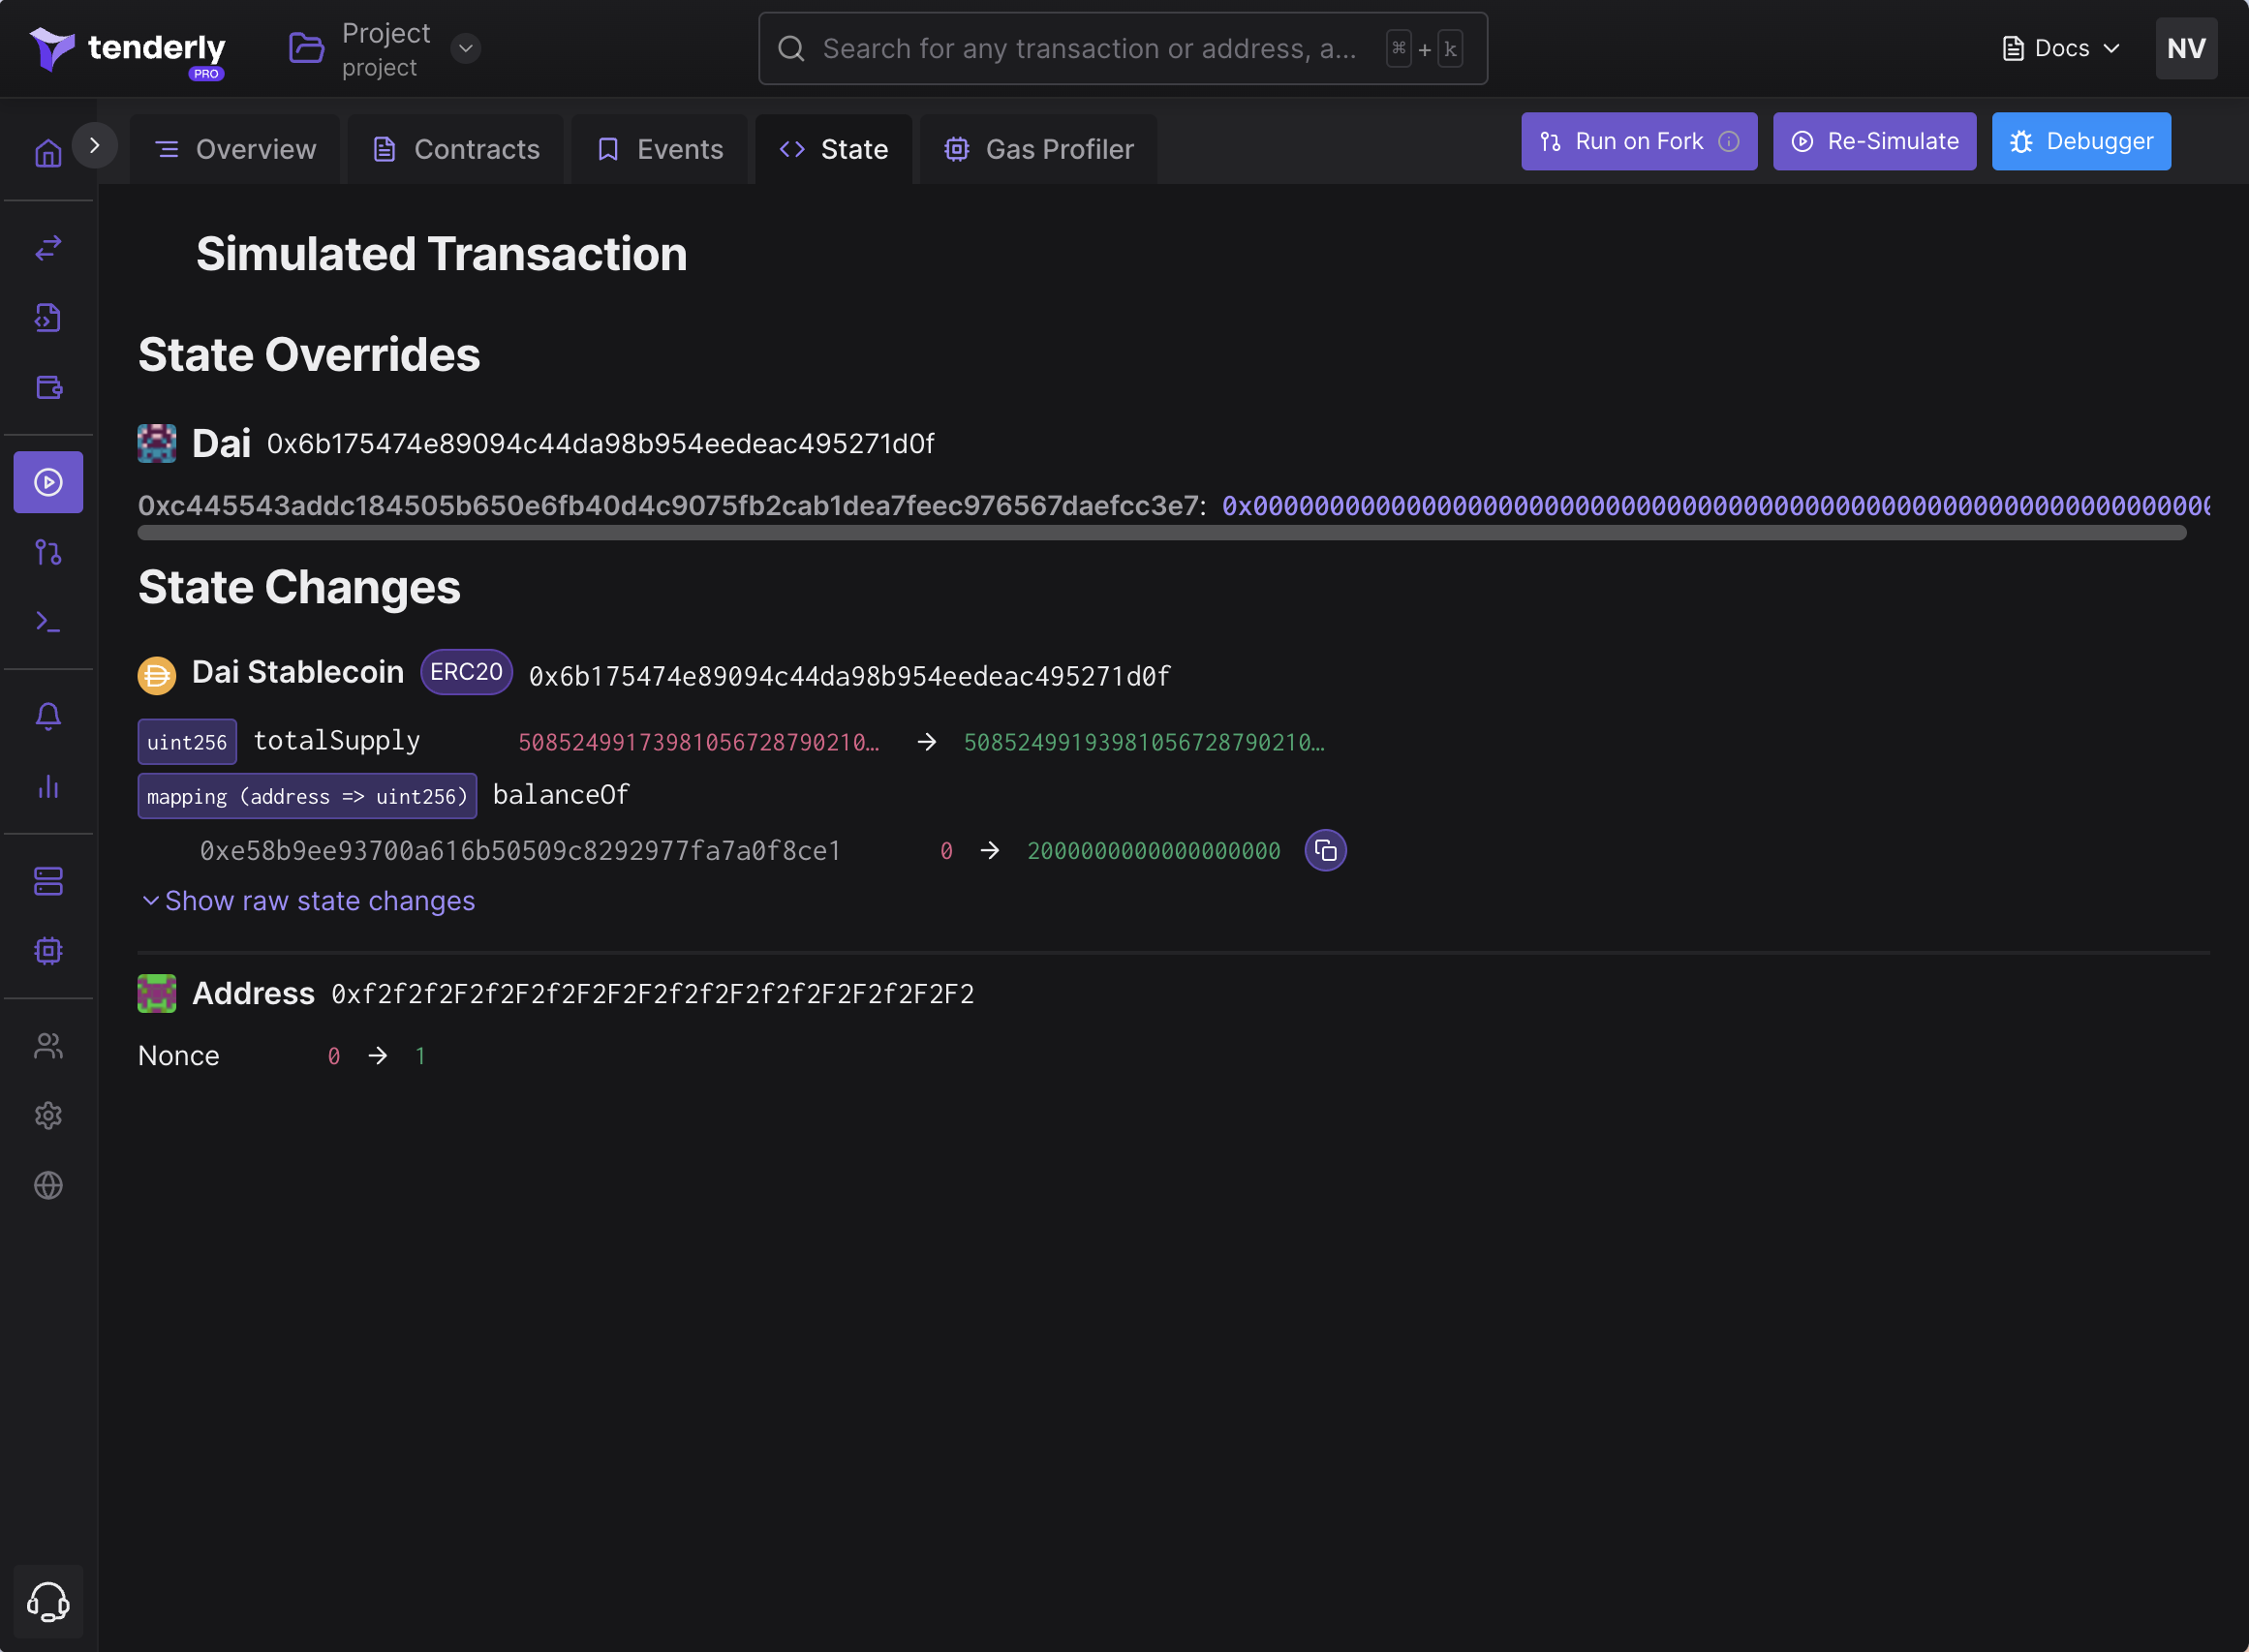
State Changes: the balanceOf change for the owner