
Layout
The builder has three regions: Session strip runs across the top. It holds defaults that apply to every step: Network, Block (defaults toPending), and a default From address. Click Configure to set default gas, gas price, and value.
Bundle rail is the left column. Each step card shows a step number, a label (New call until a contract is chosen, then ContractName · functionName), and a status badge after a run. Click a step to focus it. Drag to reorder. Use C to add a step, J/K to move between steps, and F to toggle focus mode.
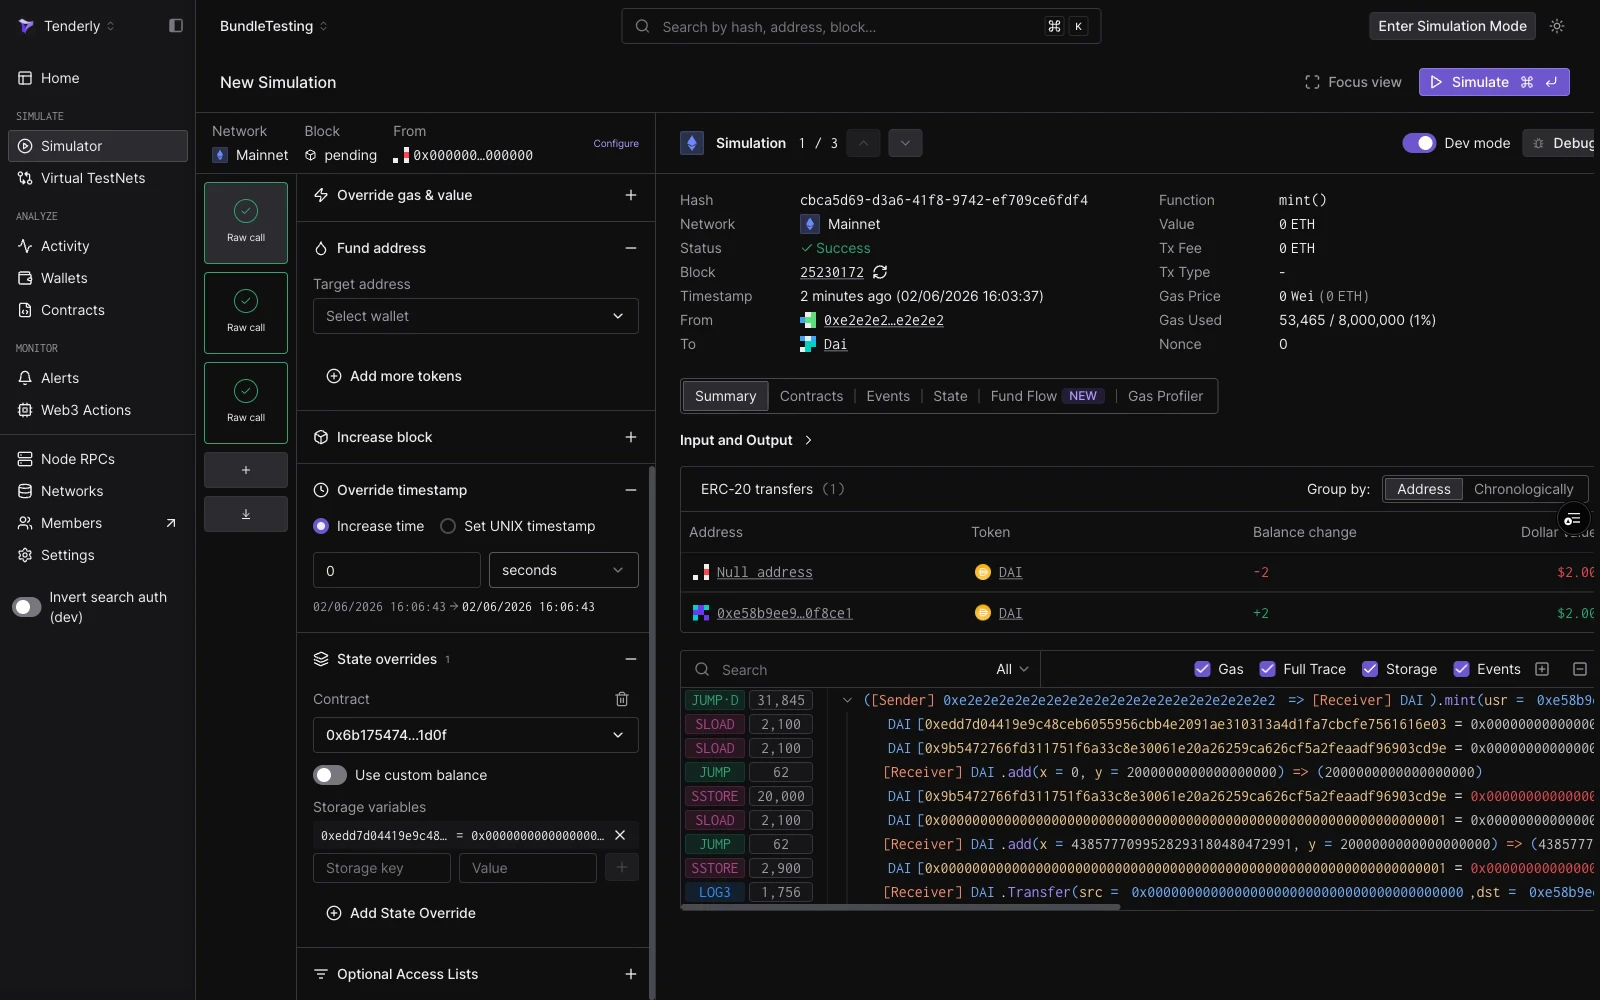
Focused step view is the right column. Before running, it shows the step editor. After running, it shows that step’s result: decoded output, gas used, events, state changes, and token transfers.
Single simulations
To run a single simulation, work with the one step that opens by default. Decoded mode lets you pick a contract and function by name:| Field | Notes |
|---|---|
| From | Defaults to the session From. Override per step. |
| Contract | Project contracts surface first. Also matches public contracts and top tokens by name, symbol, or address. |
| Function | Filtered to non-event, non-constructor methods. |
| Parameters | One typed input per ABI argument. |
0x-prefixed hex payload directly. This is useful when you have calldata from an existing transaction or a manual encode.
Click Simulate (or press ⌘↵) to run. The right panel fills with the result: function call summary, gas used, decoded output, and tabs for Events, State Changes, Fund Flow, and Gas Profiler.
You can also start from an existing transaction: click Re-Simulate on any transaction detail page to load its inputs into the builder. The simulation runs on the block and timestamp of the original by default.
To share a pre-filled form (for example from CI or a test report), click Copy draft link in the page header, or build the link yourself. See Prefill the Simulator with a draft link.
Simulation bundles
A bundle runs up to five steps in sequence, sharing state. Use a bundle when the outcome of one transaction depends on a previous one, for example, an approval that enables a later transfer. Steps are added and reordered in the rail, each with its own From override and cheatcodes, and the whole bundle executes with one click of Simulate. See Simulation Bundles for building, reordering, result badges, and how bundles appear in the simulation history.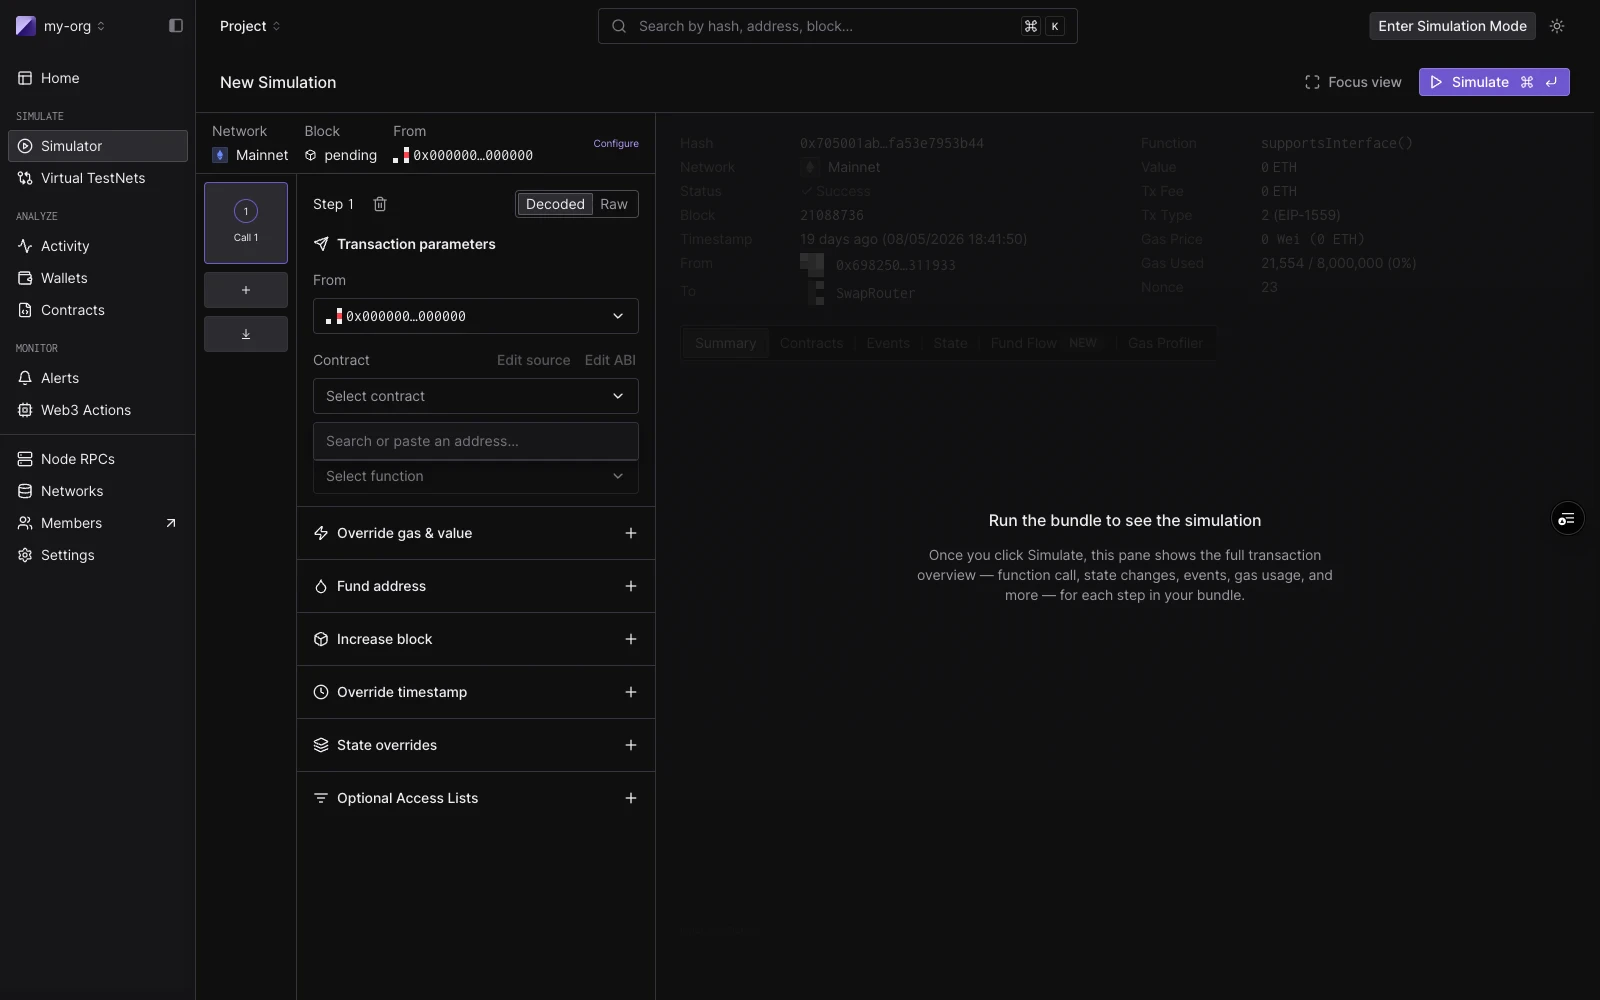
Cheatcodes
Each step has a set of cheatcodes (add-ons that run immediately before the step executes). They apply to both single simulations (as step-level controls) and each step in a bundle.| Cheatcode | What it does |
|---|---|
| Override gas & value | Set a custom gas limit and ETH value for this step. |
| Fund address | Credit any address with token balances before this step runs. Add multiple entries per step. |
| Increase block | Advance the block number by a fixed amount before this step. |
| Override timestamp | Set a custom block timestamp for this step. |
| State overrides | Override contract storage slots, balance, or bytecode before this step. Add overrides for multiple contracts. |
| Optional Access Lists | Attach an EIP-2930 access list for gas efficiency on multi-contract calls. |
See also
- Simulation Bundles: multi-step simulations with shared state, including the 3-step DAI mint, approve, and transferFrom guide.
- Simulation Mode: persistent wallet impersonation that follows you across the dashboard and accumulates state across runs.
- Simulation with State Overrides: how to override storage, balance, and bytecode.
- Simulation Parameters: full reference for session defaults, block and transaction index selection, From addresses, and cheatcode fields.
- Prefill the Simulator with a draft link: build a base64url URL that opens the Simulator with a pre-filled form, for sharing from CI or tooling.
- Editing Contract Source: test a bug fix by running a simulation against modified source code.
- Bundled Simulations (API): run bundles programmatically via the
simulate-bundleendpoint. - Virtual Environments: when you need a full persistent RPC environment instead of a stateless bundle.