Using Simulation UI
The following example guides you through running simulations using the Simulation UI.
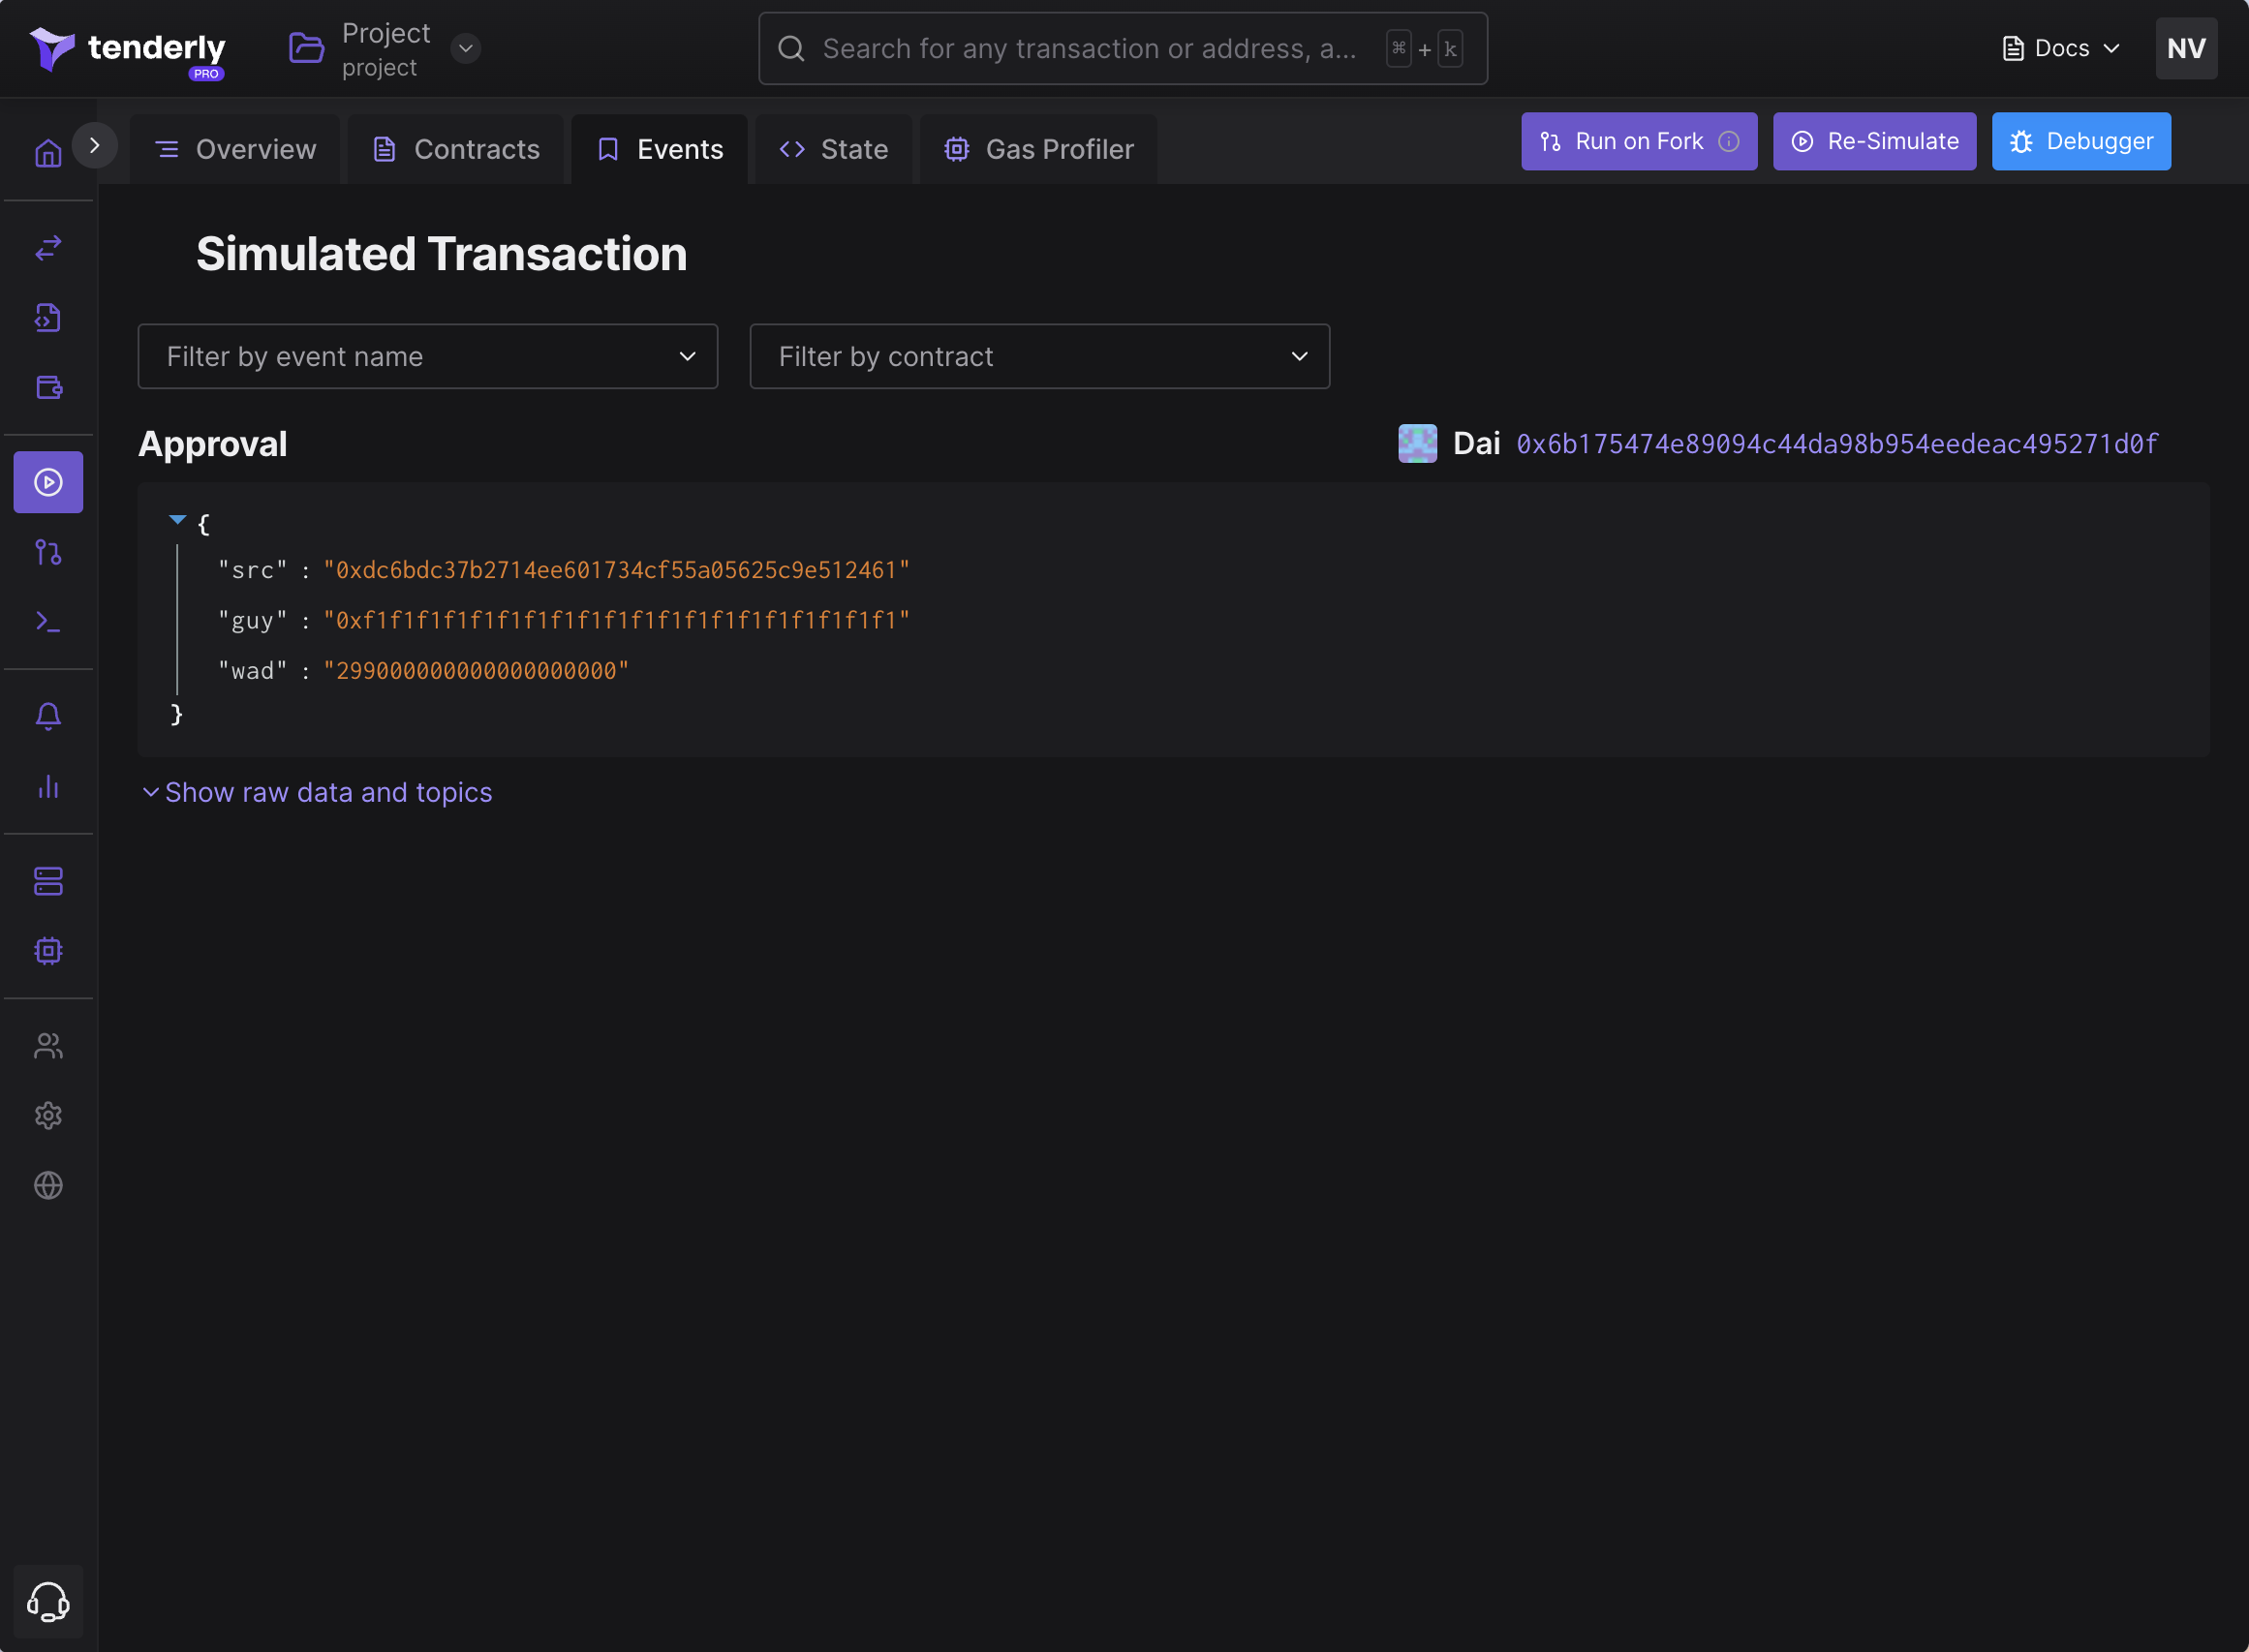
Example: simulating DAI approval
We’ll use the Simulation UI to simulate DAI approval. The ERC-20 token owner 0xdc6bdc37b2714ee601734cf55a05625c9e512461 will approve 299 DAI to the spender 0xf1f1f1f1f1f1f1f1f1f1f1f1f1f1f1f1f1f1f1f1.
This example shows:
- The approval will succeed even though the account
0xdc6bdc37b2714ee601734cf55a05625c9e512461doesn’t have any DAI balance. - You can simulate a transaction as any sender, even if you don’t have access to the private keys of that account. This is possible since Tenderly simulates the execution of unsigned transactions.
.webp)
Here are the needed steps:
Step 0: Add the Dai contract to your project. Click Contracts in the left-hand side menu and then Add Contract. Paste 0x6b175474e89094c44da98b954eedeac495271d0f to contract address and select Mainnet from the network dropdown.
Step 1: From the left-hand side menu, pick Simulations.
Step 2: From the contract dropdown, pick Dai.
Step 3: From the Function dropdown, select approve.
Step 4: Paste 0xf1f1f1f1f1f1f1f1f1f1f1f1f1f1f1f1f1f1f1f1 to the usr field and 299000000000000000000 to the ward field.
Step 5: Paste 0xdc6bdc37b2714ee601734cf55a05625c9e512461 to the from field.
Step 6: Scroll down and click Simulate.
Step 7: Go to the Events tab to see the Approval event. Go to the State Changes tab to verify that the allowance for 0xf1...f1 increased.

allowance change for the owner