Virtual TestNets
Virtual TestNets are simulated blockchain networks, designed to replicate real networks for various stages of dapp development. Use them as risk-free development and staging infrastructure that fully tracks real network state without the need to use real cryptocurrency or assets.
You can interact with Virtual TestNets through a visual UI and an enriched JSON RPC interface. This gives you full control over the Virtual chain.
Get started
Follow the Virtual TestNet Quickstart to learn how to launch and interact with your Virtual TestNet or skip to the key steps:
Use cases
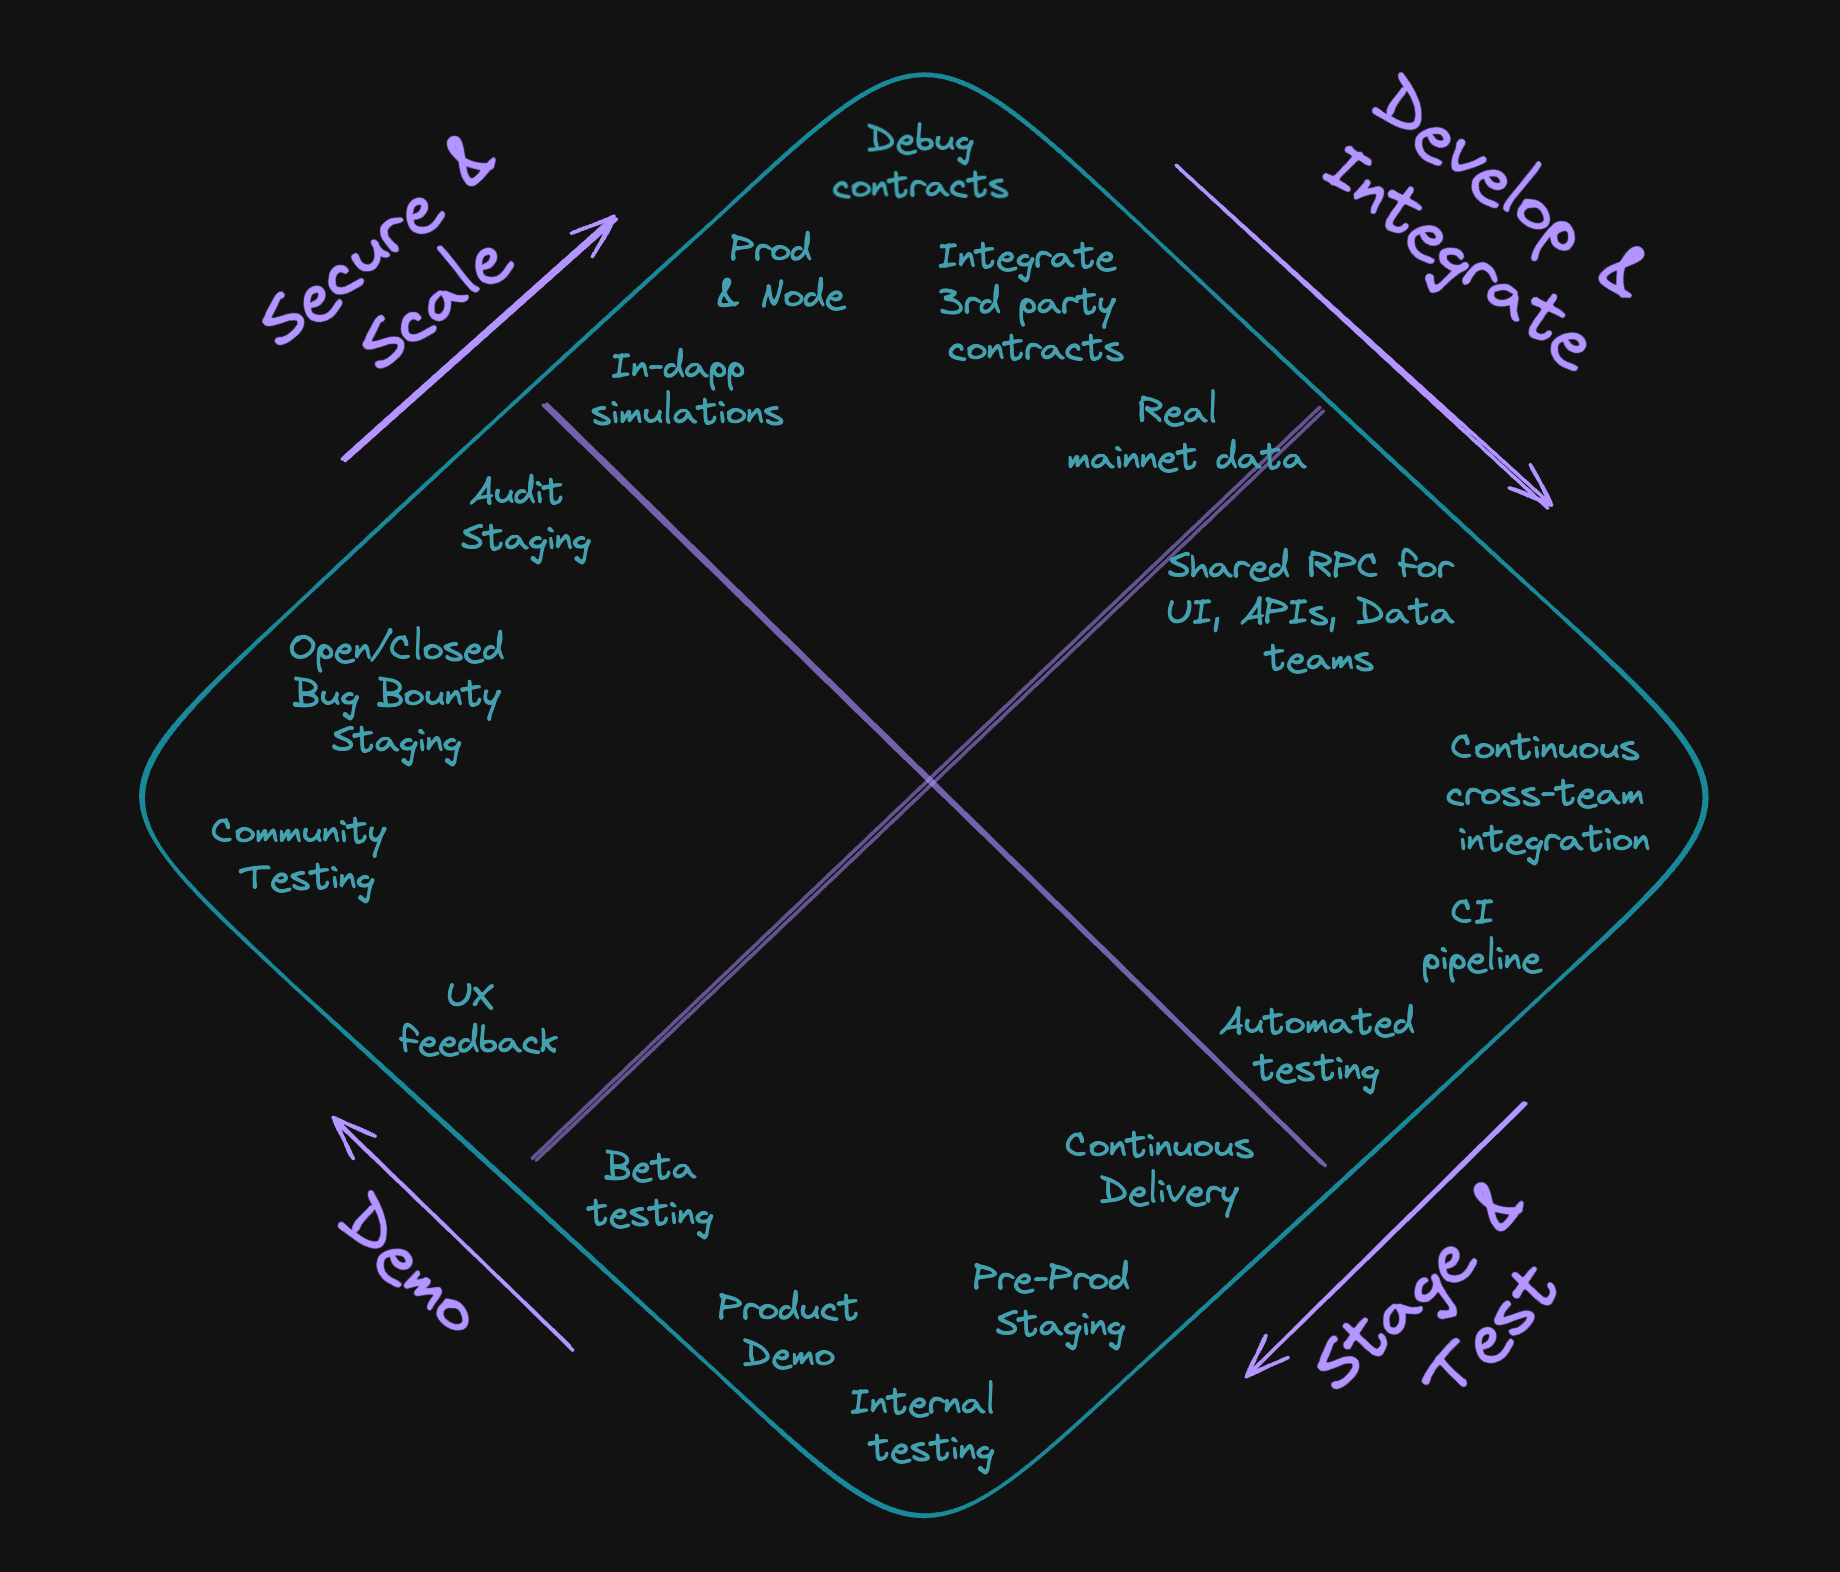
Here’s a few use cases of Virtual TestNets:
- Local node replacement allowing your team to code, test, and debug your all components of your dapps: smart contracts, dapp UI, backend, and indexing/data layer.
- Continuous integration (CI) and continuous deployment (CD) infrastructure, allowing frequent integration of all dapp components and deploying different artefacts (smart contracts, UI, subgraphs, etc.). Set up a CI workflow using Github Actions.
- Staging infrastructure that serves your entire dapp for purposes of manual testing, demoing, community testing, and contract auditing. The first step is staging smart contracts
- Collaborative development infrastructure piece of your Web3 tech stack, allowing your team develop in iterations with minimal interference. You can achieve this by forking a Virtual TestNet.
Features and tools
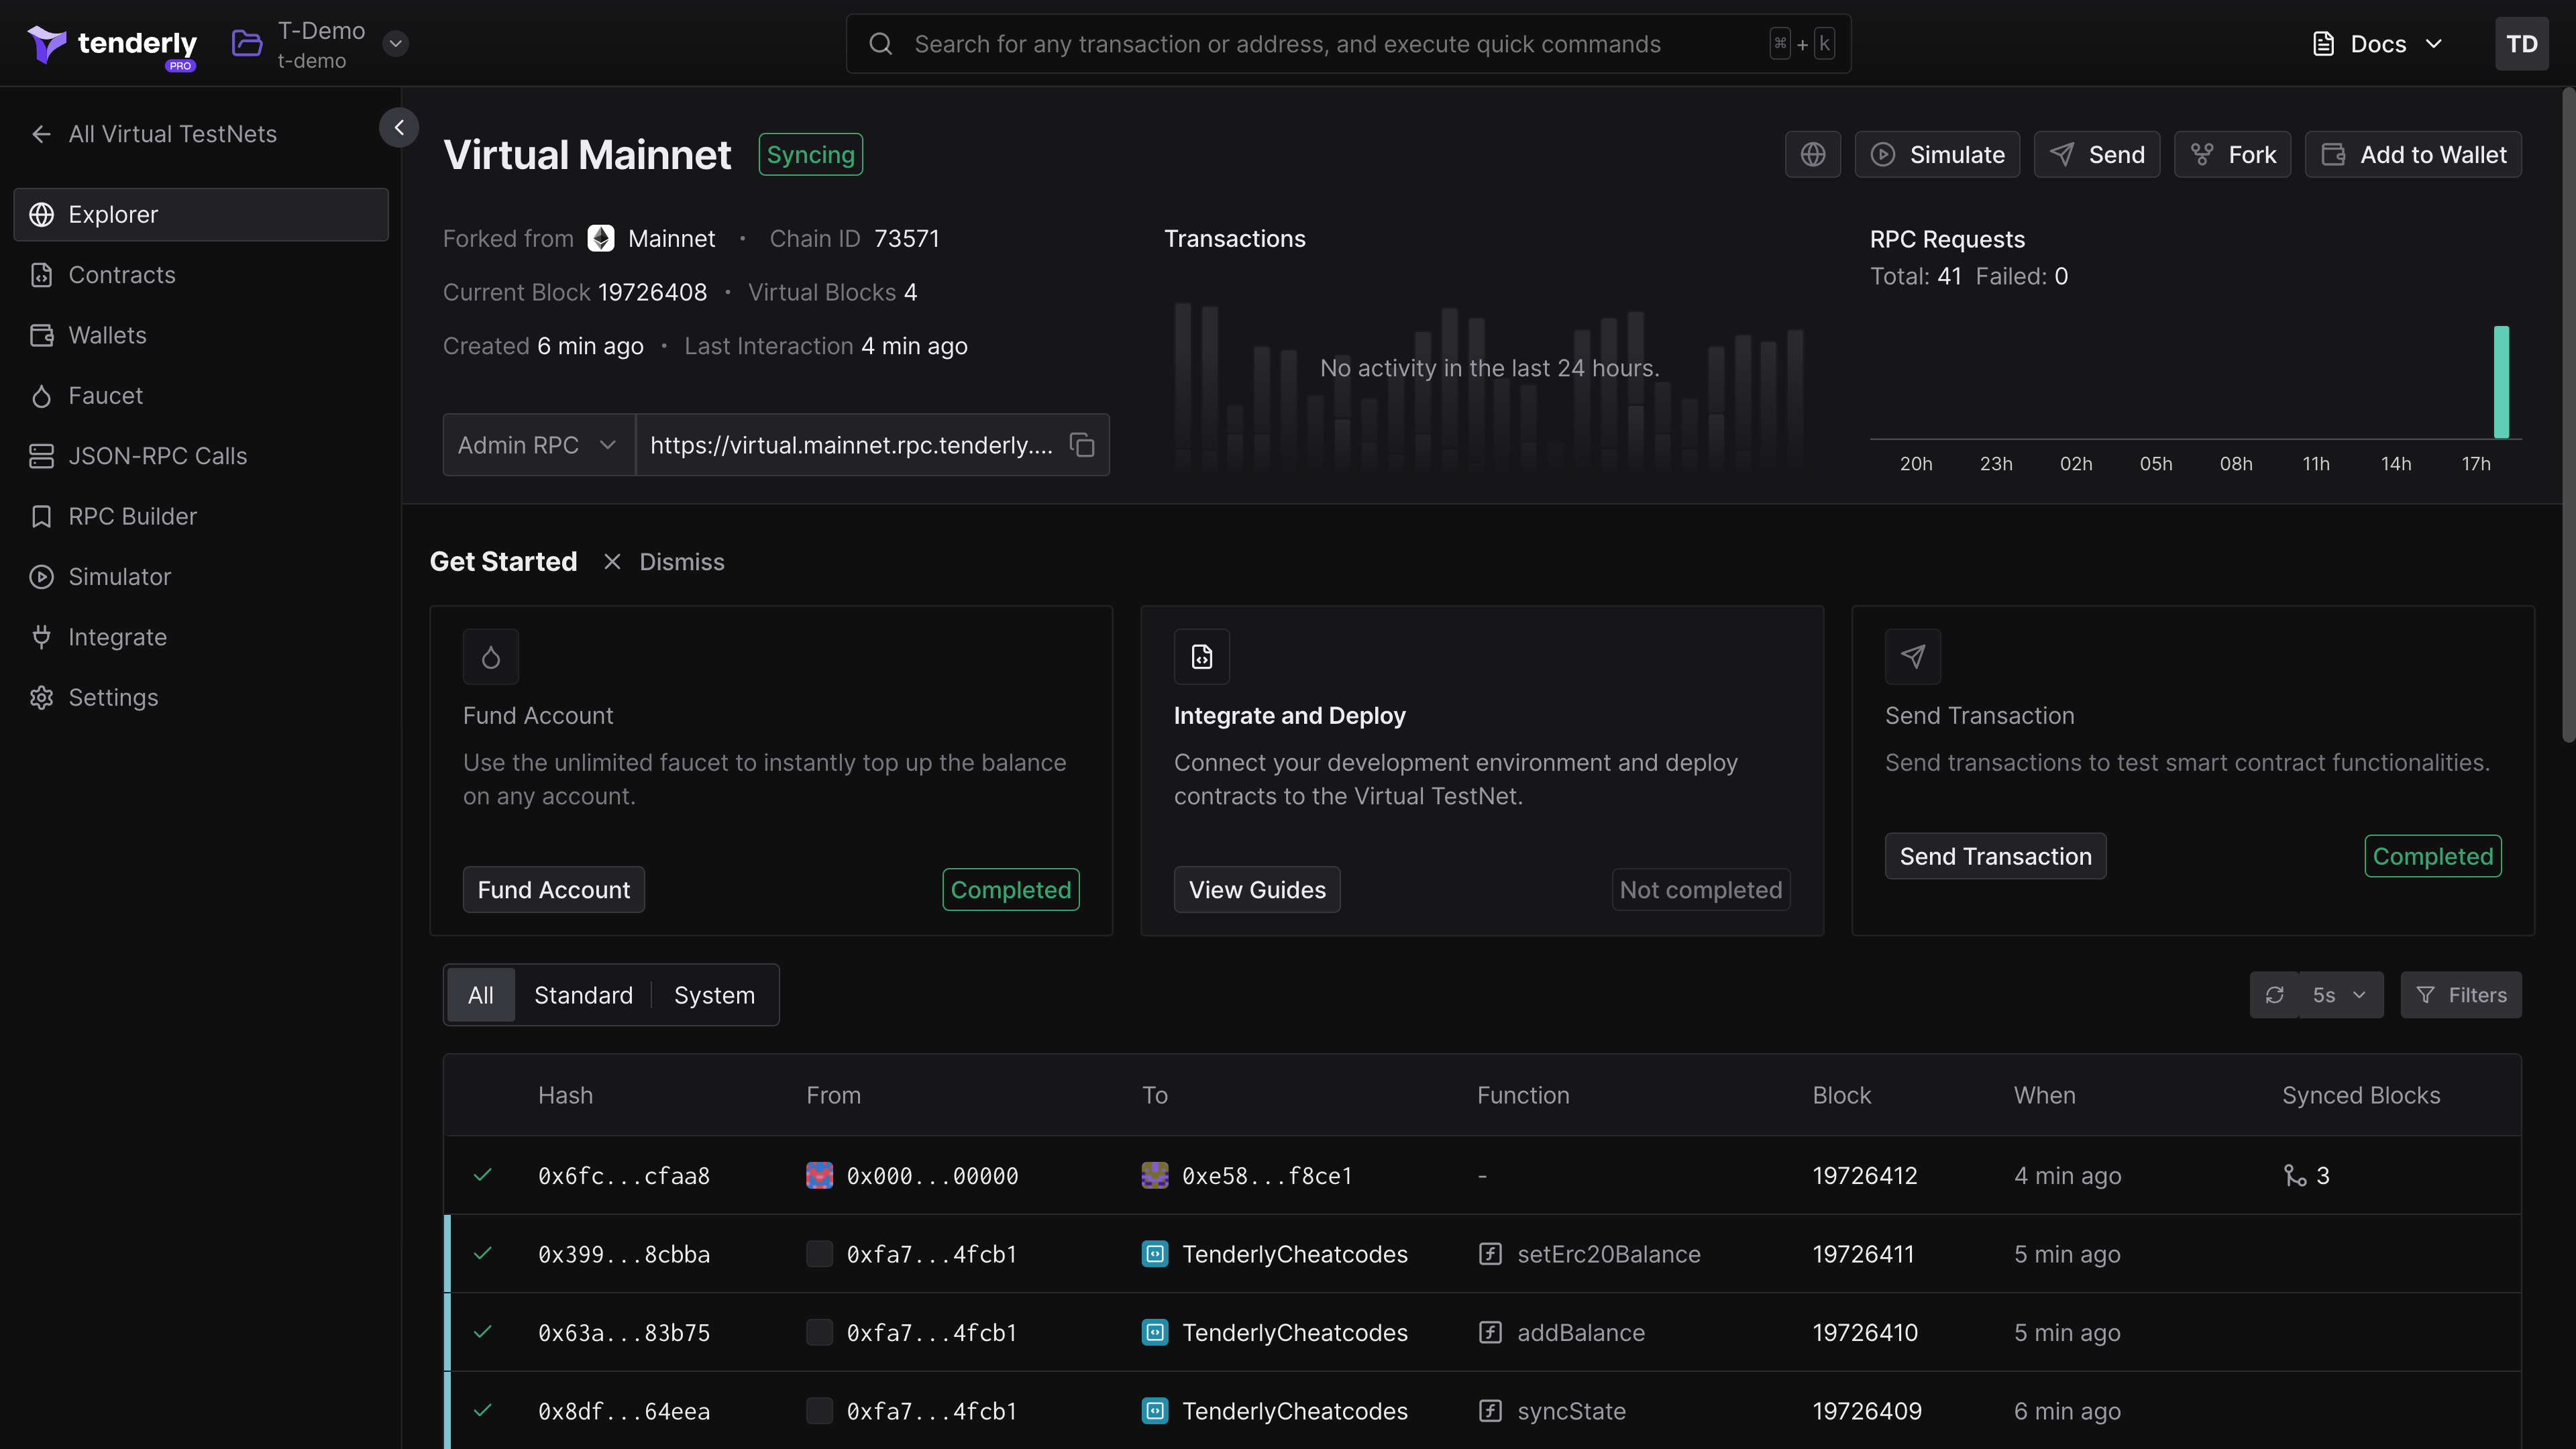
Virtual Testnet Explorer→
Get an overview of transactions, contracts, wallets, and RPC calls on your TestNet.
Unlimited Faucet→
Use the built-in faucet to top up the native currency or ERC-20 token balances on any account.
State Sync→
Keep the state of your Virtual TestNet in real-time sync with the state of the parent network.
Transactions
With Virtual TestNets you can perform all operations you would do with a real network:
- Send transactions: Interact with your Virtual TestNet by sending transactions
- Simulate transactions: Simulate transactions from the Dashboard or via RPC
- Debug transactions: Find and fix issues causing your transaction to revert or error out
Contracts and wallets
Virtual TestNets allow you to deploy, verify, and keep track of relevant contracts:
- Deploy contracts: Learn how to deploy contracts to your TestNet
- Verify contracts: Follow the Hardhat or Foundry guides to verify contracts on Virtual TestNets
- Add Virtual TestNet to wallet: Add your Virtual TestNet as a provider in your Metamask wallet
JSON RPC interface
TestNets come with both regular and enriched JSON-RPC interface:
- RPC Reference: Explore standard and RPC methods you can use on your Virtual TestNet
- Admin RPC: “God mode” RPC that allows you to fully customize your Virtual TestNet environment
- Public RPC: Standard RPC link that you can integrate into your dapp and expose it publicly
Interacting with TestNets
Virtual TestNets Dashboard UI lets you configure, manage, monitor usage data, and interact with your Virtual TestNets. You can send and simulate transactions, fund accounts, and more.

You can also interact with your TestNets via JSON-RPC. There are two RPC URLs offering different capabilities: Admin RPC and Public RPC.
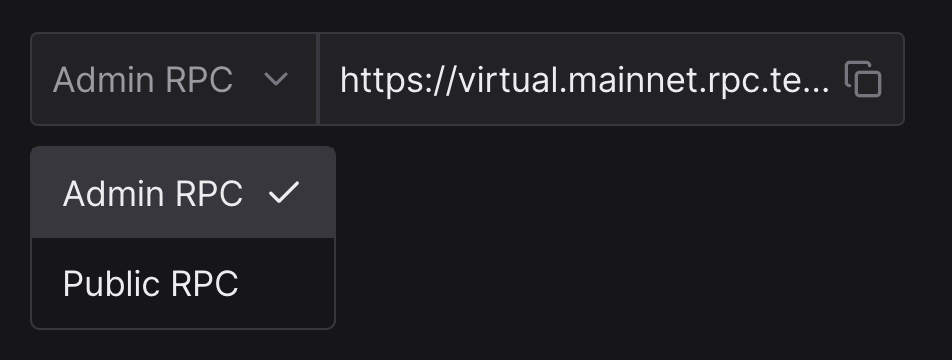
Public RPC
When staging dapp for external demoing and testing, use the Public RPC in the UI. Using the Admin RPC makes it possible for testers to use customization methods and affect network state in potentially undesirable ways.
The Public RPC functions like a standard node provider RPC, supporting all standard RPC methods along with custom Tenderly methods for tracing and simulating transactions. Refer to the Public RPC Reference for details.
This is the RPC you’ll use to integrate into your dapp’s UI or backend when you’re ready to demo your dapp externally.
Admin RPC
The Admin RPC link is your “god mode RPC”. It includes all capabilities of the Public RPC plus additional powerful methods for advanced management of your TestNet.
You will use this RPC to manage and customize your TestNet environment to fit the needs of your dapp or use case. Refer to the Admin RPC Reference to learn about network customization options via RPC.
TestNet integrations
TestNets supports multiple frameworks and libraries essential for development and testing.
Staging on TestNets
In addition to development and testing, TestNet can also serve as a staging environment for your project. Virtual TestNets can run your smart contracts as if on the live network, process transactions in milliseconds, and give you and your users a block explorer.
Follow the guides below to learn how to stage the different elements of your project on TestNets: