

Web3 Action बनाना
जारी रखने के लिए, अपने account में log in करें या यदि आपके पास एक नहीं है तो एक निःशुल्क account बनाएँ।
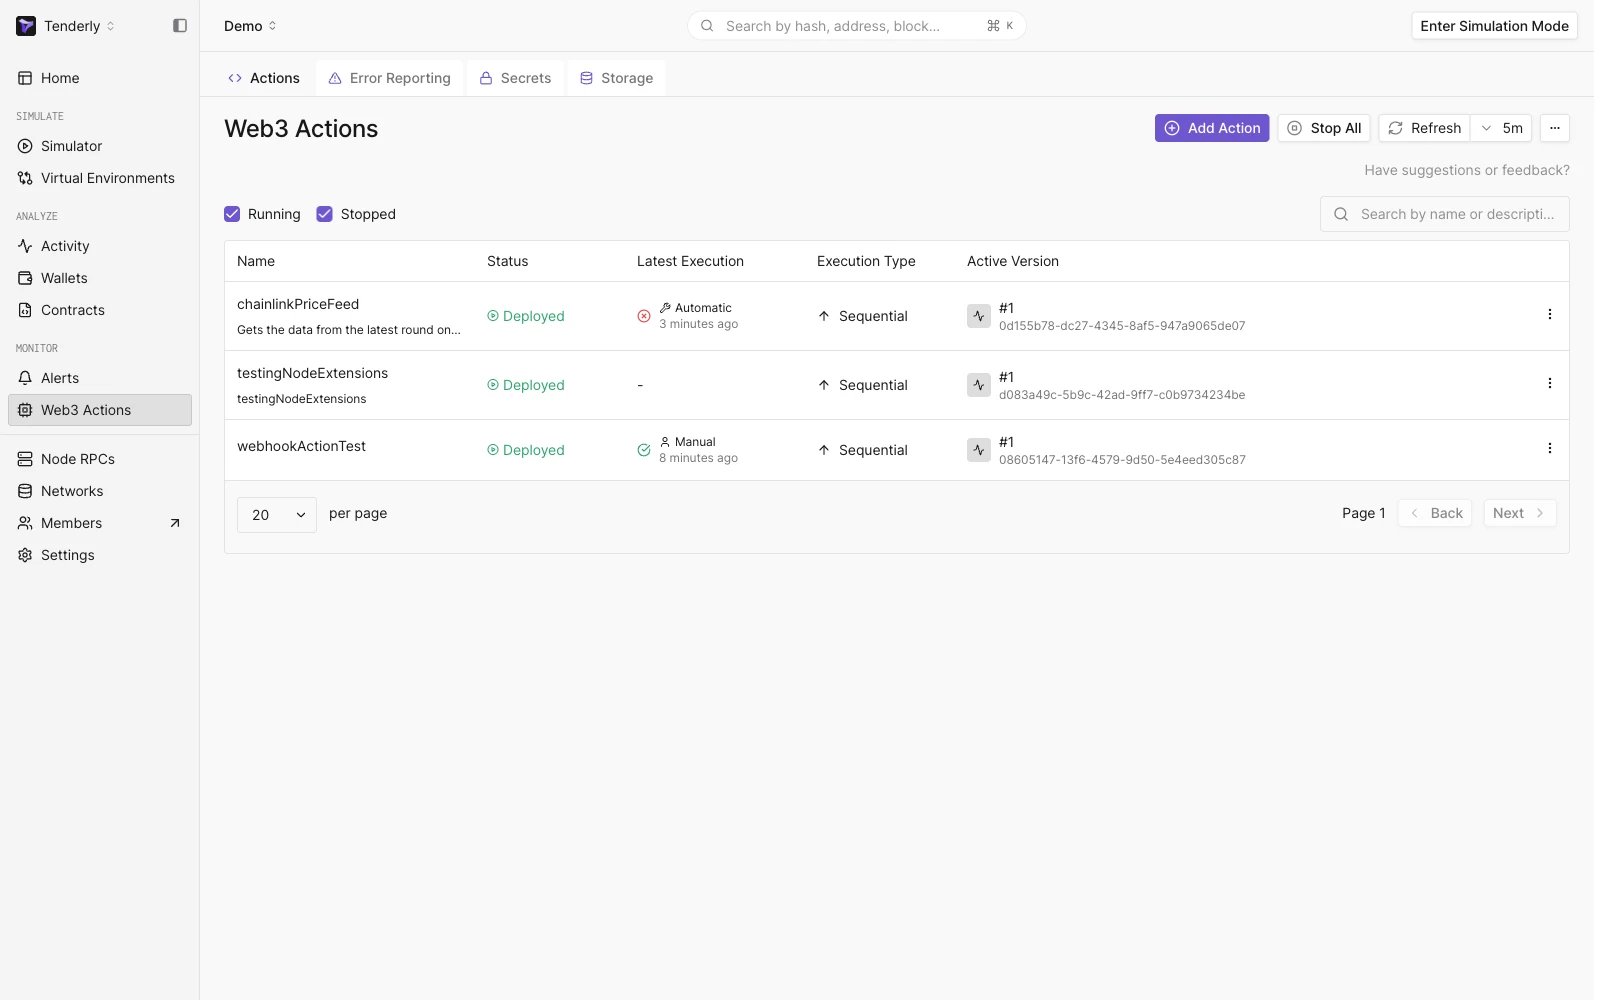
Navigating to the Actions section
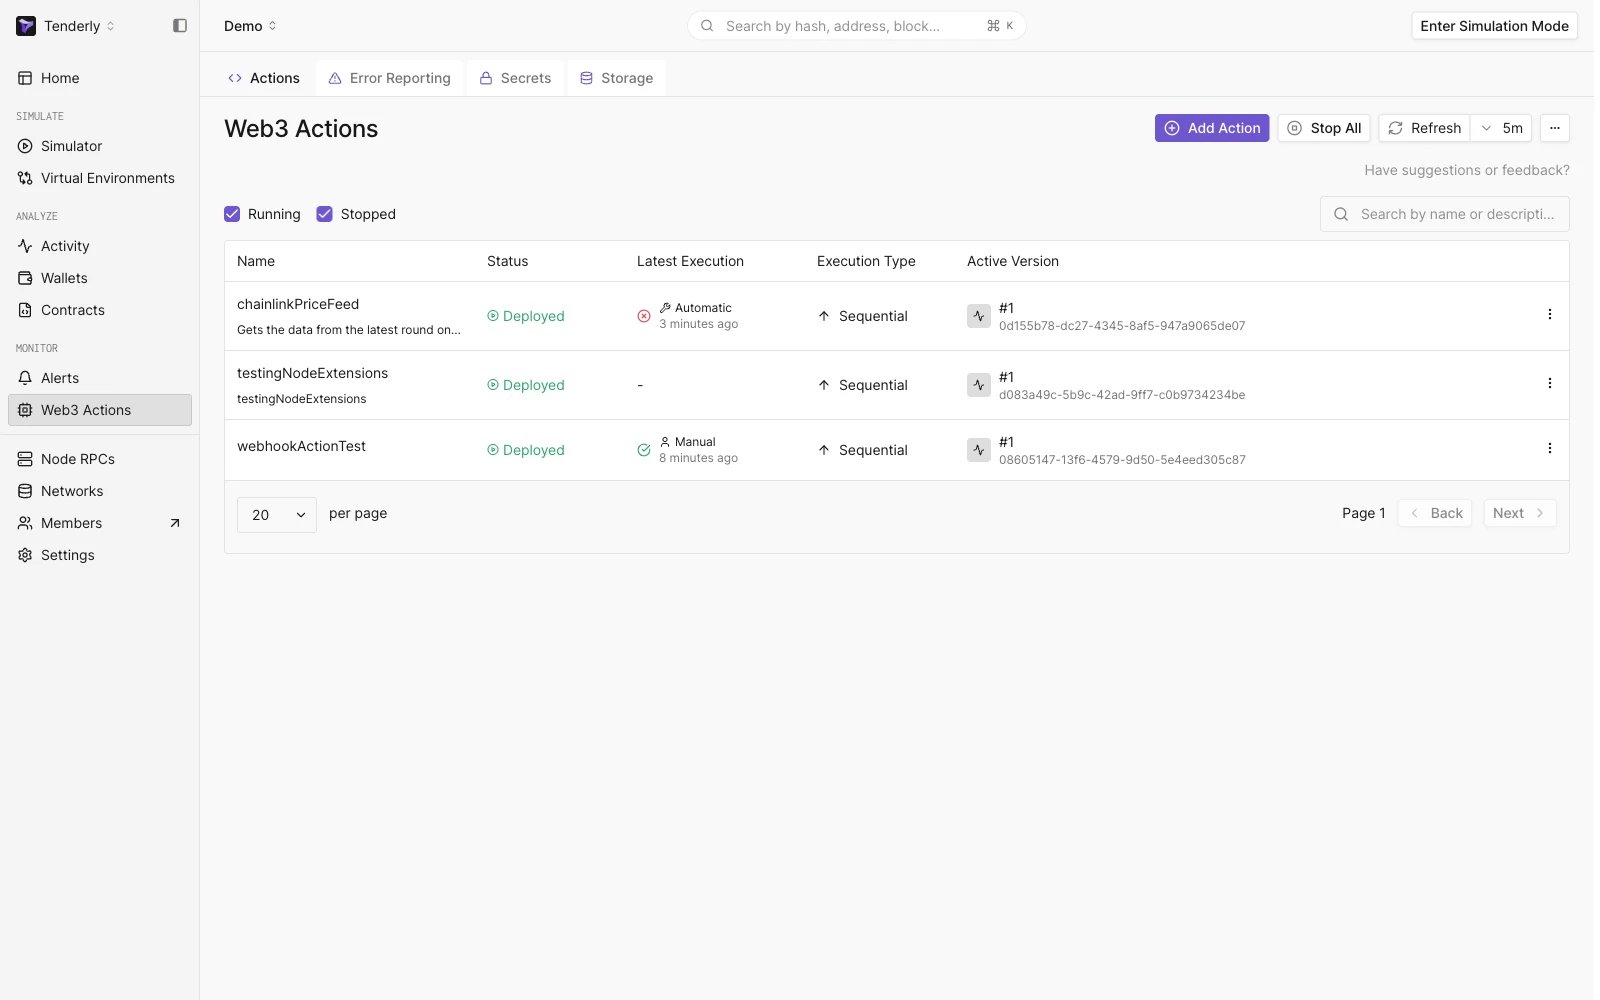
Creating a Web3 Action
- Trigger Type: एक on-chain या off-chain event चुनें जो आपके custom code के execution को trigger करेगा।
- Function: event होने पर execute होने वाला JavaScript या TypeScript में लिखा आपका application logic।
- Trigger: प्रत्येक pre-defined trigger (event) की अपनी सेटिंग्स हैं। उदाहरण के लिए, Block event के लिए, आप निगरानी करने के लिए network और event के trigger होने के लिए mine किए जाने वाले blocks की संख्या चुन सकते हैं।
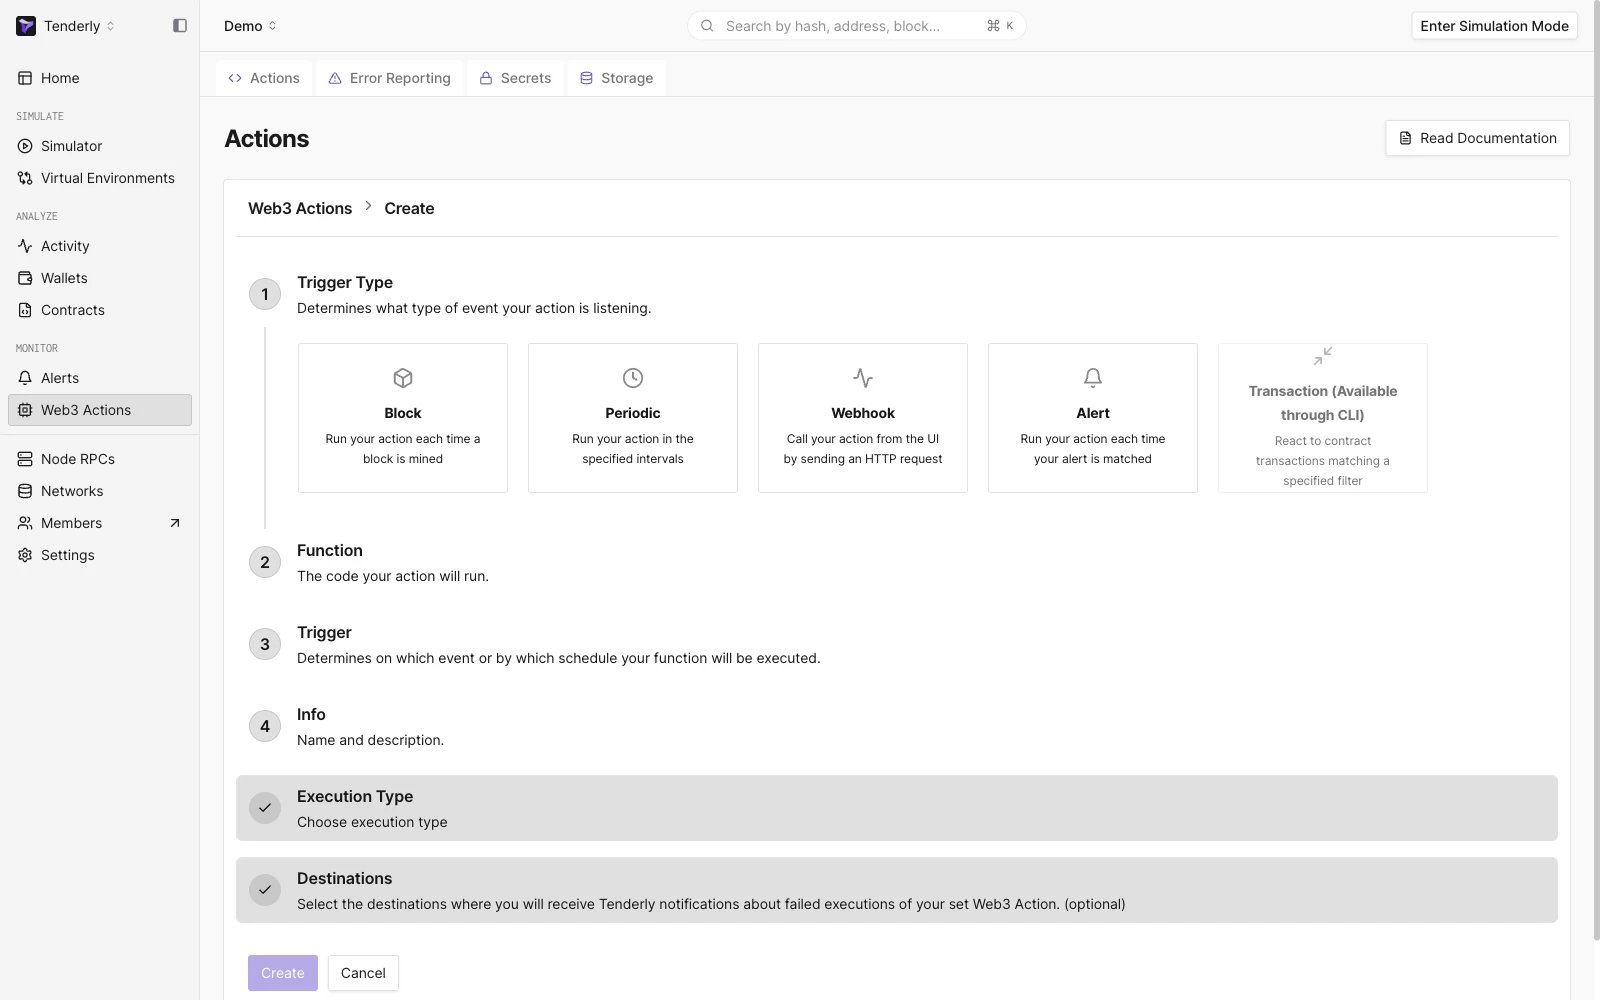
Configuring a new Web3 Action
चरण 1: trigger type चुनें
वह event चुनें जिसे आप Web3 Action को listen करने के लिए चाहते हैं (वह event जो आपके custom code को चलाने के लिए trigger करेगा)। builder Block, Periodic, Webhook, और Alert triggers प्रदान करता है; alert-triggered action तब चलती है जब आपका कोई Alert fire होता है जिसमें यह action उसके destination के रूप में सेट है। Transaction trigger केवल CLI के माध्यम से उपलब्ध है। उदाहरण के लिए, हर बार Mainnet network पर block mine होने पर अपना custom code (अगले चरण में outlined) चलाएँ।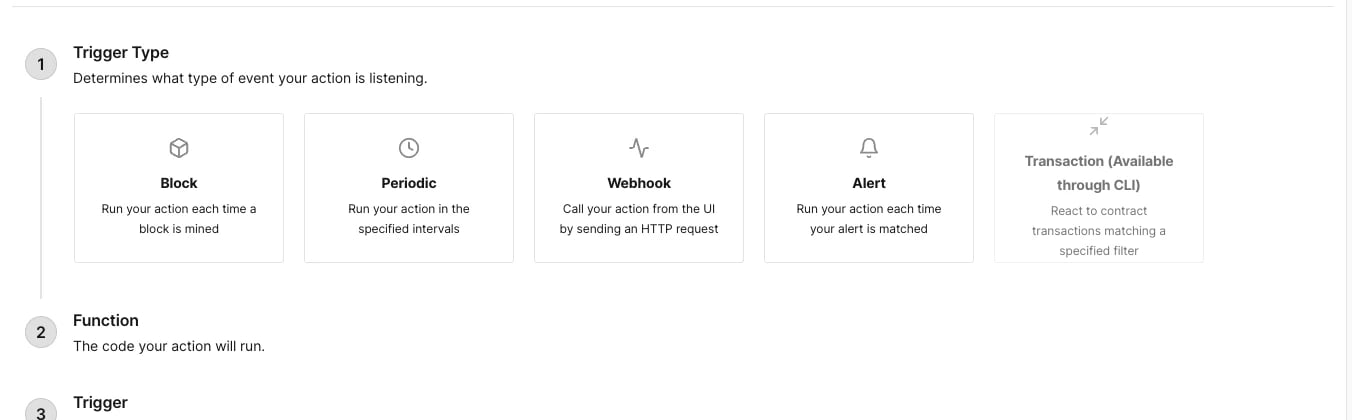
Choosing a trigger type for your Web3 Action
चरण 2: अपना custom code जोड़ें
Functions अनुभाग के तहत, अपना custom JavaScript या TypeScript code सीधे paste या लिखें। यह वह custom logic है जो block mine होने पर execute होगा। Web3 Actions functions के बारे में अधिक जानें। उदाहरण के लिए, block mine होने पर “Action triggered” संदेश को console में log करें।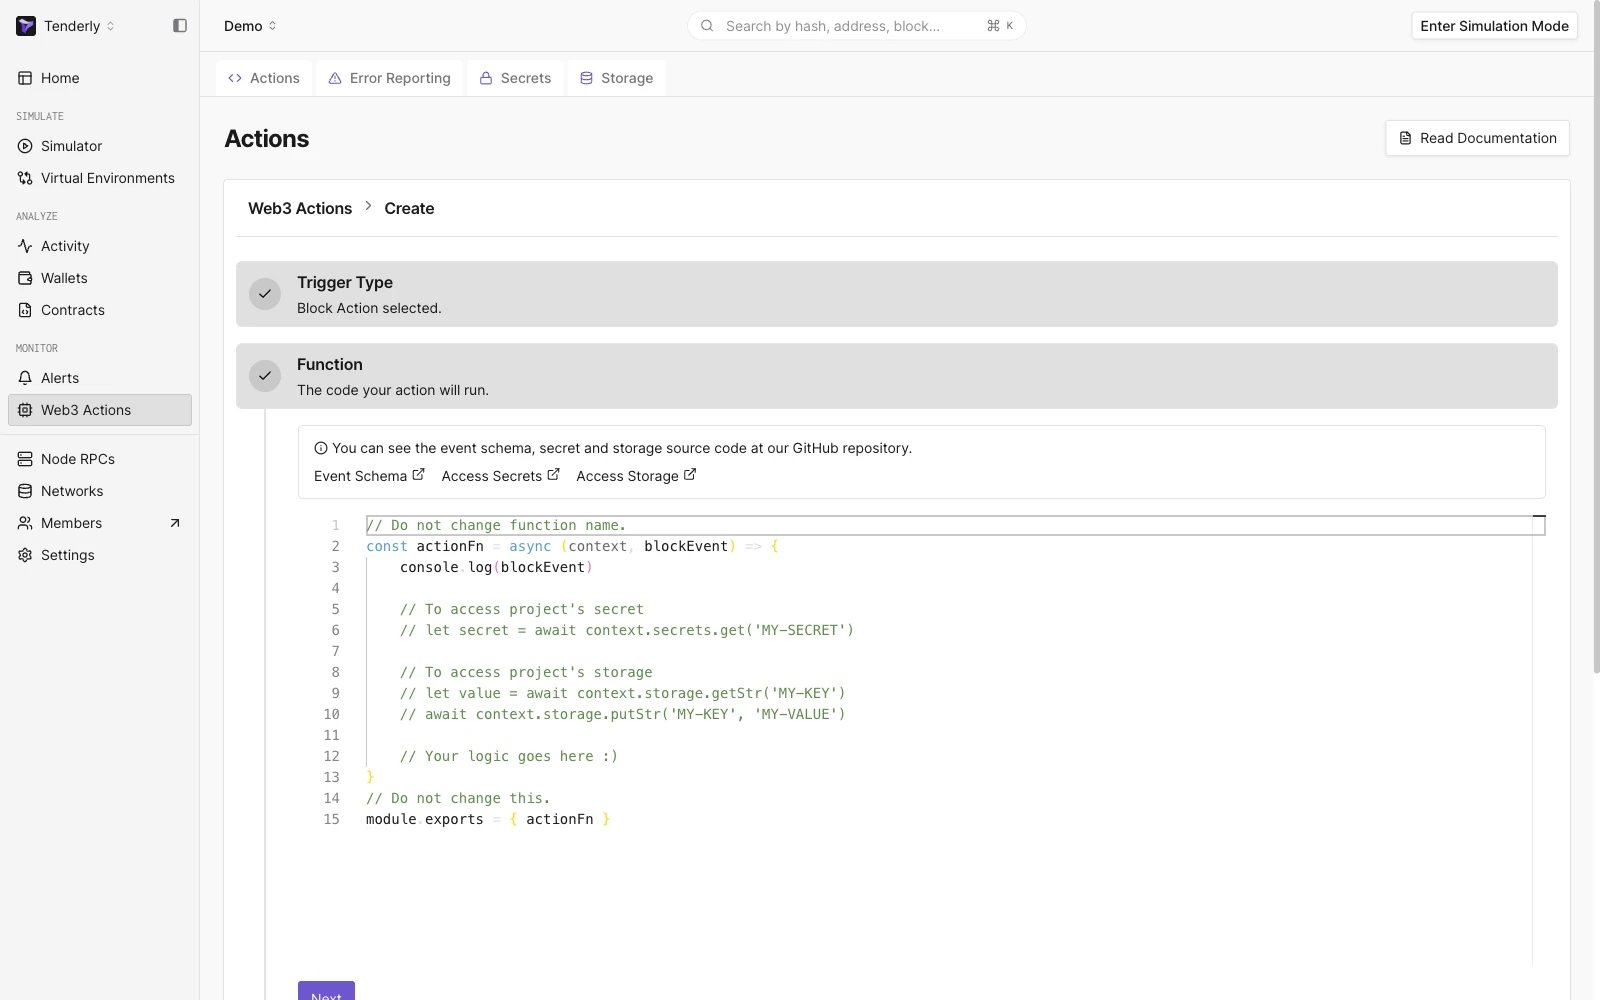
Adding your custom Web3 Action code
Tenderly Dashboard का उपयोग करके बनाए गए functions के लिए कई JavaScript libraries प्रदान करता है।
चरण 3: trigger सेटिंग्स निर्दिष्ट करें
trigger-specific configurations निर्दिष्ट करें। प्रत्येक trigger type की अलग-अलग सेटिंग्स होती हैं। Web3 Actions Events और उन्हें कॉन्फ़िगर कैसे करें, इसके बारे में अधिक जानें। Block trigger type के लिए, आपको दो अतिरिक्त parameters परिभाषित करने की आवश्यकता है: network (Mainnet) और block period (10)। इसका मतलब है कि हमारा code Mainnet network पर mine किए गए हर 10वें block पर execute होगा।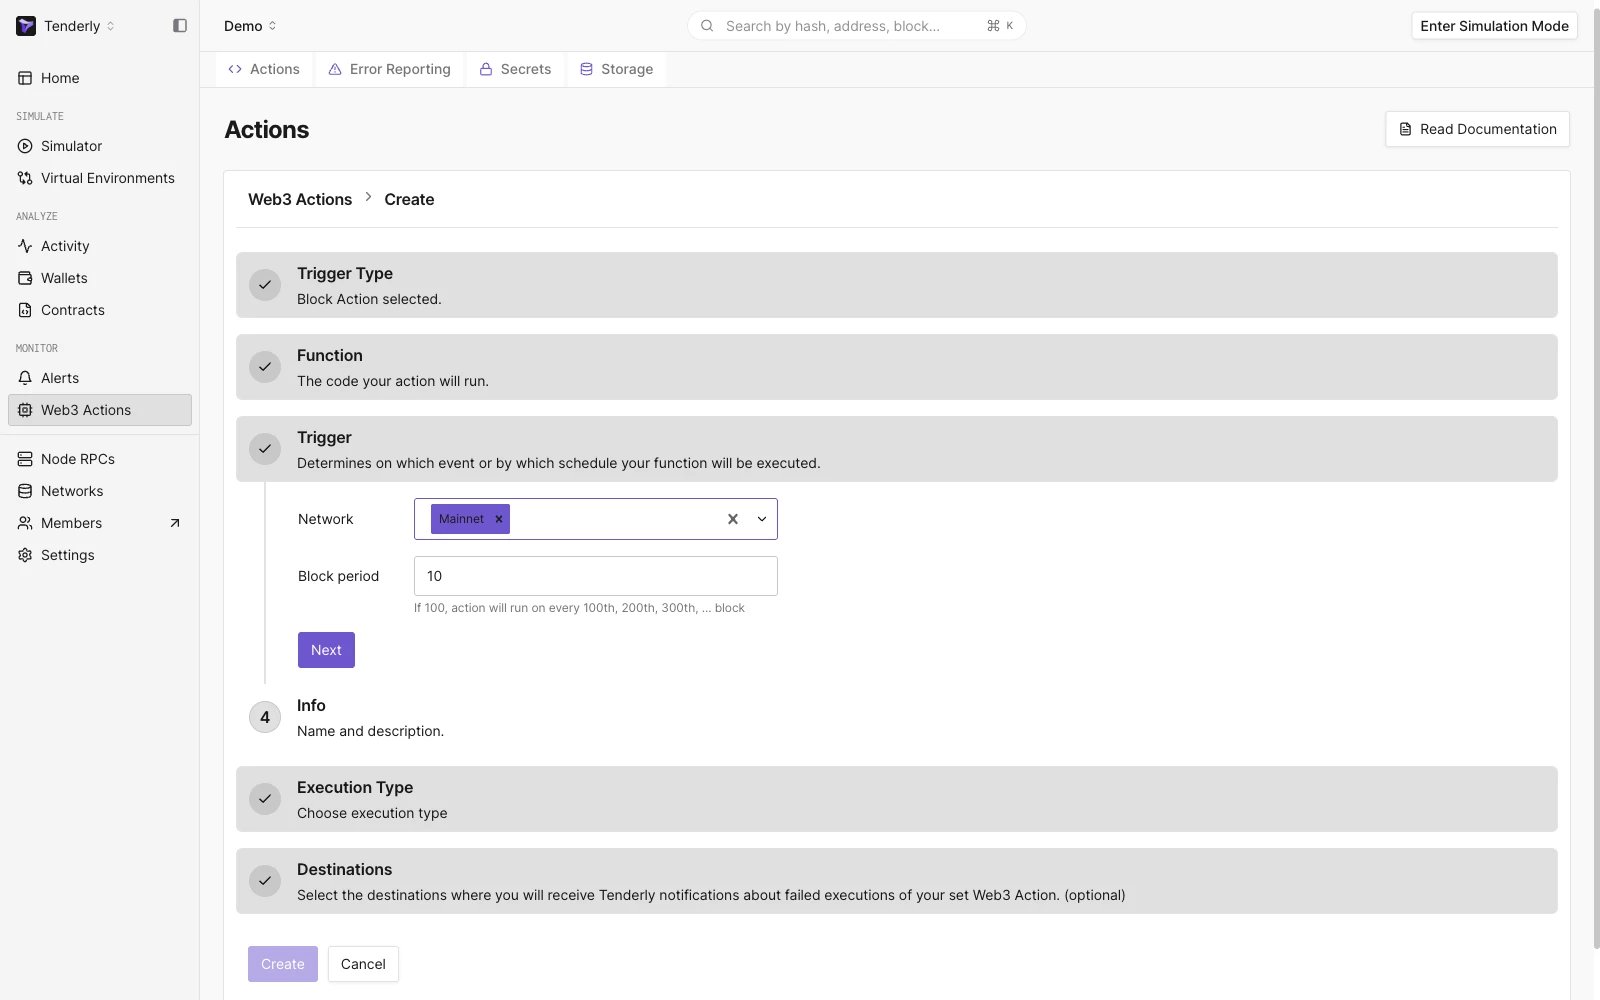
Specifying trigger settings
चरण 4: title और description जोड़ें
Info अनुभाग में, Web3 Action का title और description जोड़ें। title और description आपकी Web3 Actions के व्यवहार को प्रभावित नहीं करते हैं।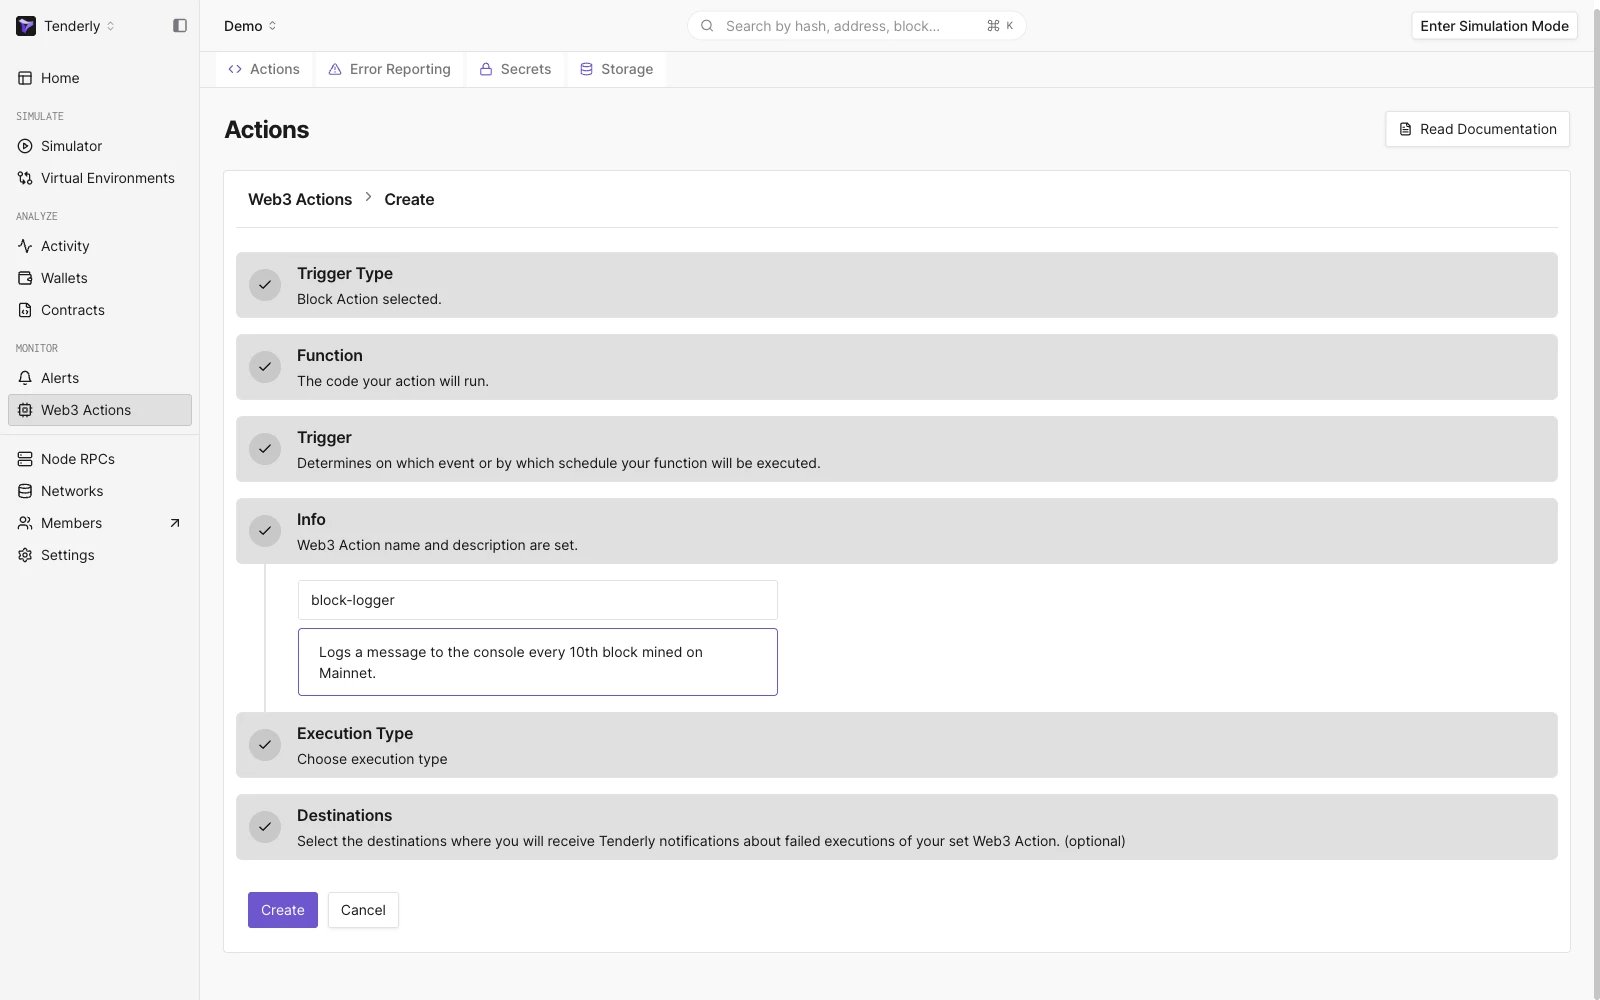
Adding a title and a description for your Web3 Action
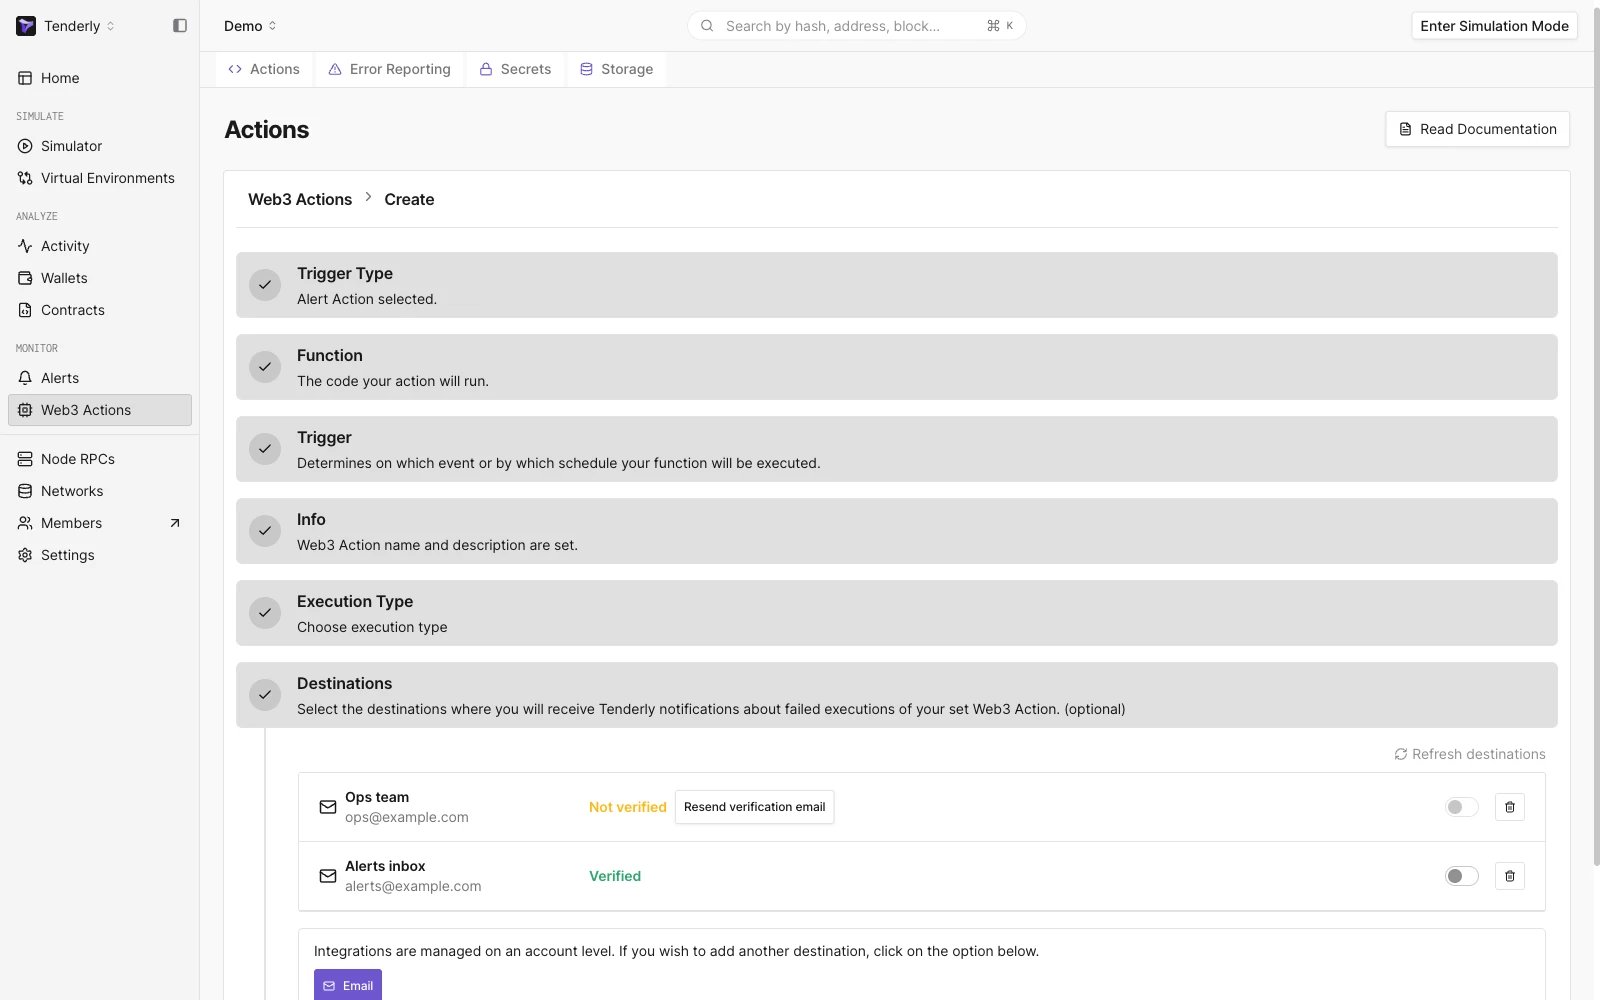
Activating email notifications for possible Web3 Action failure
चरण 5: अपनी Web3 Action Deploy करें
समाप्त होने पर, अपनी Web3 Action को build और deploy करने के लिए Create बटन पर क्लिक करें। एक बार deploy होने के बाद, आपको Overview पेज पर forward किया जाएगा, जहाँ आप अपनी Web3 Action को stop, upgrade, और delete कर सकते हैं।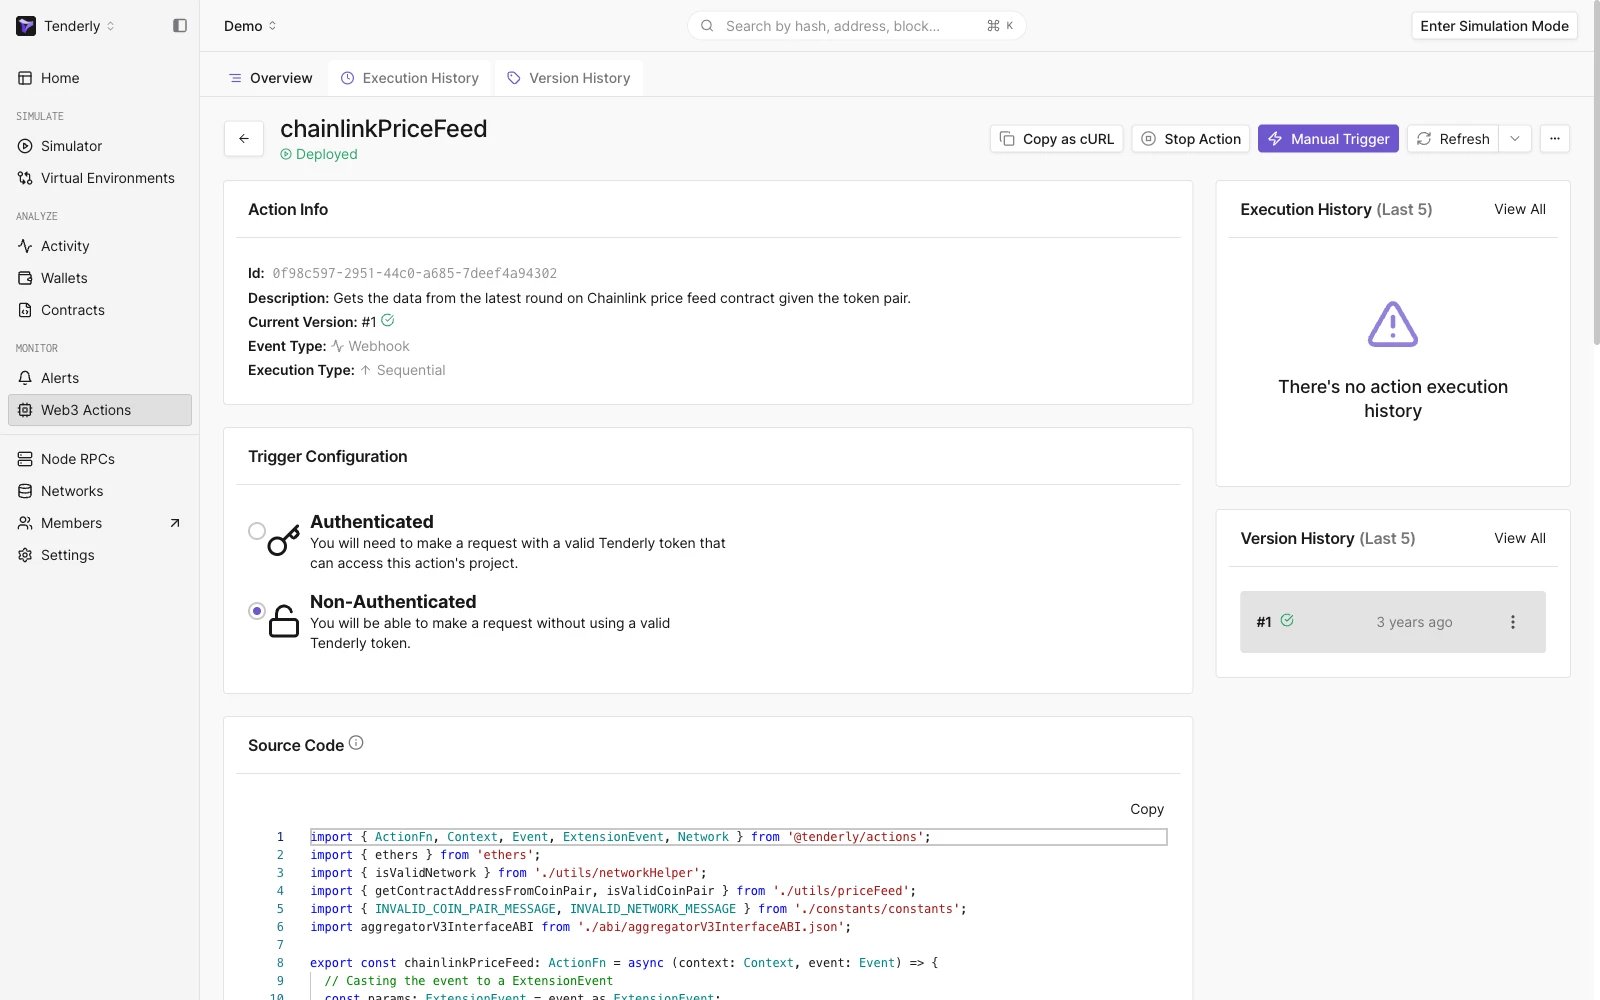
An overview of your Web3 Action
चरण 6: अपनी Web3 Action की निगरानी करें
शीर्ष पेज मेनू से Execution History tag पर क्लिक करके अपनी Web3 Actions के execution की निगरानी करें। यहाँ आपको अपनी Web3 Action के प्रत्येक execution instance के लिए एक log entry दिखाई देगी।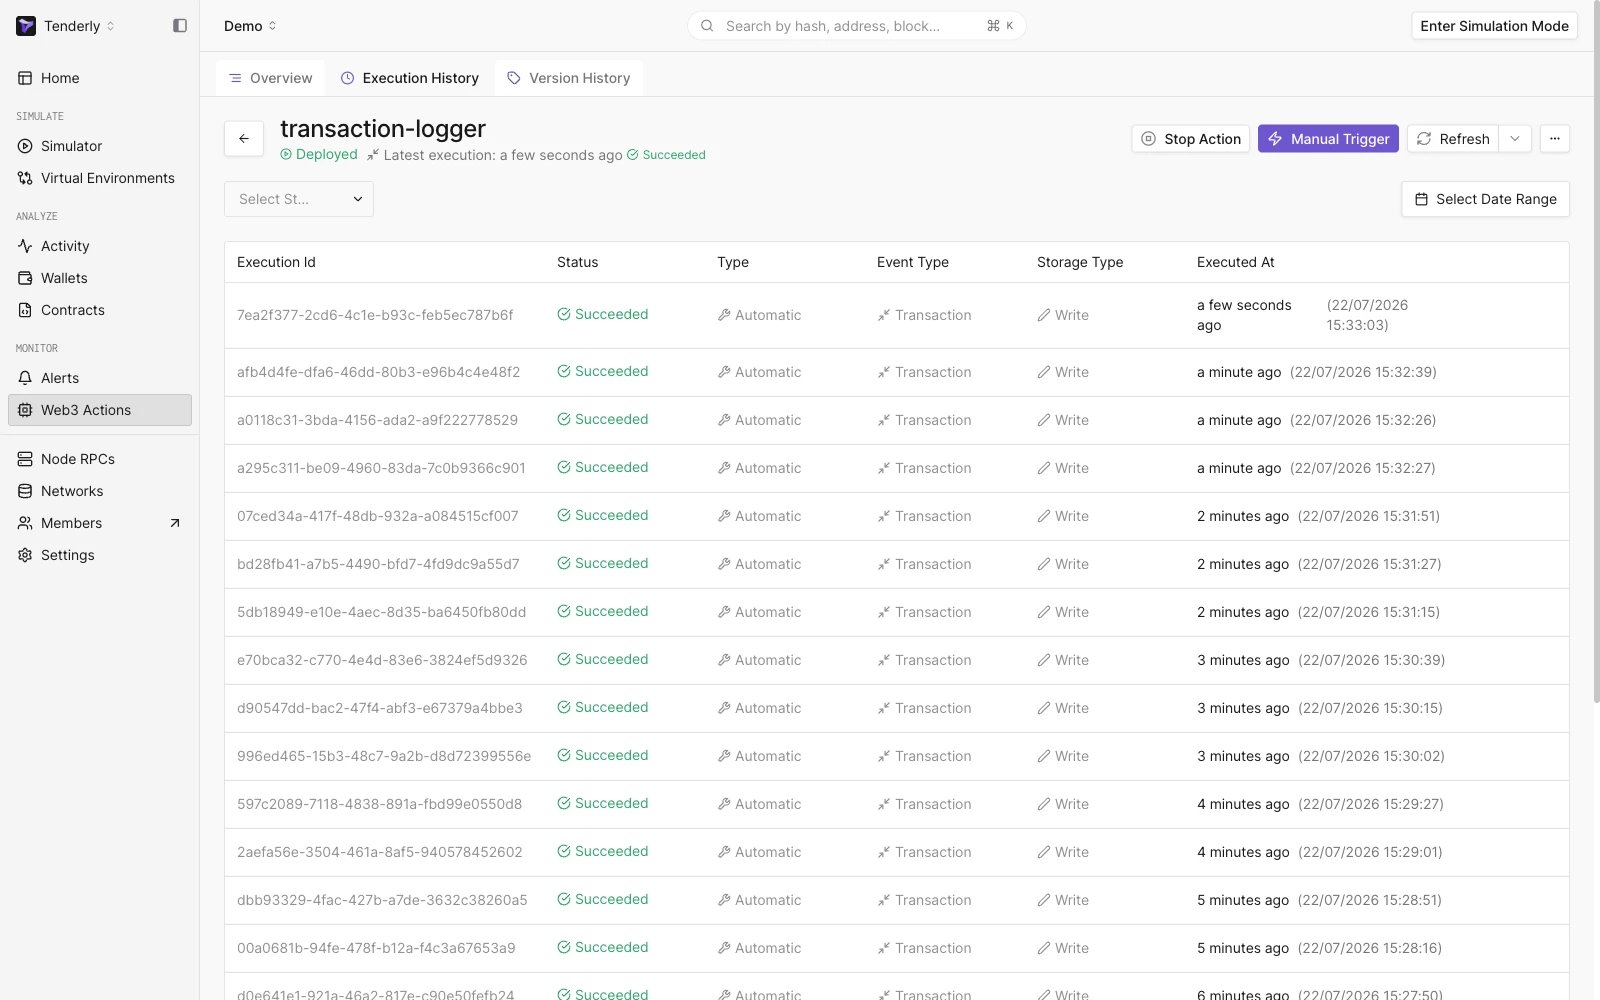
Monitoring the execution of your Web3 Action
Web3 Actions को programmatically deploy और प्रबंधित करें
यदि आप YAML configuration के माध्यम से action triggers निर्दिष्ट करना और अपने project के code-base में अपने action functions रखना पसंद करते हैं, तो CLI का उपयोग करके Web3 Action बनाने और deploy करने पर Quickstart का पालन करें।Transaction-triggered Web3 Actions केवल CLI दृष्टिकोण का उपयोग करके बनाई जा सकती हैं।
संसाधन
- Web3 Actions Functions, Events, और Triggers के बारे में अधिक जानें।
- action functions के लिए उपलब्ध Context, Storage, और Secrets के बारे में अधिक जानें।
- Project Structure और tenderly.yaml configuration के बारे में अधिक जानें।