

चरण 1: Alerts setup wizard लॉन्च करें
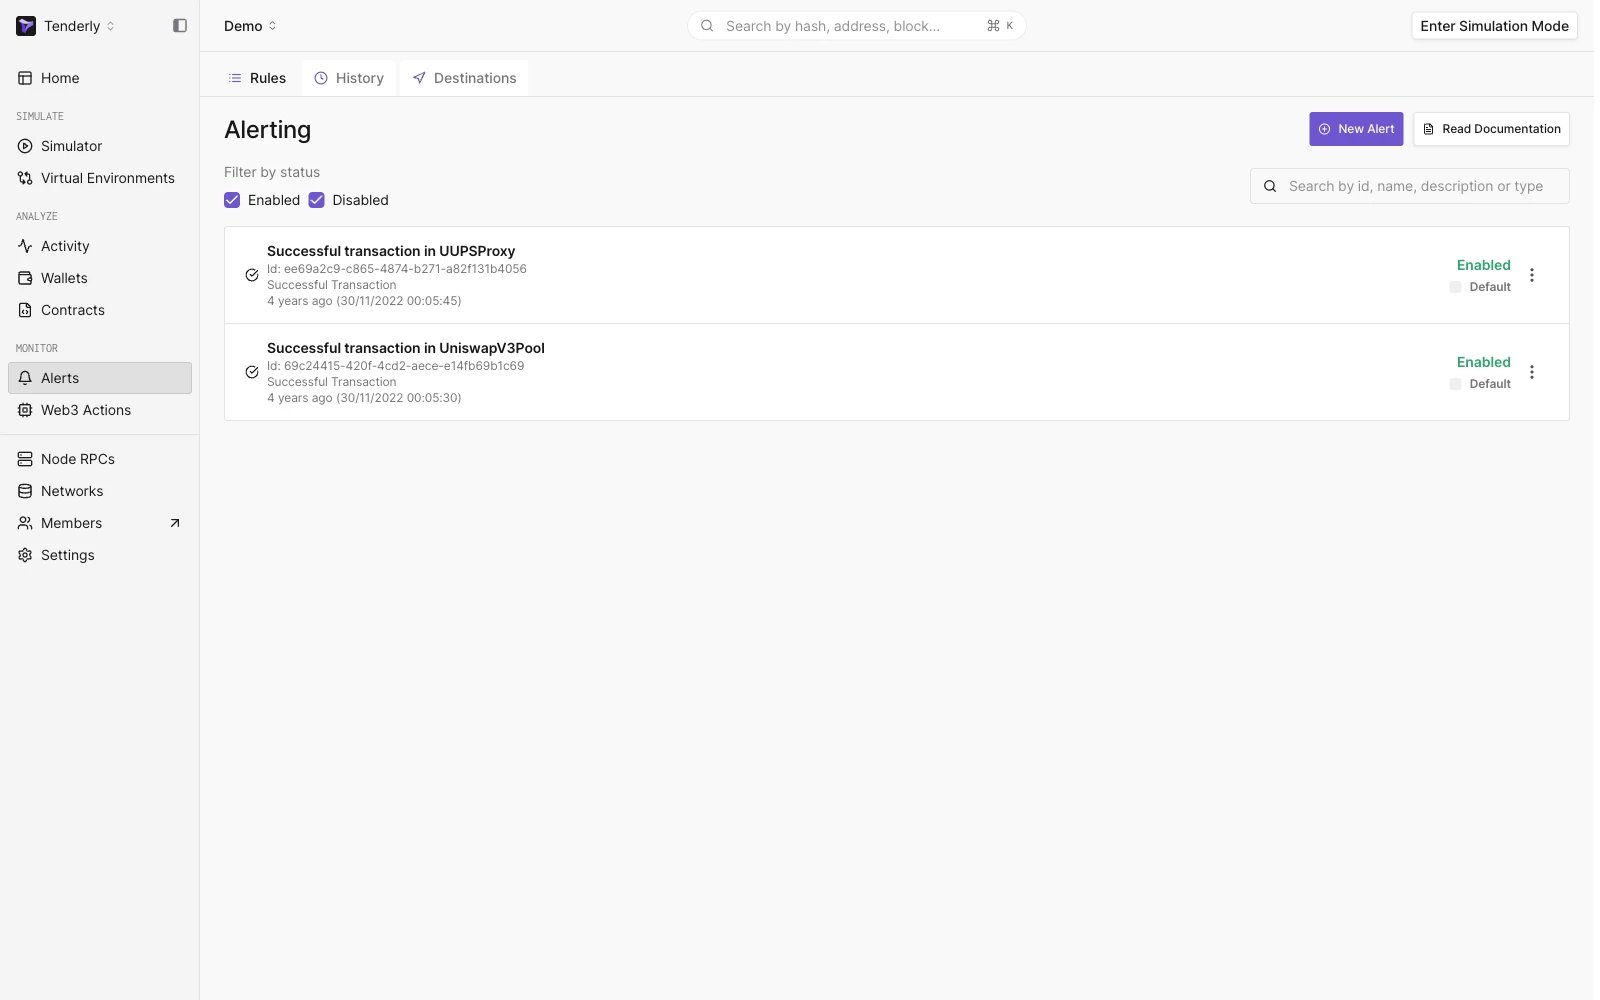
Alerts landing page
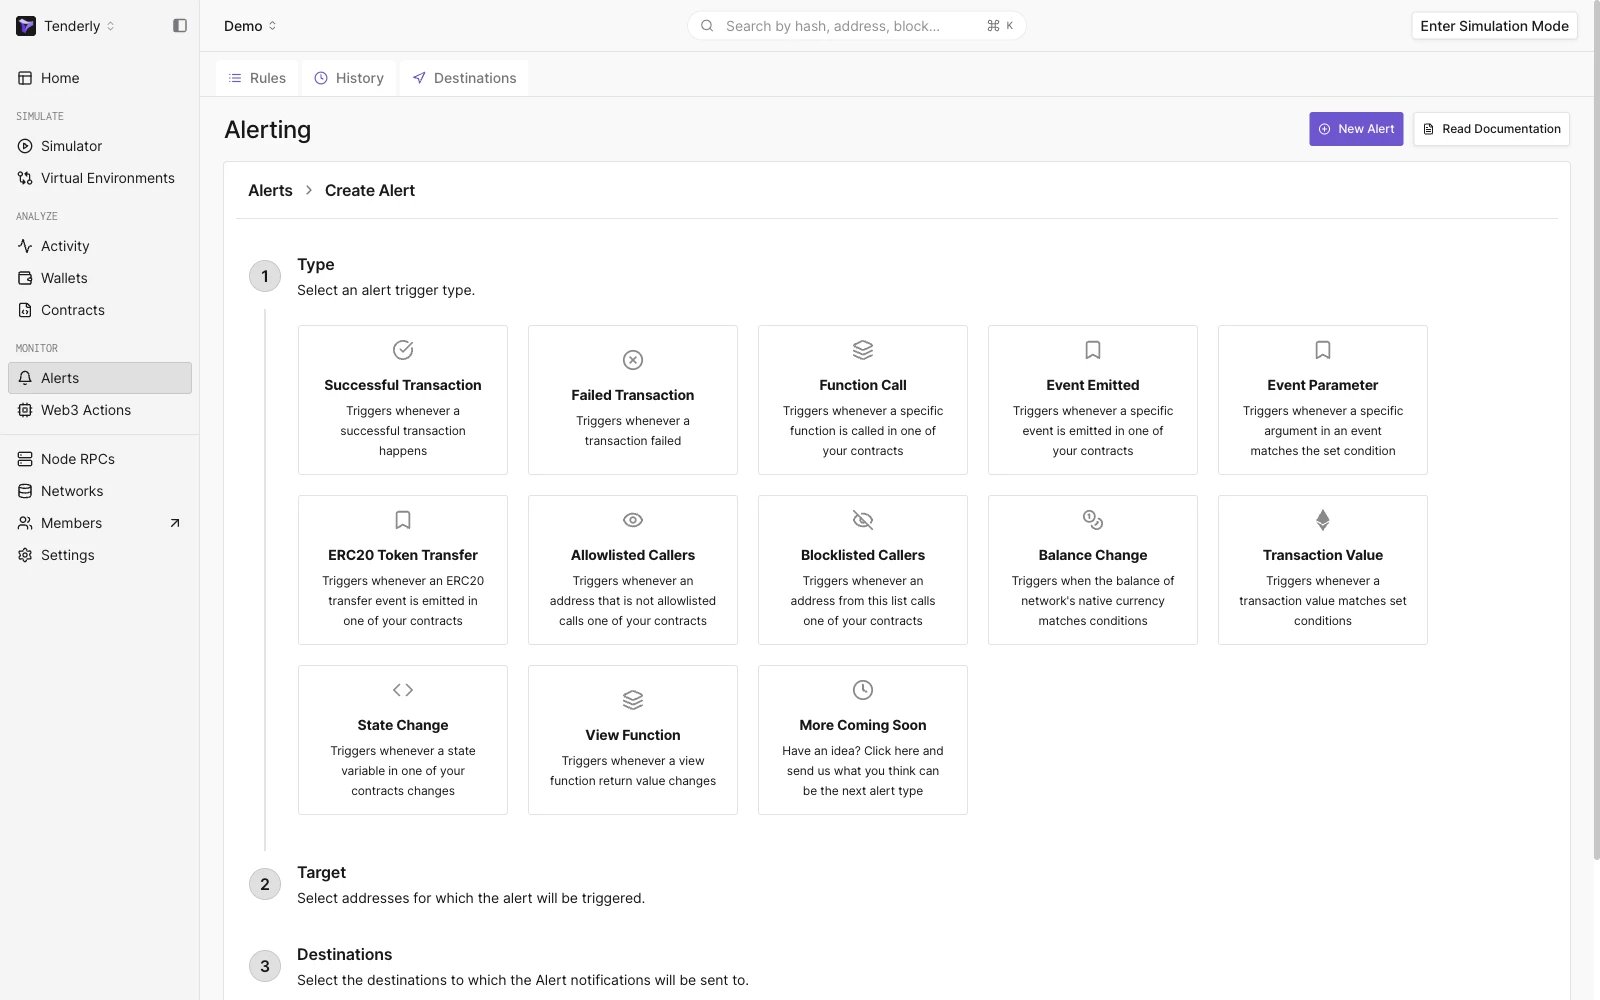
Alert set up wizard
- Alert Type: वह event जिसे आप Alert के listen करने और घटित होने पर आपको notification भेजने के लिए चाहते हैं। Tenderly 12 Alert Types का समर्थन करता है।
- Alert Target: यहाँ, आप Tenderly को बताते हैं कि आप कौन से addresses की निगरानी करना चाहते हैं। Target विकल्प सभी Alert Types में समान हैं।
- Alert Parameters: Target के आधार पर, यहाँ आप उस विशिष्ट address(es) का चयन करते हैं जिसकी आप निगरानी करना चाहते हैं और साथ ही Alert Type के लिए विशिष्ट अन्य सेटिंग्स।
- Alert Destinations: वह स्थान जहाँ आप event होने पर notifications प्राप्त करना चाहते हैं।
चरण 2: Successful Transaction Alert Type चुनें
उपलब्ध Alert Types की सूची से, सफल transaction होने पर निगरानी करने के लिए Successful Transaction चुनें।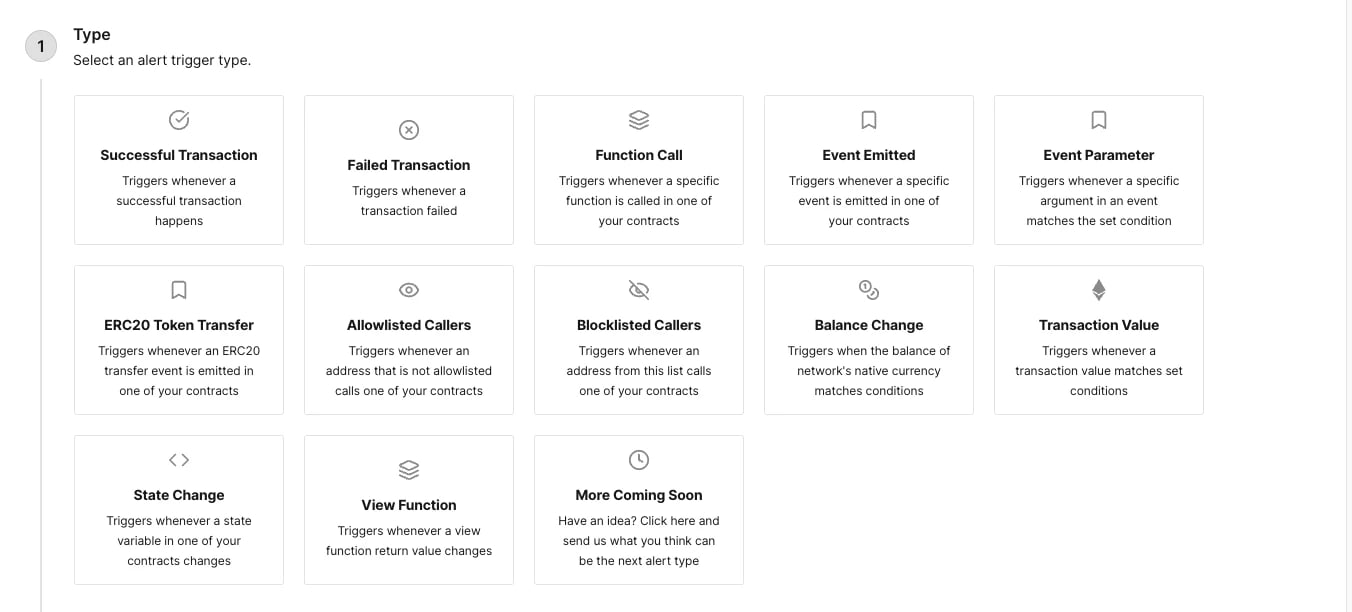
Available Alert trigger types
कुछ Alert Types स्व-व्याख्यात्मक हैं, जबकि अन्य अधिक सूक्ष्म हैं, इसलिए कृपया प्रत्येक के विस्तृत विवरण के लिए Alert Trigger Types दस्तावेज़ पेज देखें।
चरण 3: Alert Target को Address पर सेट करें
Alert Target अनुभाग वह जगह है जहाँ आप Tenderly को बताते हैं कि आप कौन से address(es) की निगरानी करना चाहते हैं और वे कहाँ स्थित हैं। उपलब्ध Target विकल्प सभी Alert Types के लिए समान हैं और इनमें शामिल हैं:- Address: एक single smart contract या wallet की निगरानी करें
- Network: किसी विशिष्ट network पर सभी transactions की निगरानी करें
- Project: अपने Tenderly Project का हिस्सा सभी addresses की निगरानी करें
- Tag: विशिष्ट tag से लेबल किए गए सभी contracts और wallets की निगरानी करें
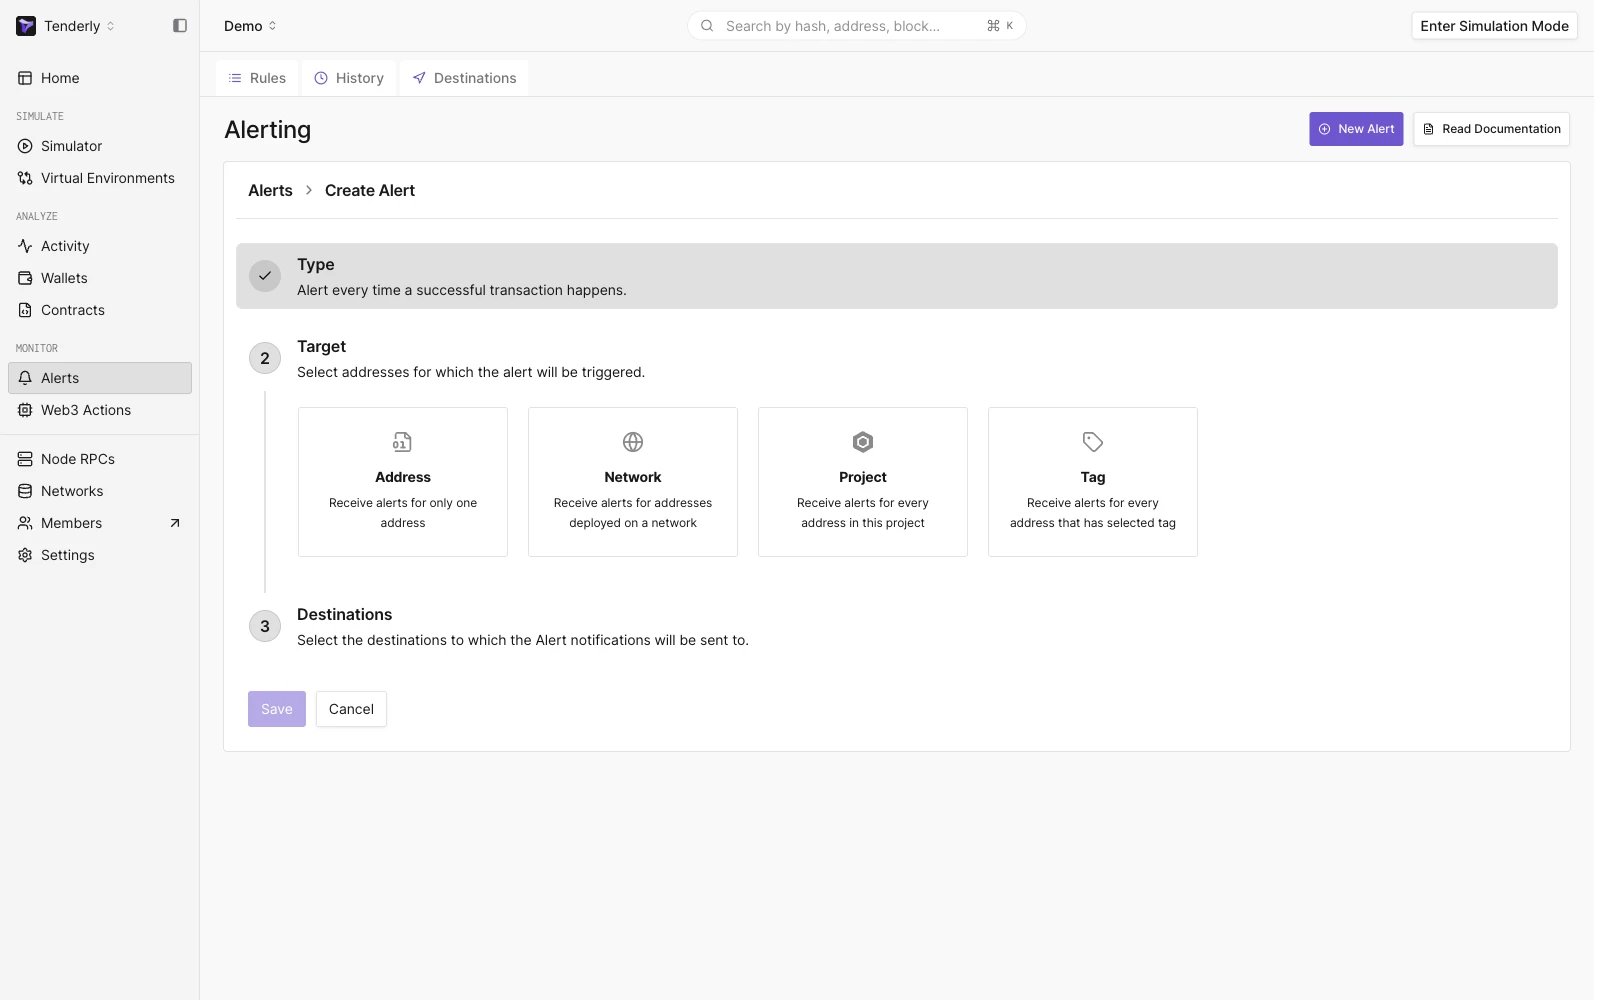
Available Alert Targets
चरण 4: wallet address को Target Parameter के रूप में सेट करें
Target को Address पर सेट करने के साथ, हमें Tenderly को यह बताना होगा कि हम किस wallet address की निगरानी करना चाहते हैं। Tenderly आपके project से जुड़े सभी smart contracts और wallets को खींचेगा और उन्हें एक dropdown में प्रदर्शित करेगा।यदि आपने अपने Tenderly Project में कोई smart contracts या wallets नहीं जोड़े हैं, तो wallet या smart contract जोड़ने का तरीका जानने के लिए इन quick guides का पालन करें।
Alerts केवल आपके project के addresses के लिए evaluate होते हैं, इसलिए निगरानी वाला address project में जोड़ा होना चाहिए।
यदि जोड़ा गया address project के Transactions view में शोर बढ़ाता है, तो आप Alerts को प्रभावित किए बिना उसे transaction listing से छिपा सकते हैं।
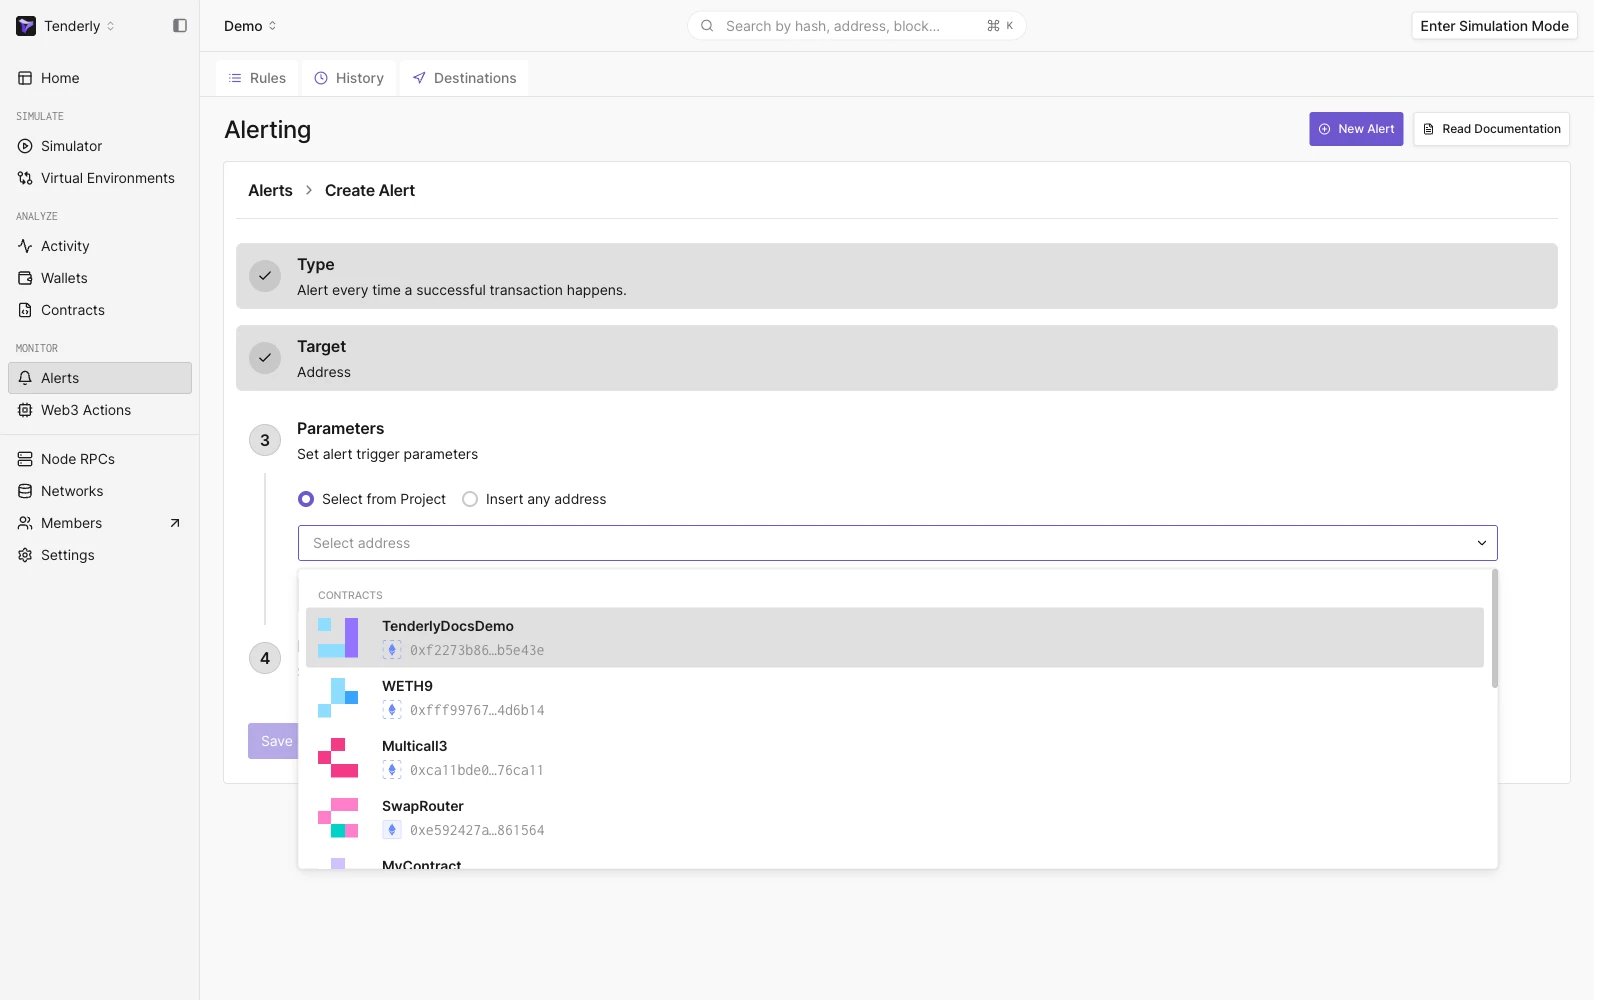
List of smart contracts and wallets associated with the project
चरण 5: Alert Destination के रूप में Email चुनें
चीज़ों को सरल रखने के लिए, हम अपने Tenderly Wallet पर आने और जाने वाले सफल transactions के बारे में हमें सूचित करने वाला email notification प्राप्त करना चाहते हैं। Alert Destination के रूप में Email का चयन करें और email address सहित आवश्यक विवरण भरें। यदि आप एक नया email address जोड़ रहे हैं, तो आपको यह पुष्टि करनी होगी कि आप वहाँ notifications प्राप्त करने में सक्षम होने के लिए मालिक हैं।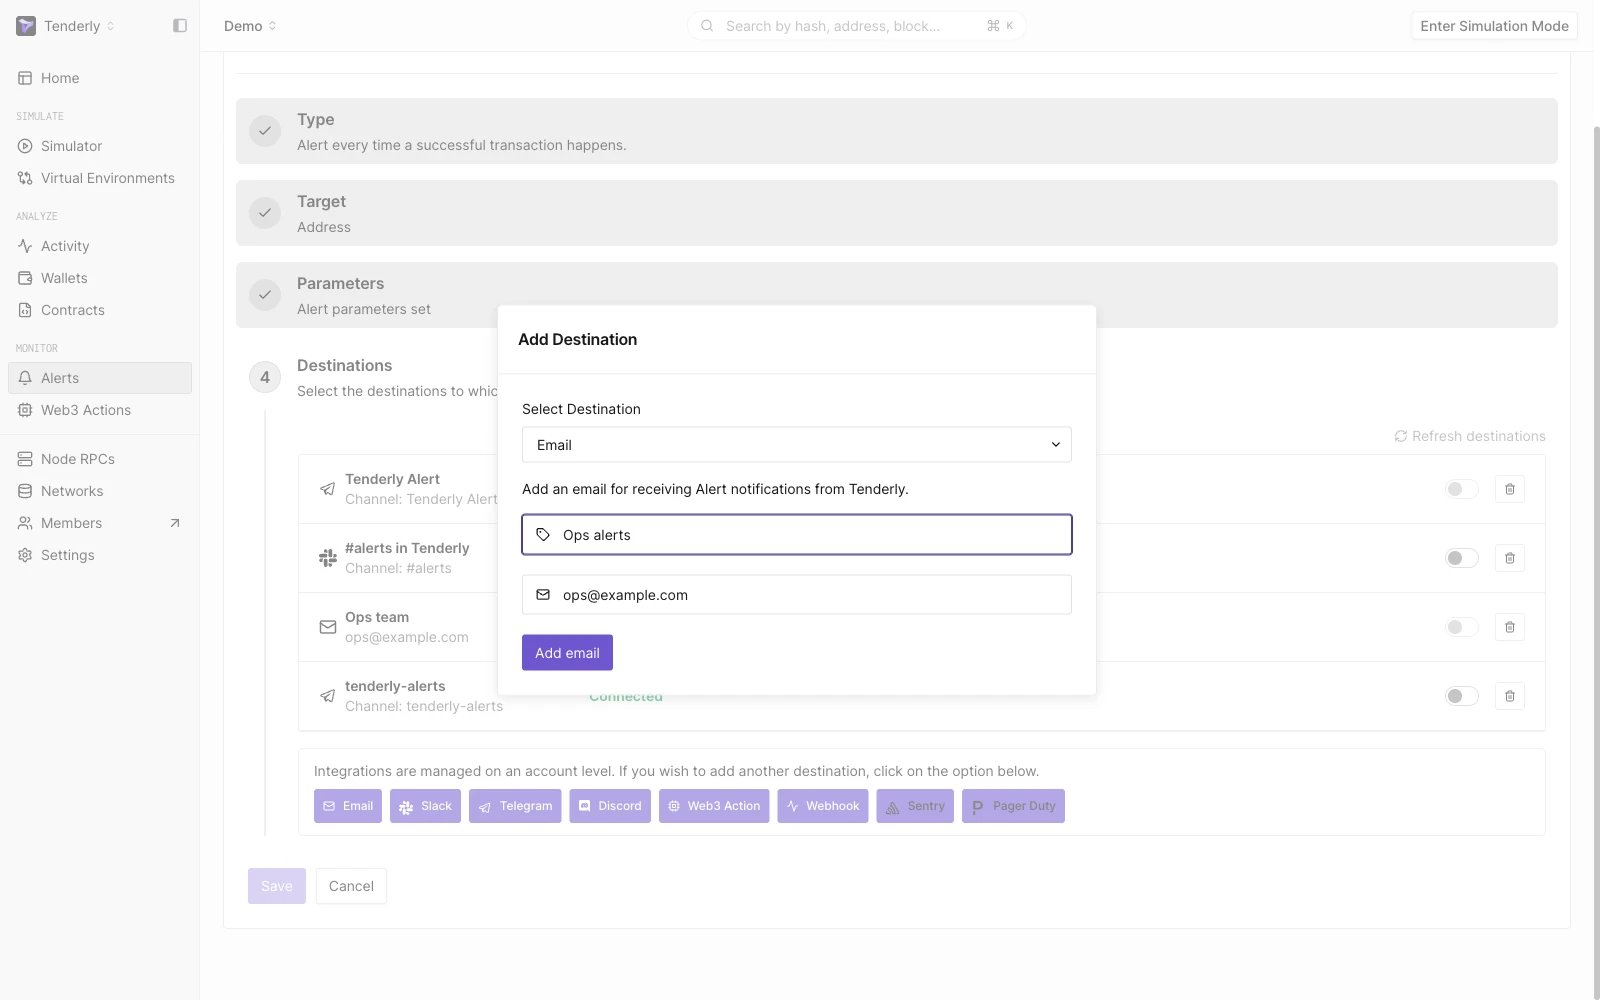
Setting Email as the Alert Destination
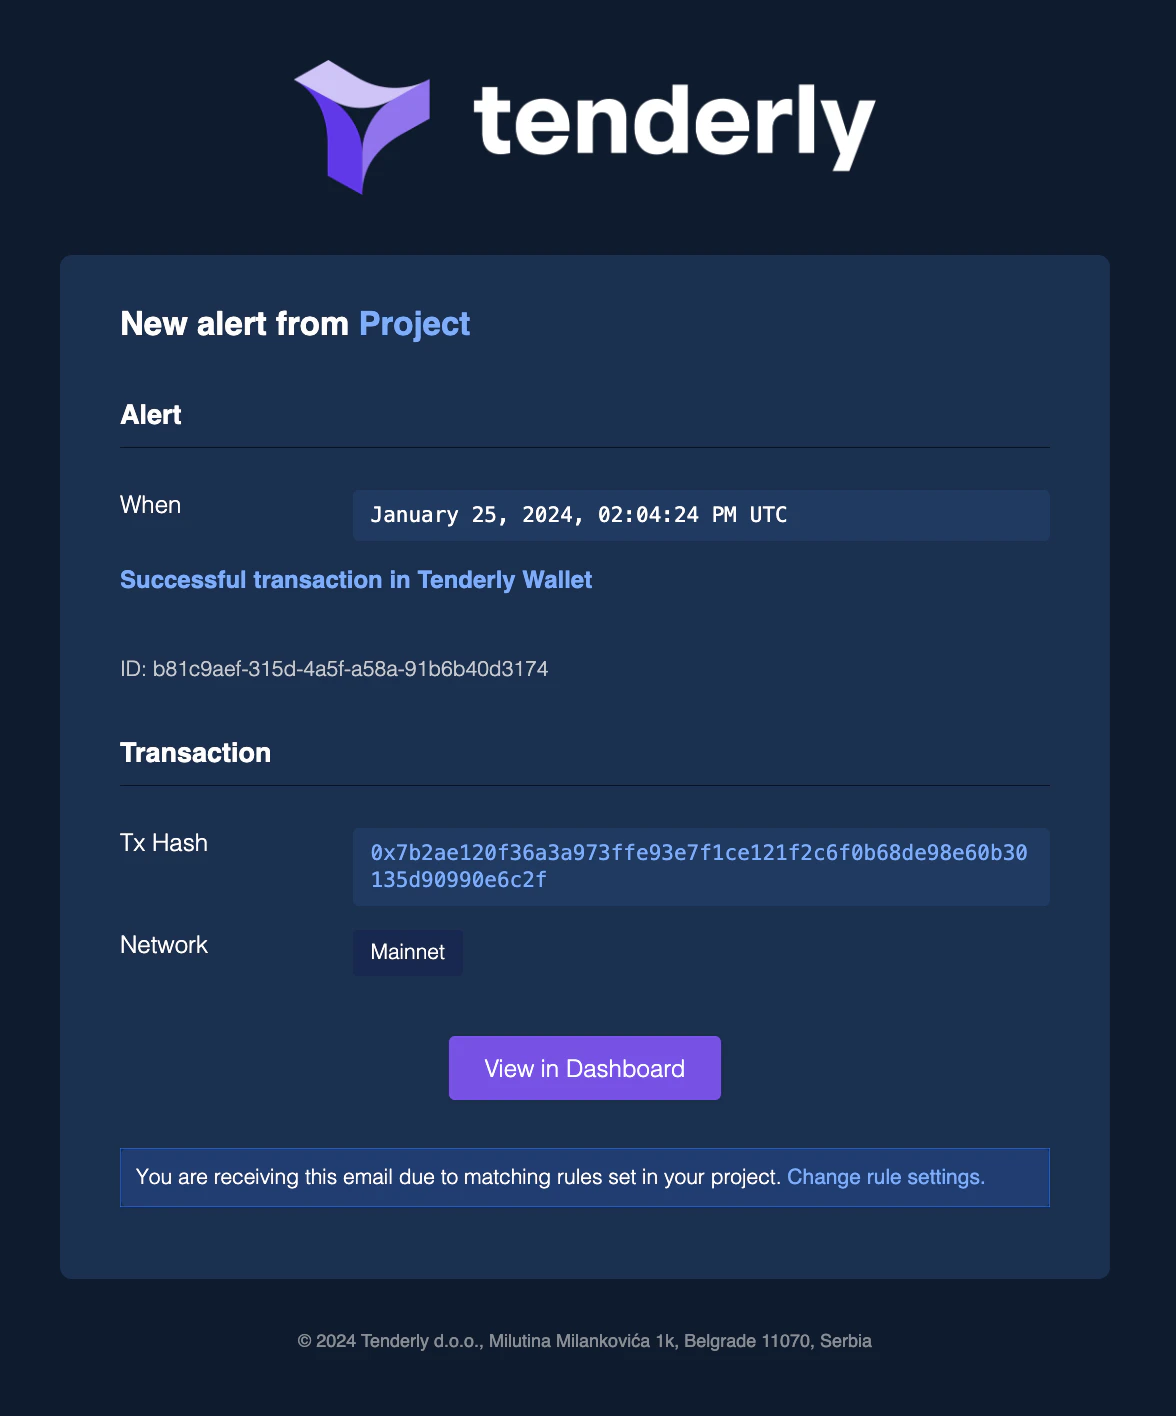
Email notification from Tenderly
एकल Alert से notifications कई Destinations पर भेजे जा सकते हैं। इसी तरह, आप कई Alerts को एकल Destination पर notifications भेजने के लिए सेट कर सकते हैं। एक बार जब आप पहली बार Destination जोड़ लेते हैं, तो इसका उपयोग भविष्य में बनाए गए Alerts द्वारा किया जा सकता है।
चरण 6: Alerts और Destinations का प्रबंधन
सभी deployed Alerts Rules view से प्रबंधित किए जा सकते हैं। Alert पर क्लिक करके उसे खोलें, जहाँ प्रबंधन विकल्प मिलेंगे: Enable/Disable, Trigger Test Alert, Duplicate Alert, Edit, या Remove।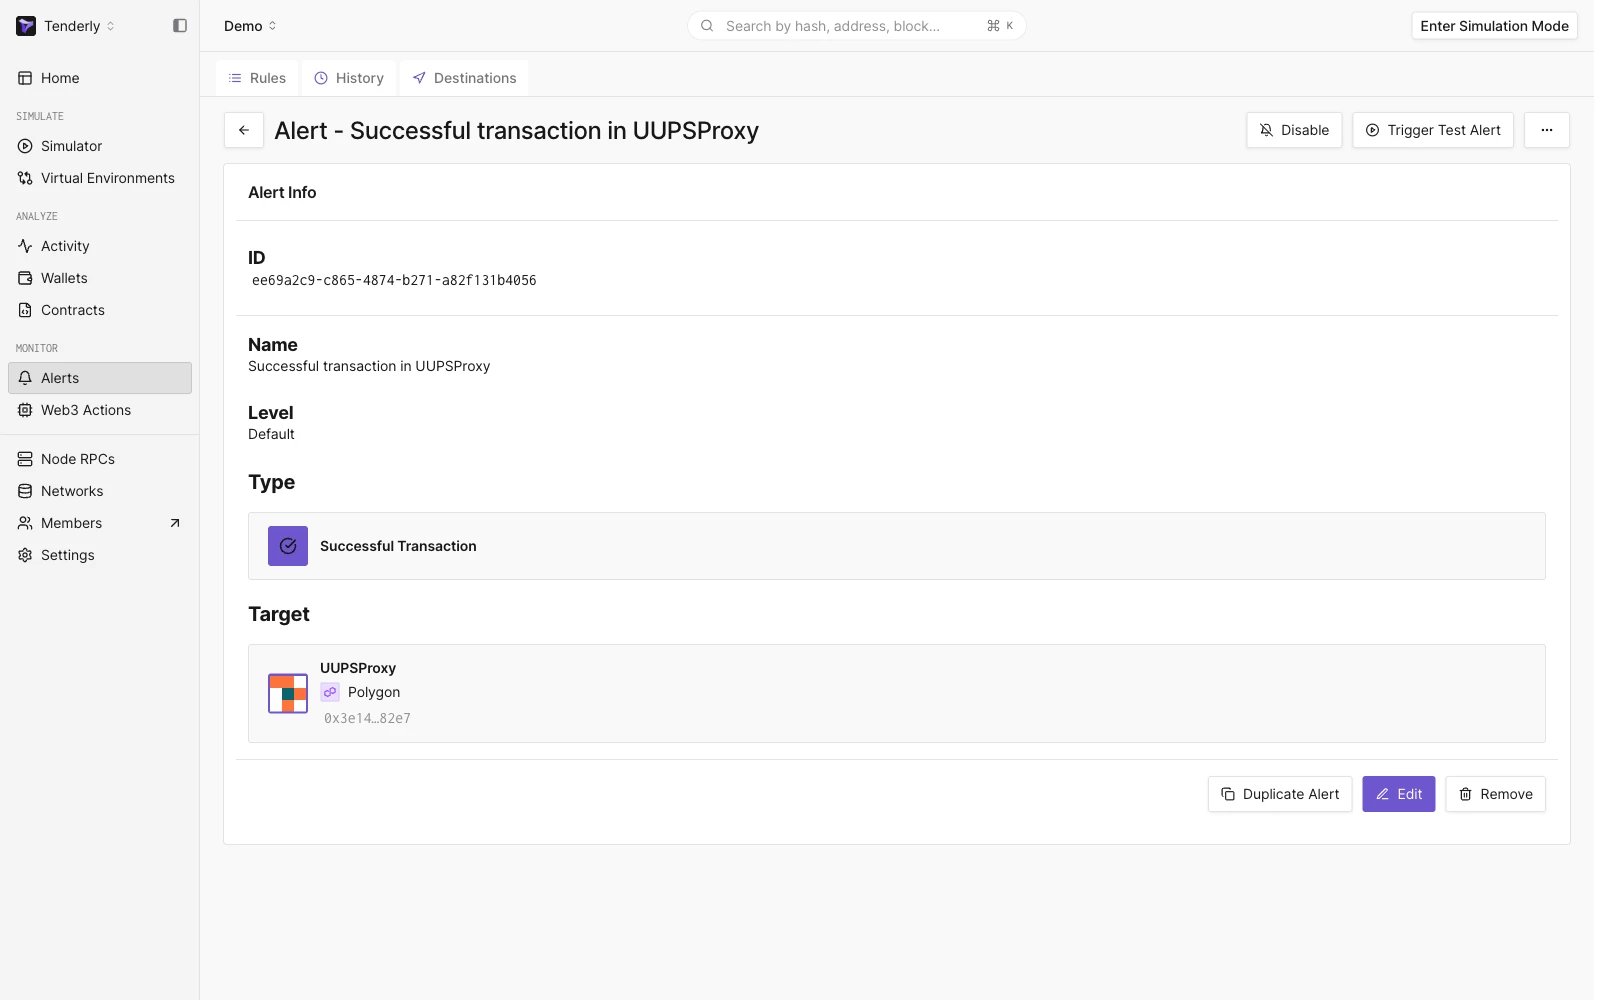
Managing an existing Alert
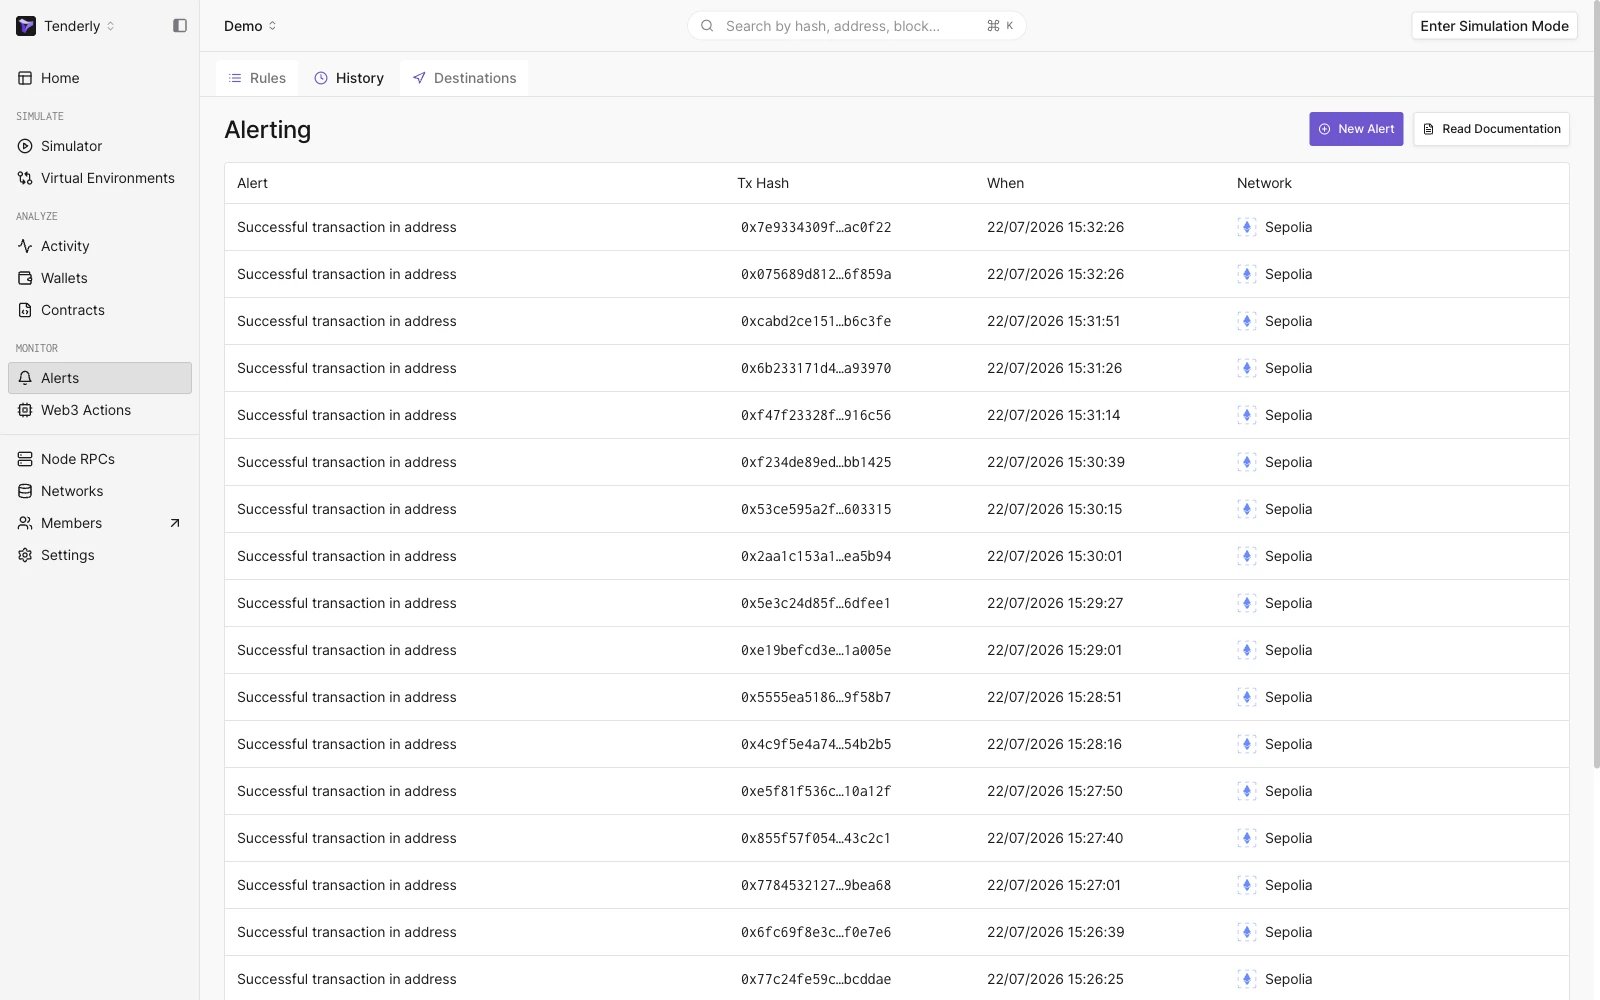
History of Alert execution
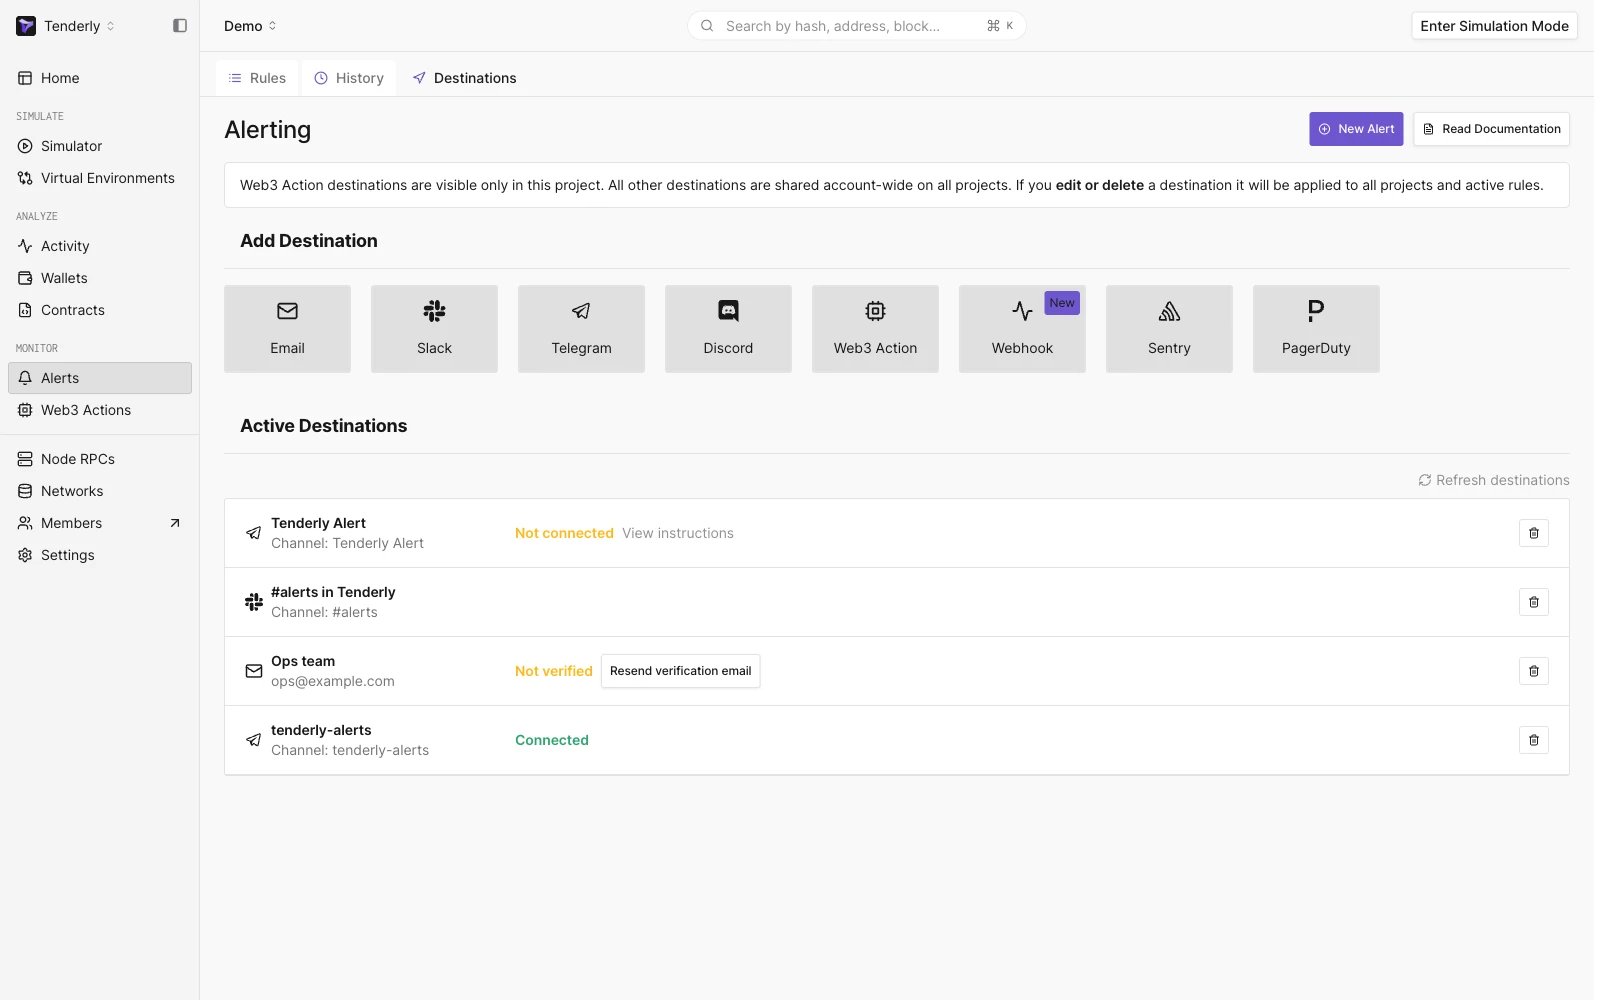
List of created Alert Destinations