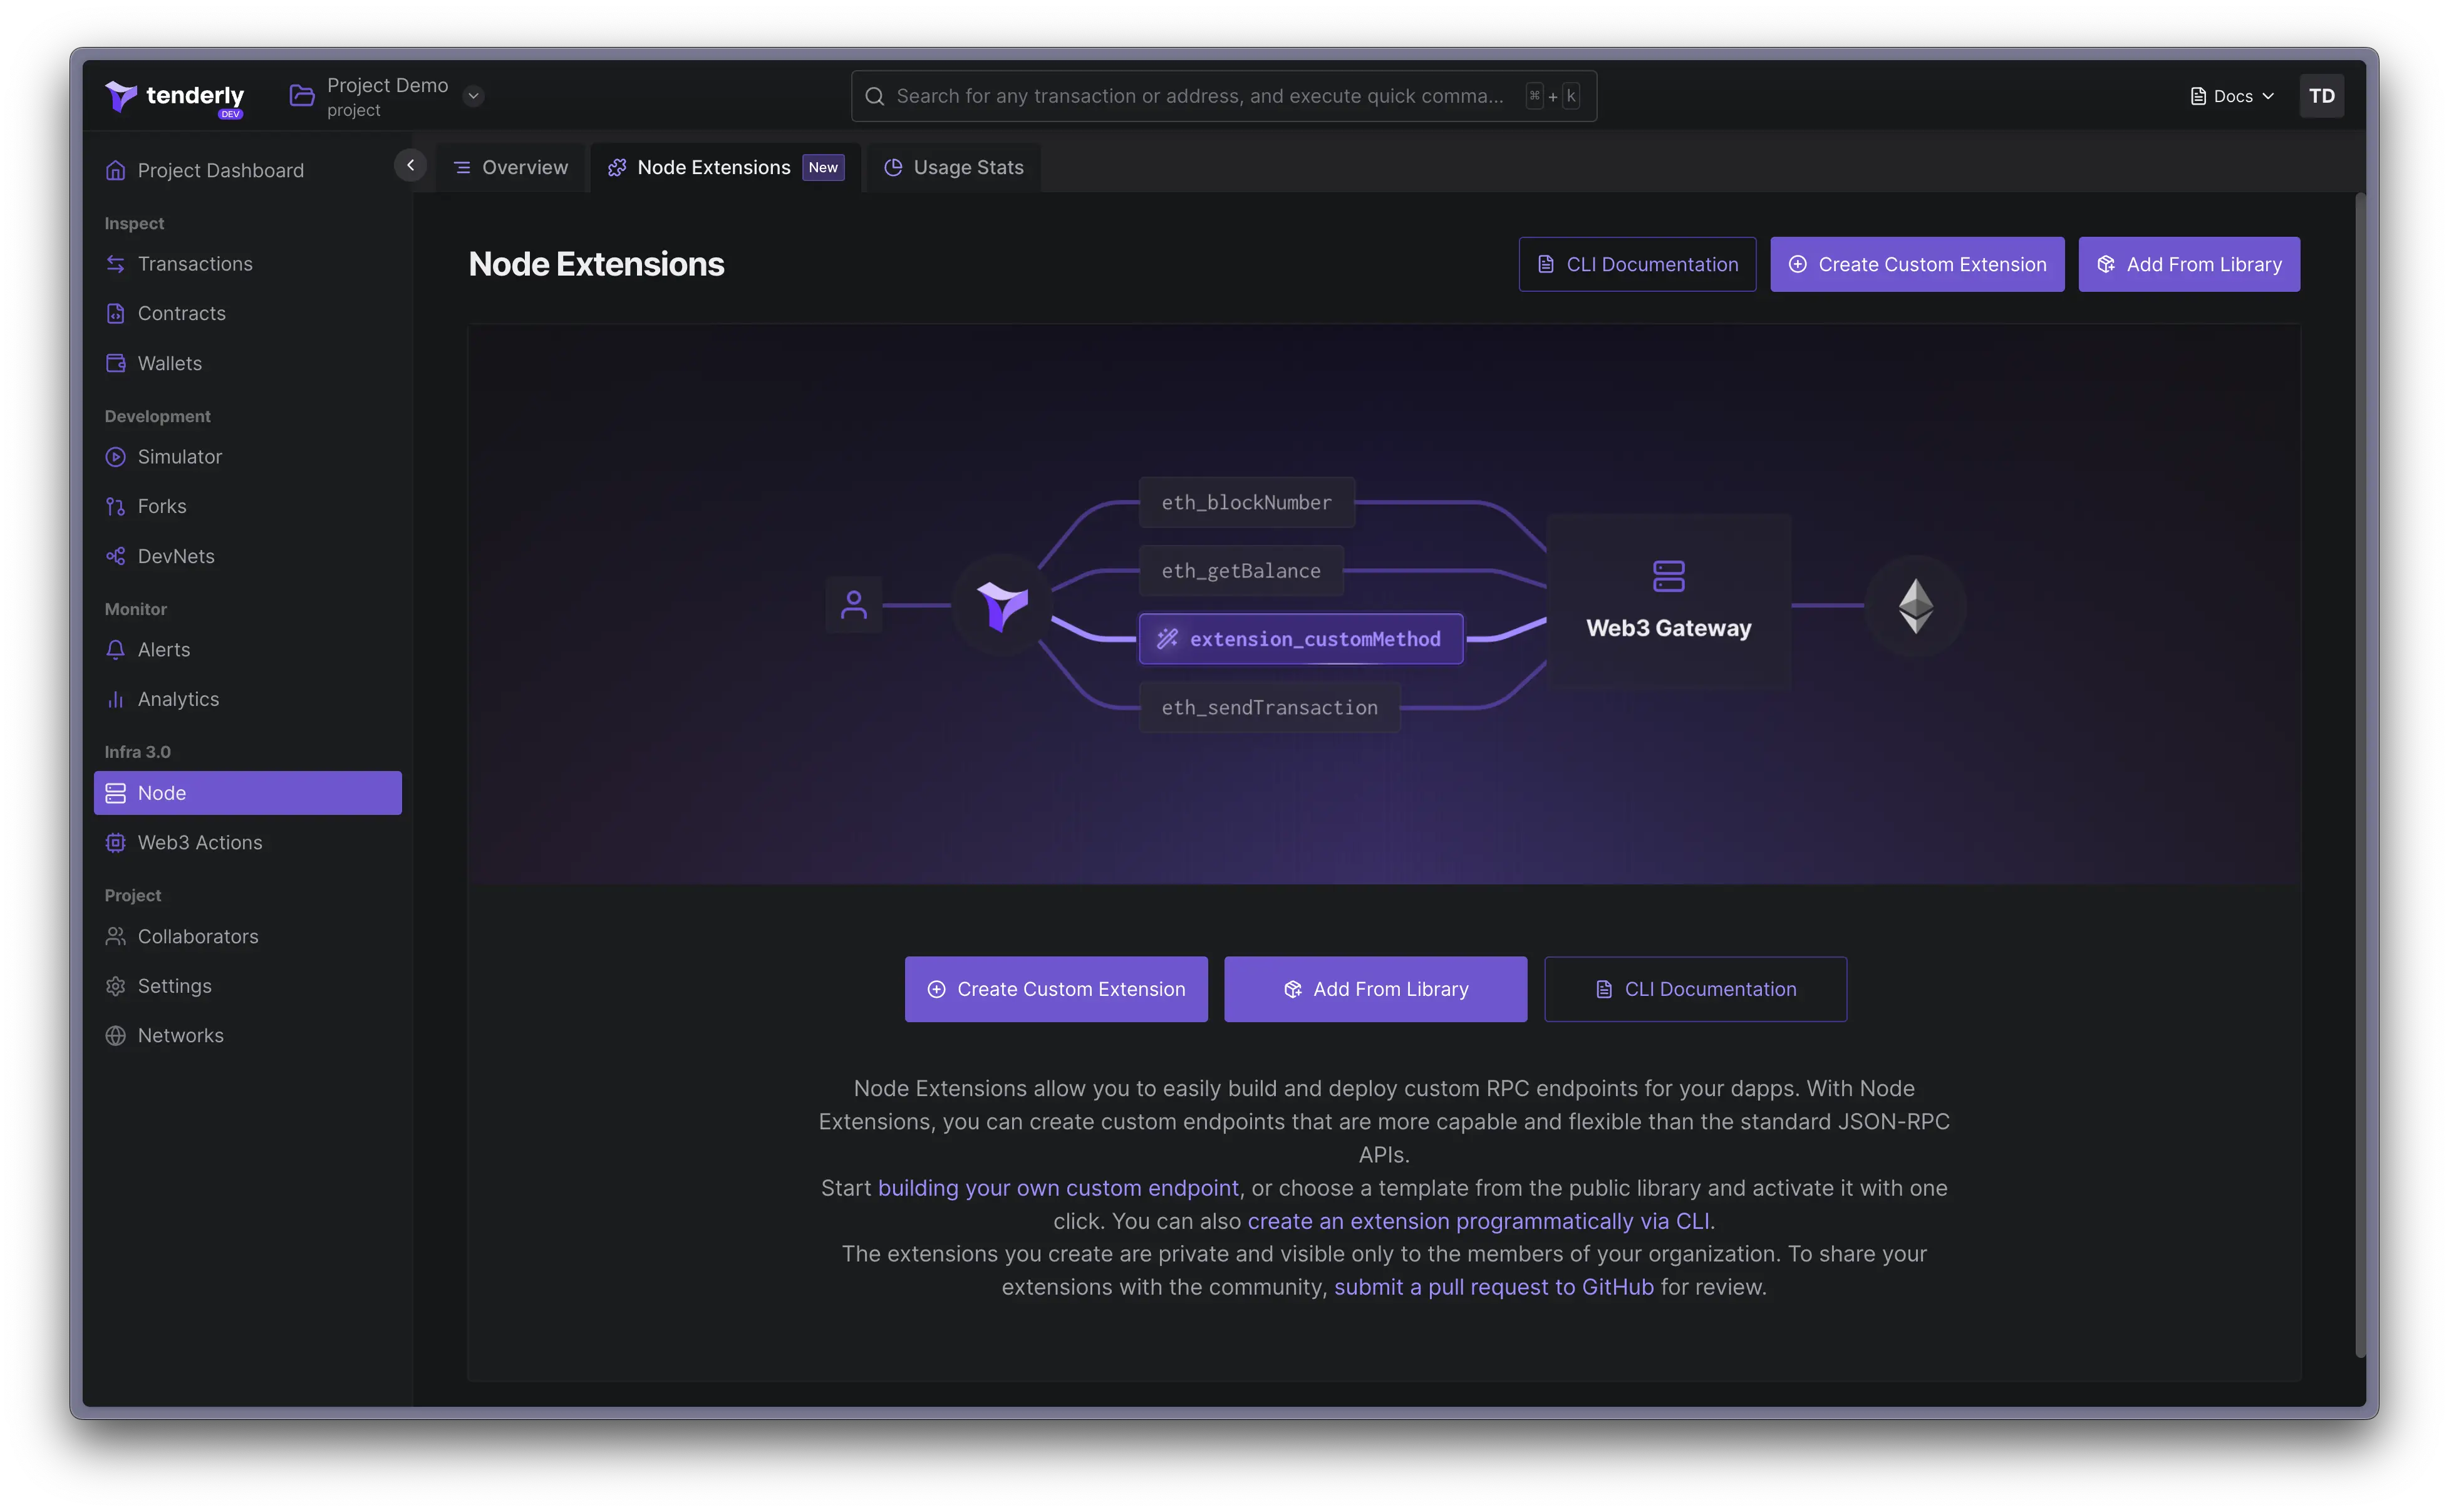
Node Extensions
Node Extensions allow you to extend the functionality of Node RPC with custom RPC methods tailored to your dapp, protocol, or specific needs using JavaScript or TypeScript. All Node Extensions are executed through Node RPC.
RPC methods built as a Node Extensions have the extension_ prefix.
How to create a Node Extension
There are several ways to create a Node Extension:
- Build it from scratch
- Repurpose a Web3 Action
- Deploy from the Node Extensions library
- Deploy via the CLI
If your node extensions use API keys, secrets, or other sensitive information, you can use Web3 Action Secrets to securely store and access this information from code. To retrieve a secret, use await context.secrets.get('API_KEY') in your Node Extension.
Build from scratch
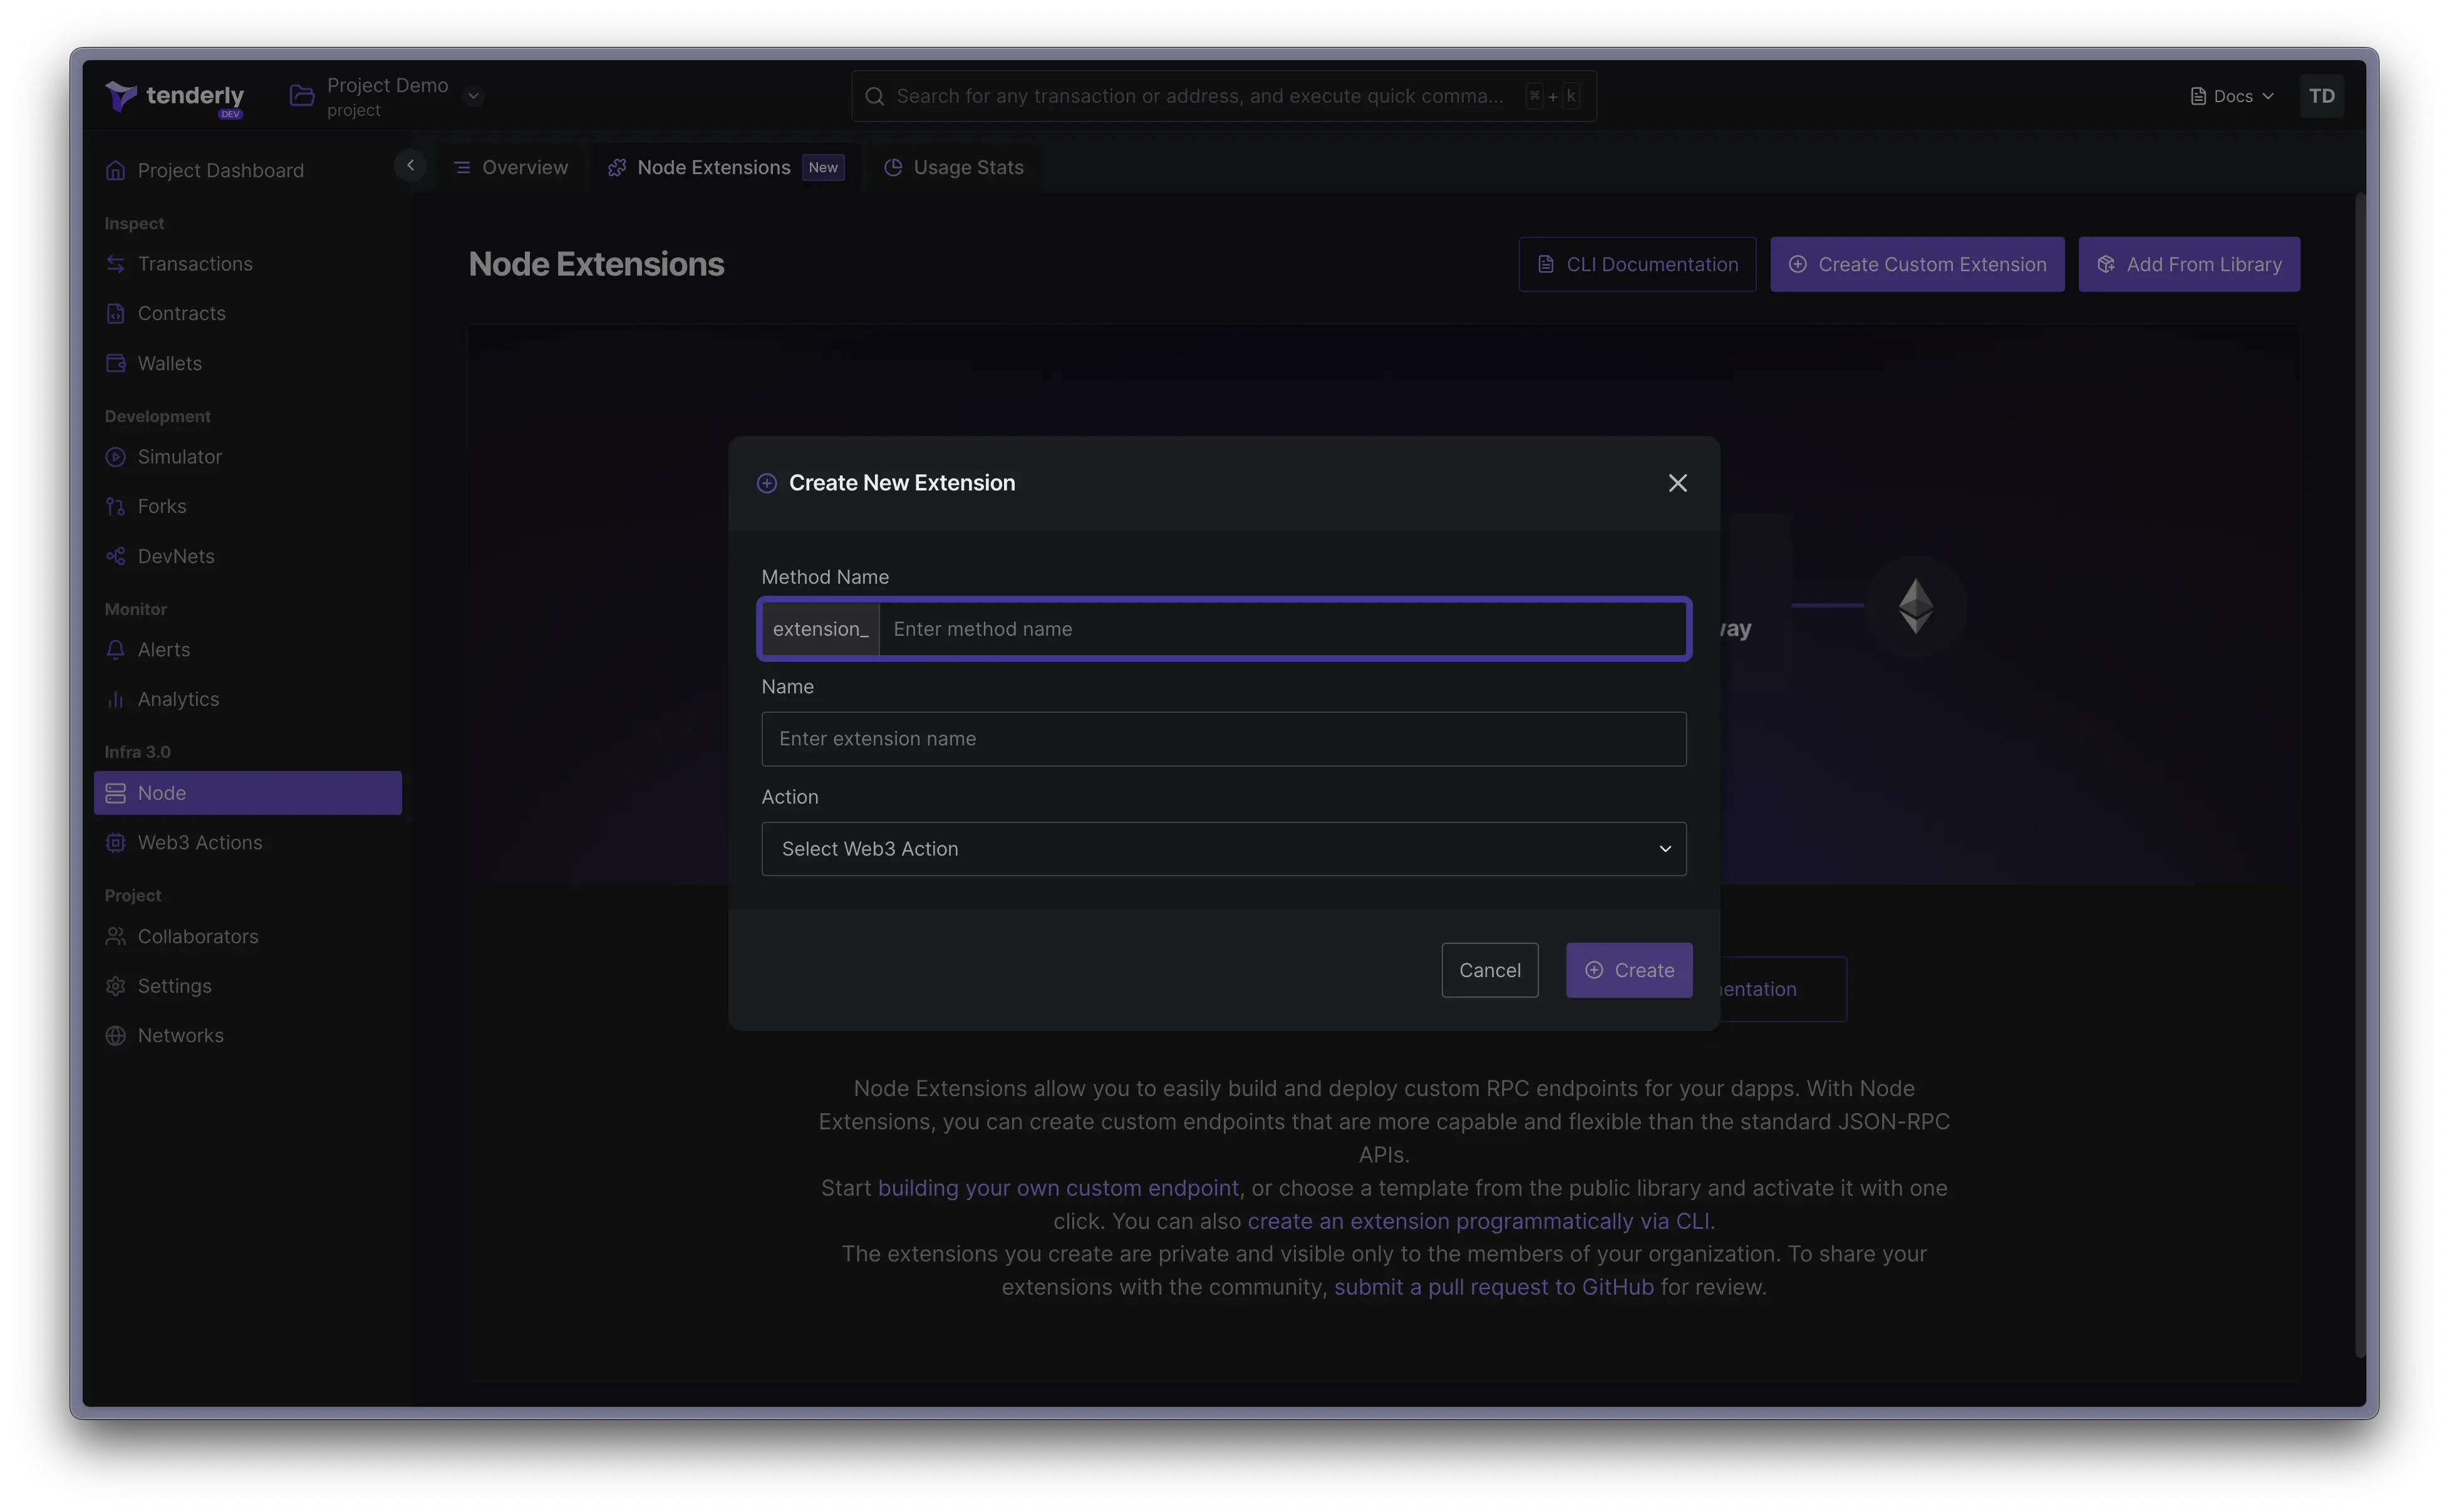
Open the Tenderly Dashboard, click Node in the sidebar on the left, navigate to the Node Extensions tab, and click the Create Custom Extension button.
Give your new RPC method a name and write the Javascript/Typescript code that will be executed each time the method is called.
Repurpose a Web3 Action
If you’ve already created a Web3 Action with a non-authenticated webhook trigger type, you can use its source code as the function of your Node Extension.
Go to the Node Extensions tab in the Tenderly Dashboard and click the Create Custom Extension button.
Select the desired Web3 Action from the dropdown menu. The function field with the Javascript/Typescript code from your Web3 Action will be populated automatically.
Once created, the Node Extension automatically picks up any source code changes of the connected Web3 Action.
Node Extensions library
Use the Node Extension Library if you need a ready-made Node Extension in one click. You can also use these examples to get inspired and start experimenting with building your own Node Extensions.
Navigate to the Node Extensions tab in the Tenderly Dashboard and click the Add From Library button. Here, you’ll see a list of all publicly available Node Extensions.
Click the Activate button to set up a pre-defined Node Extension with its corresponding Web3 Action that represents the source code of the extension.
Node Extensions deployed from the Node Extension Library cannot be edited. To further customize a Node Extension, you need to create a new Node Extension from scratch.
Deploy via CLI
Download and install the Tenderly CLI from Github.
The tenderly node-extensions init command initializes the node_extensions section of your tenderly.yaml file.
The following arguments are required:
name: Give the Node Extension a unique name.description: Describe what it does.methodName: Provide the name of the method. All Node Extensions method names must start with theextension_prefix.
Example command and output:
tenderly node-extensions init --name "extension-name" --description "extension description" --methodName "extension_test"Before you use the tenderly node-extensions init command, you need to set up a Web3 Action with the tenderly actions init command.
Make sure this Web3 Action is set up as a non-authenticated webhook event.
The tenderly node-extensions deploy command deploys extensions specified in the tenderly.yaml file.
It accepts the following arguments:
account: The account for which the Node Extension is defined in thetenderly.yamlfile.project: The project for which the extension is defined in thetenderly.yamlfile.extensionName: Specifies the extension in the providedaccount/projectthat should be deployed.
If no arguments are provided, the command will attempt to deploy all Node Extensions defined in the tenderly.yaml file. If any of the deployments fail, the command will print out the failure reasons and continue with the deployment.
The deployment process will fail if you attempt to deploy a Node Extension without a previously deployed Web3 Action.
Managing Node Extensions
Testing
Click the Test button to open the Test Node Extension modal. This modal contains a JSON-RPC Request Builder, which you can use to create a JSON input payload for your custom method name.
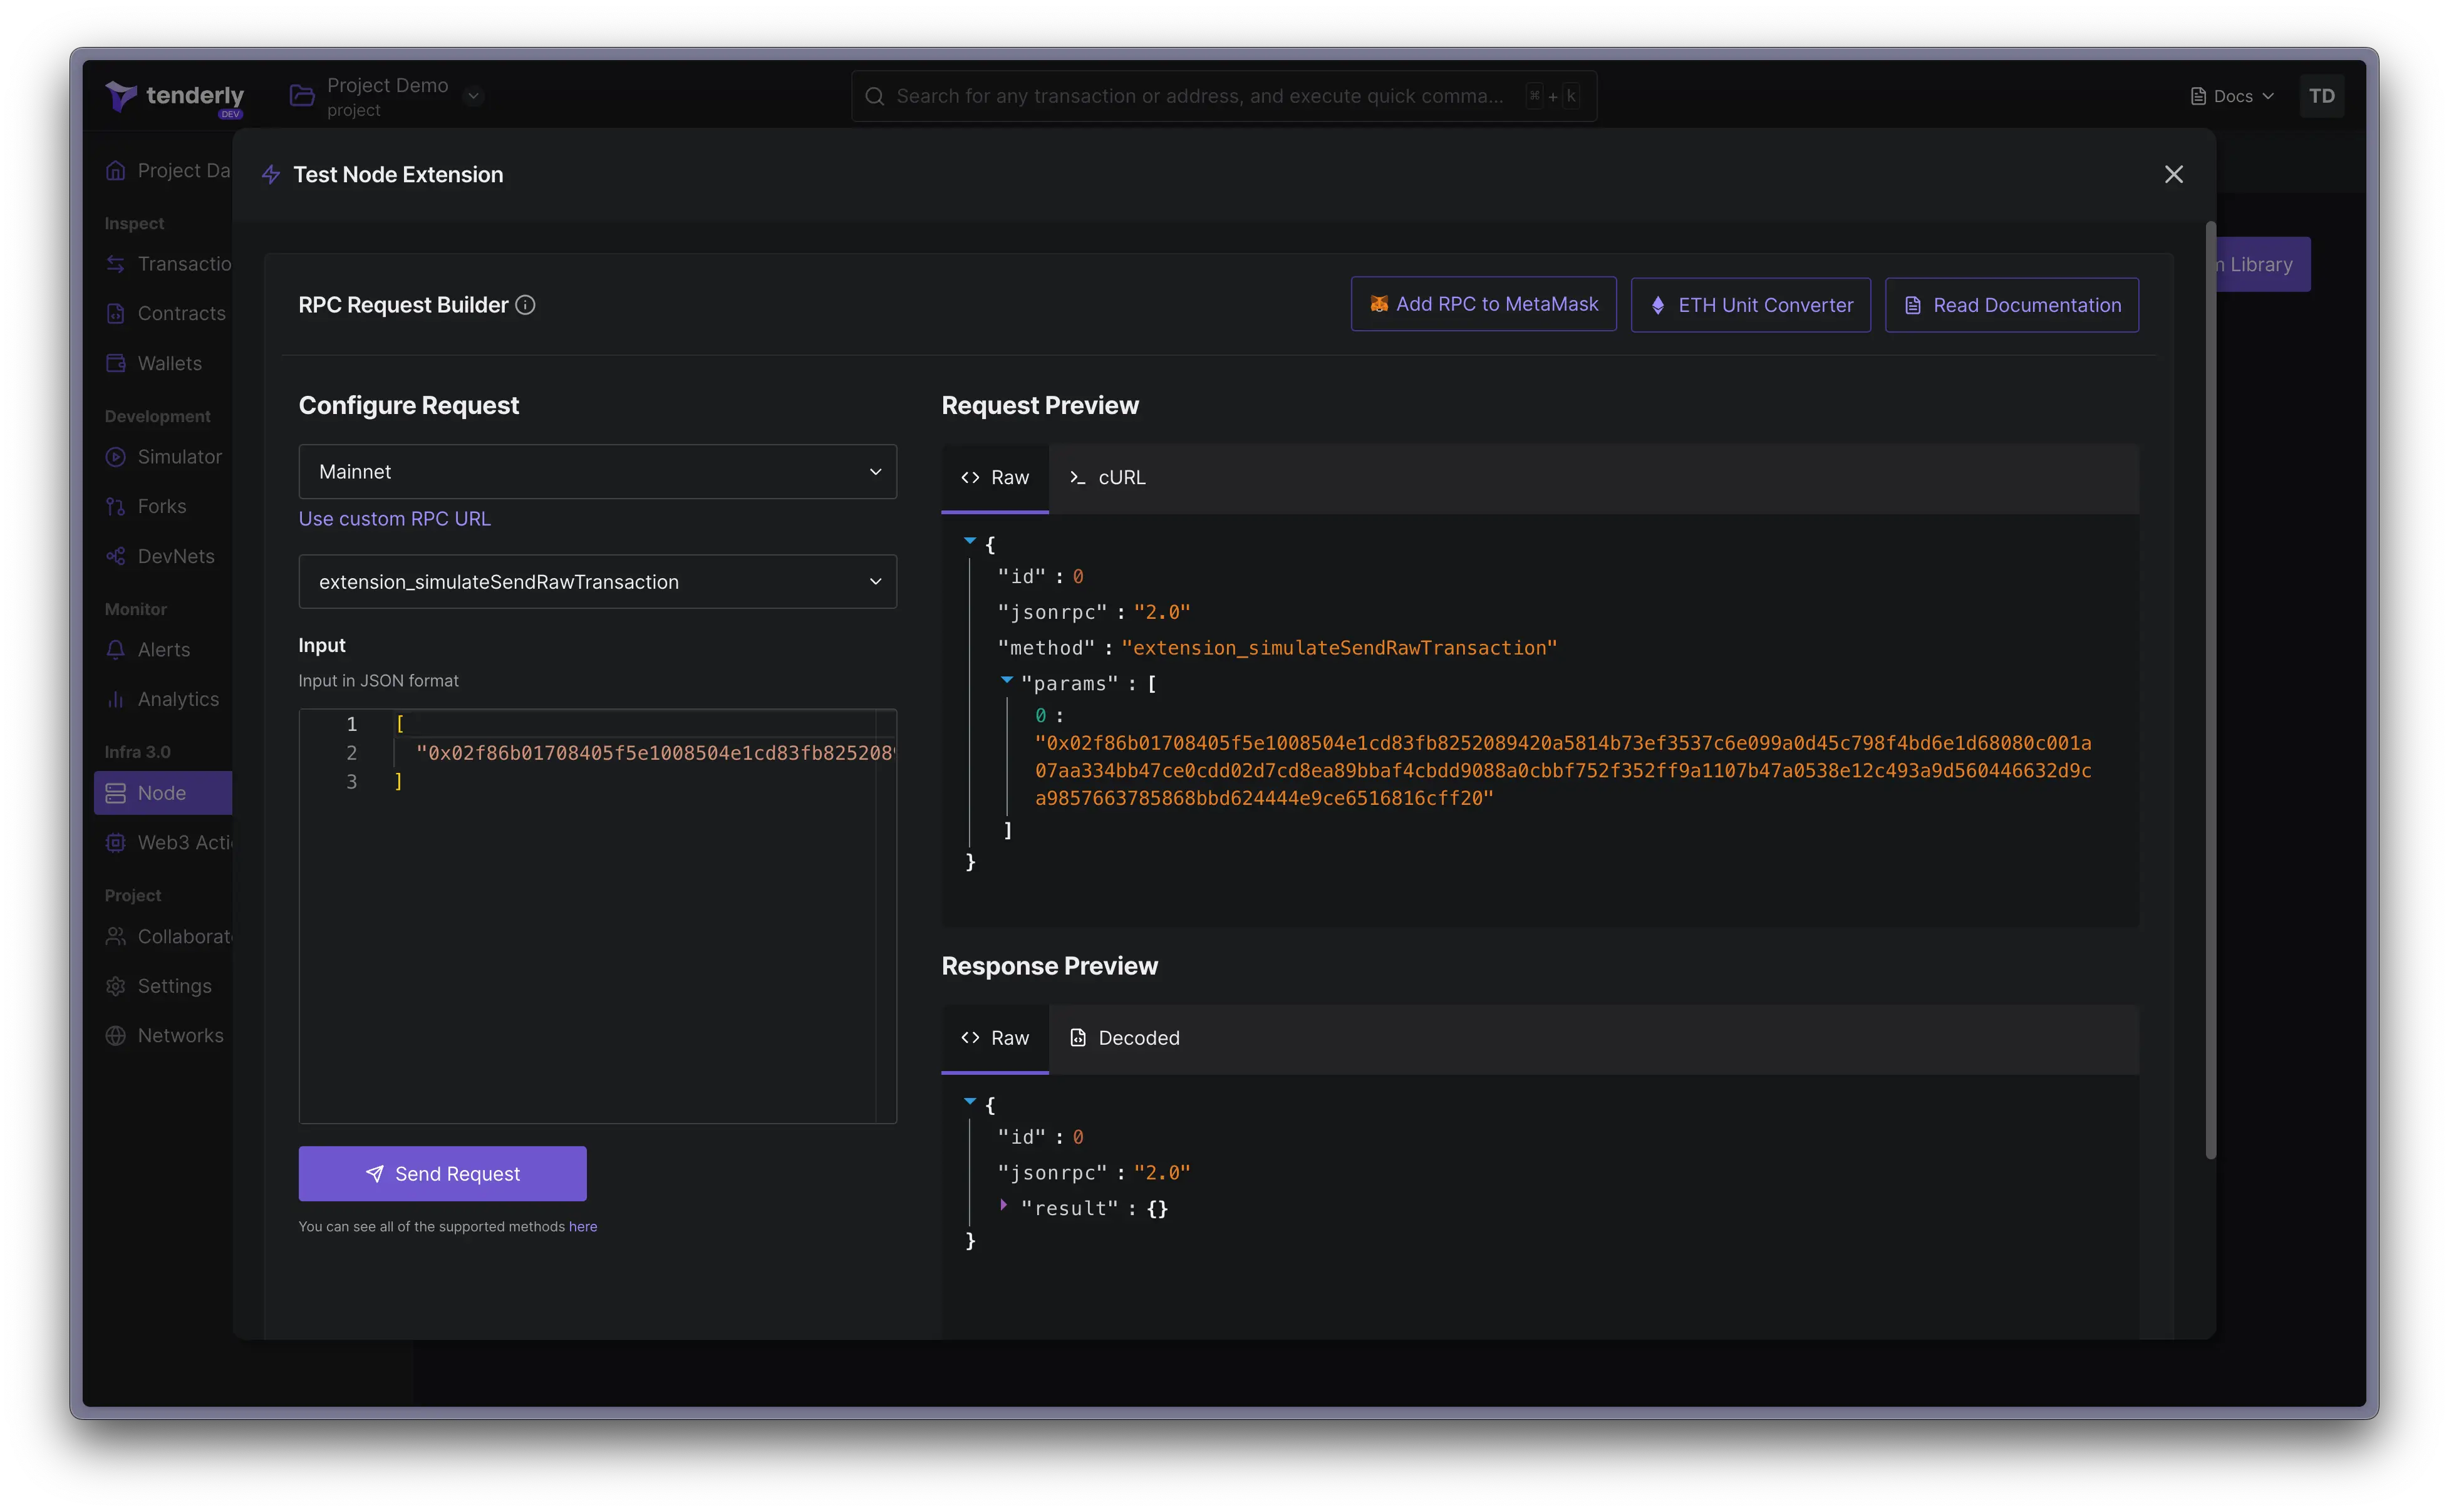
Click the Send button to execute the Node Extension. The preview of the request and response data will be shown in the modal.
Node Extensions reused from the Node Extension Library cannot be edited.
Deactivating
If you create a Node Extension from the Library, deactivation permanently deletes it and its associated Web3 Action from your list. This action cannot be undone, so make sure you want to permanently delete the Node Extension before deactivating it.
However, deactivating a custom Node Extension that you created will simply pause its execution. To reactivate the Node Extension, simply click the Activate button.
If the associated Web3 Action is stopped, you won’t be able to test or run the Node Extension. Make sure that the Web3 Action is running before attempting to activate or test the Node Extension.
Editing
You can edit your custom Node Extensions in the following ways:
- If you created the extension using the Tenderly CLI, the extension needs to be redeployed from the CLI.
- If you created the extension from the Tenderly Dashboard, you can edit the code directly from the Dashboard.
You can see the connected Web3 Action when you open the extension card and go to the single Node Extension page view.
Clicking on the connected Web3 Action takes you to the Web3 Action page. Any changes you make here will require changes to the connected Web3 Action.
Contributing to the Node Extension Library
We welcome contributions to our public GitHub repository, which contains Node Extension examples and starter code.
To contribute to our repository, simply open a pull request with your Node Extension source code and a description of its use case.
Once your pull request is reviewed and approved, your Node Extension will be added to our repository and made available for others to use and build upon. You will also be credited as the author which can help you build your reputation within the community.