

步骤 1:启动 Alerts 设置向导
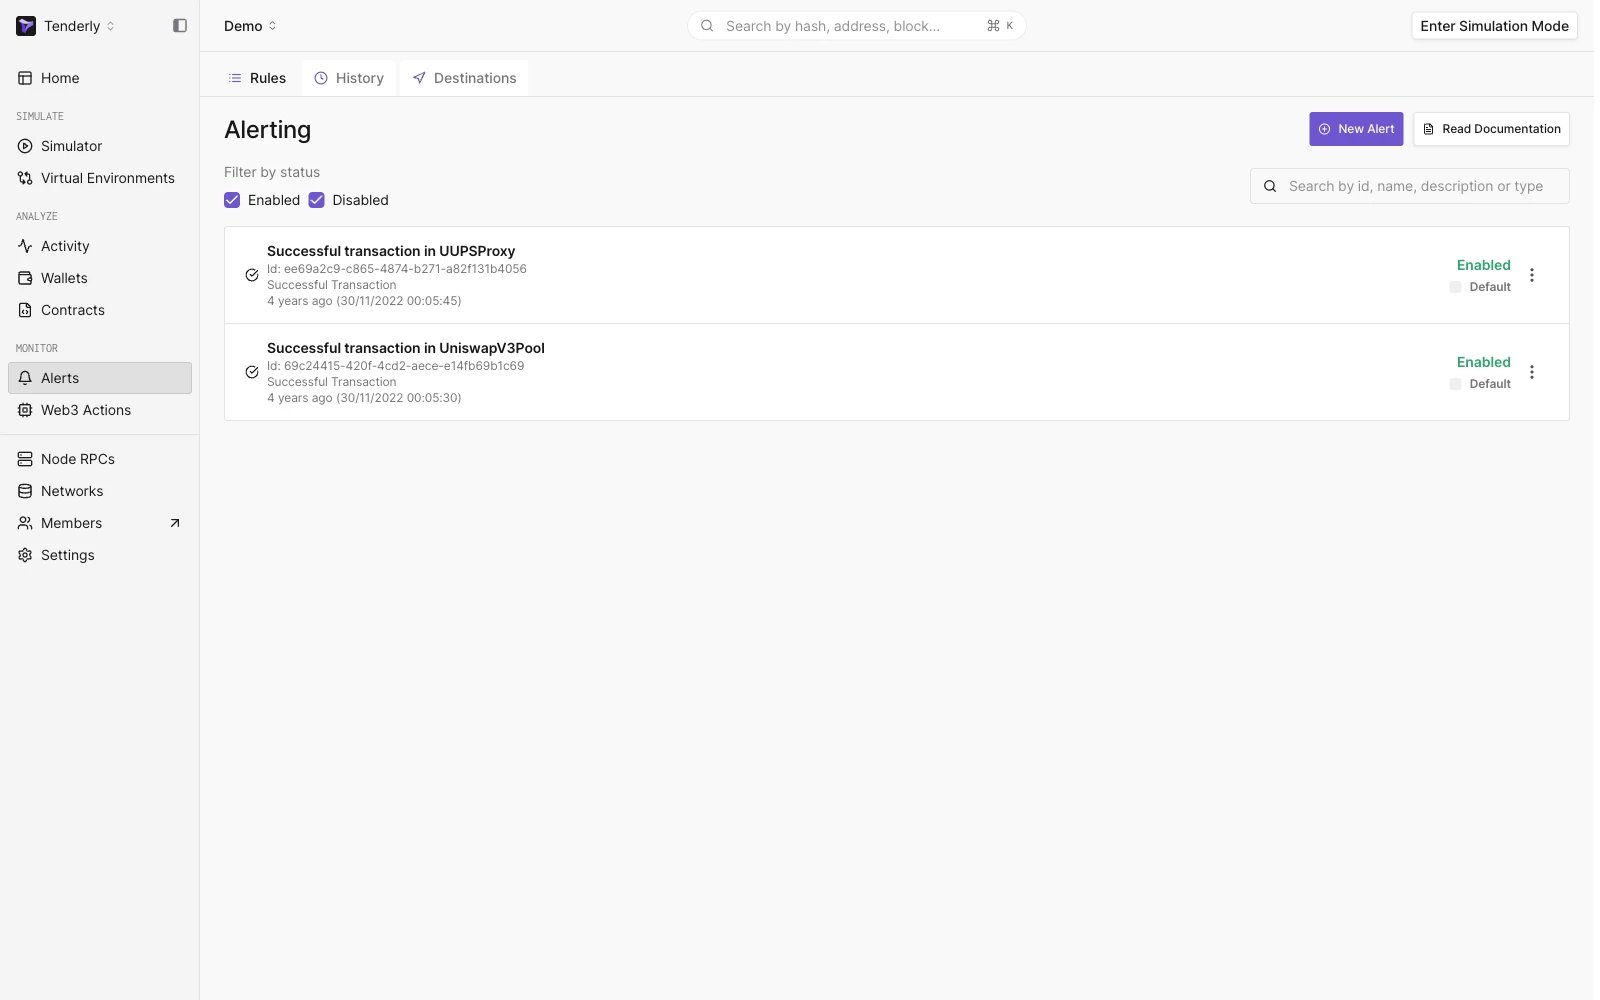
Alerts 主页
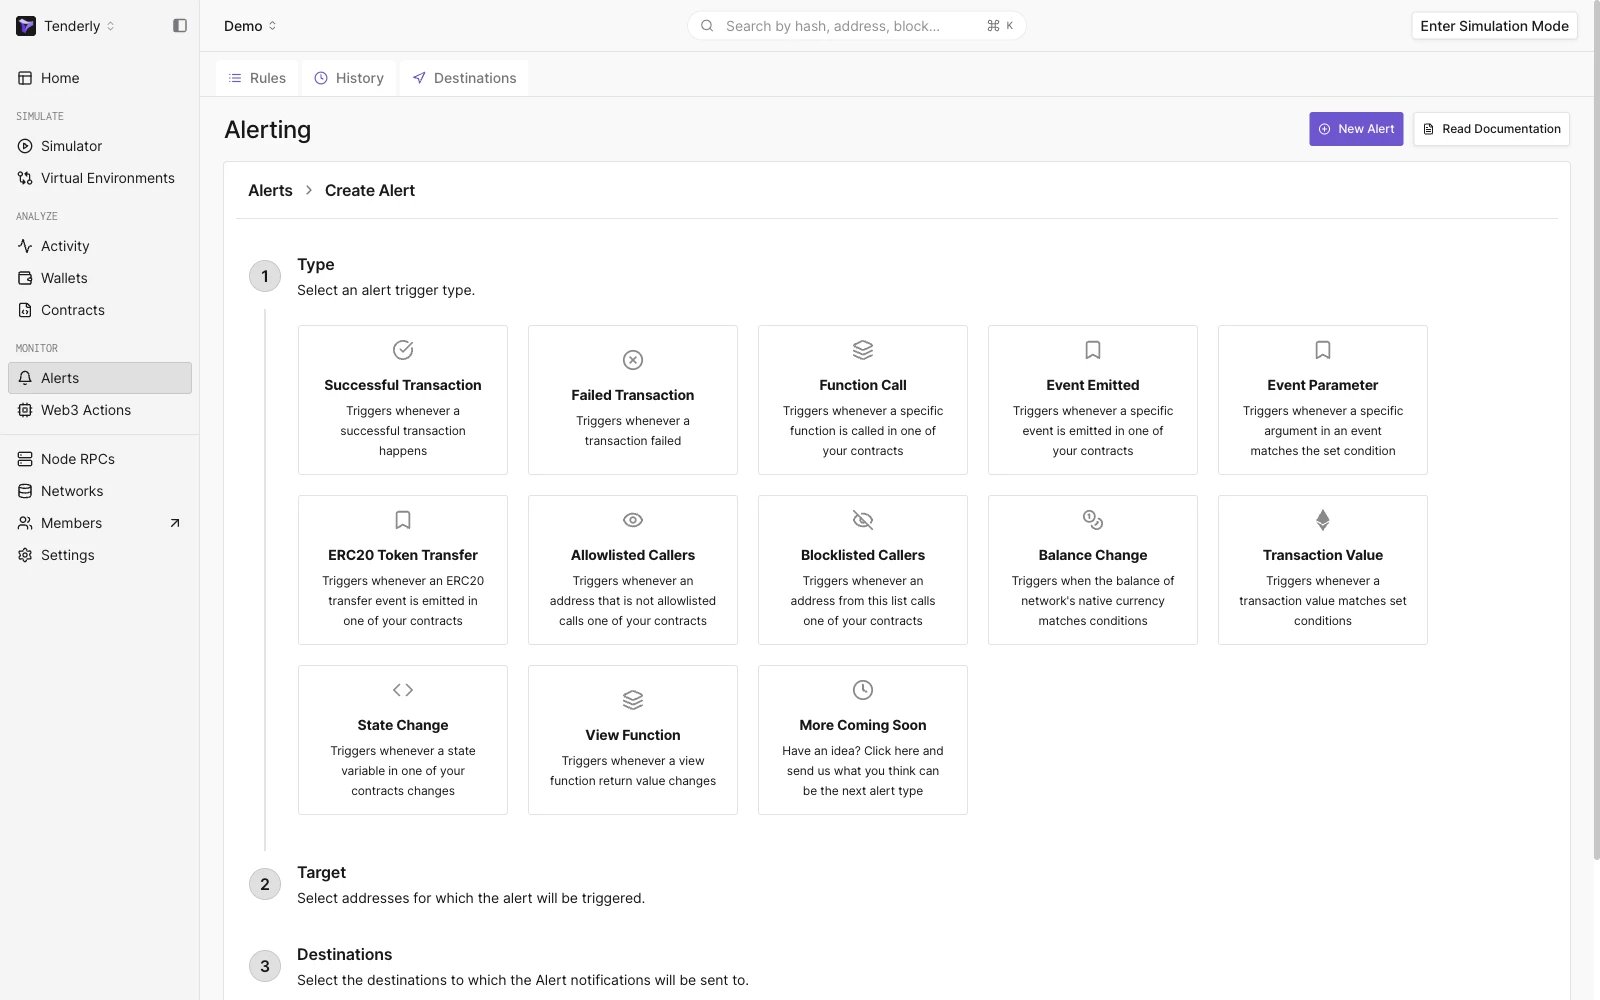
Alert 设置向导
- Alert Type: 您希望 Alert 监听的事件,事件发生时向您发送通知。Tenderly 支持 12 种 Alert Types。
- Alert Target: 在这里告诉 Tenderly 您希望监控哪些地址。所有 Alert Types 的 Target 选项相同。
- Alert Parameters: 基于 Target,在此选择您希望监控的具体地址以及与 Alert Type 相关的其他设置。
- Alert Destinations: 事件发生时您希望接收通知的位置。
步骤 2:选择 Successful Transaction Alert Type
从可用的 Alert Types 列表中, 选择 Successful Transaction 以监控成功事务的发生。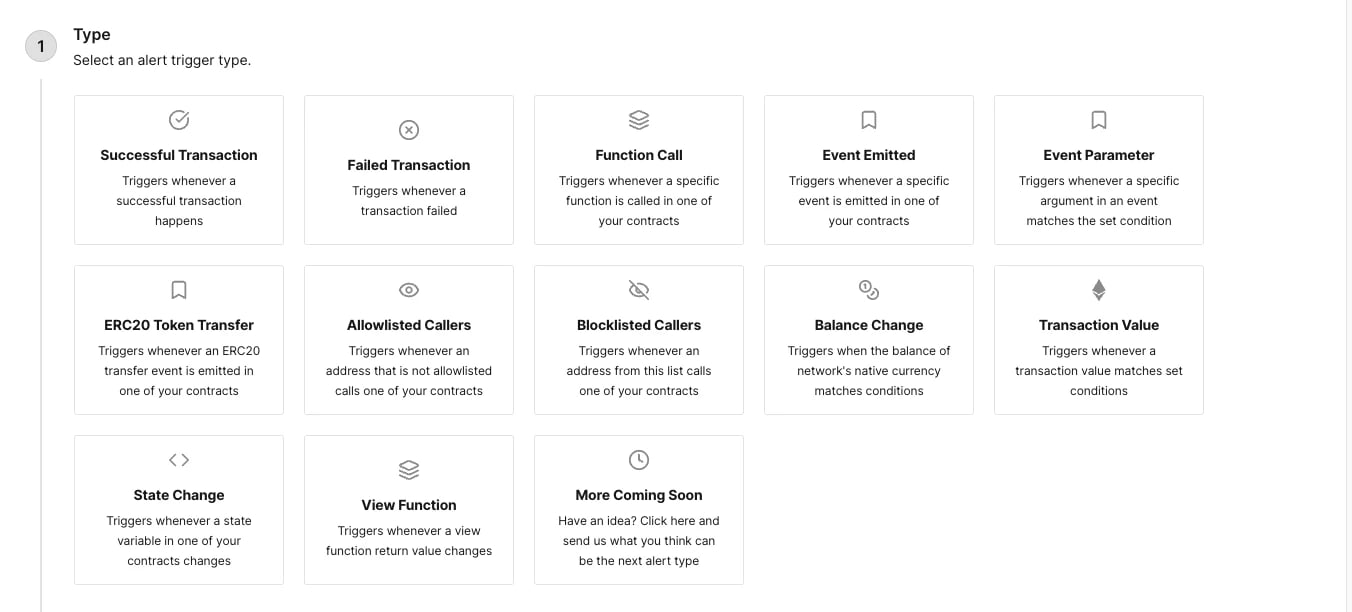
可用的 Alert 触发器类型
一些 Alert Types 的含义一目了然,而另一些则更为细致,请参阅
Alert Trigger Types 文档 页面以获取每种类型的详细
说明。
步骤 3:将 Alert Target 设置为 Address
在 Alert Target 部分,您可以告知 Tenderly 您希望监控的地址及其所在位置。 所有 Alert Types 可用的 Target 选项相同,包括:- Address: 监控单个智能合约或钱包
- Network: 监控特定网络上的所有事务
- Project: 监控您 Tenderly 项目中的所有地址
- Tag: 监控带有特定标签的所有合约和钱包
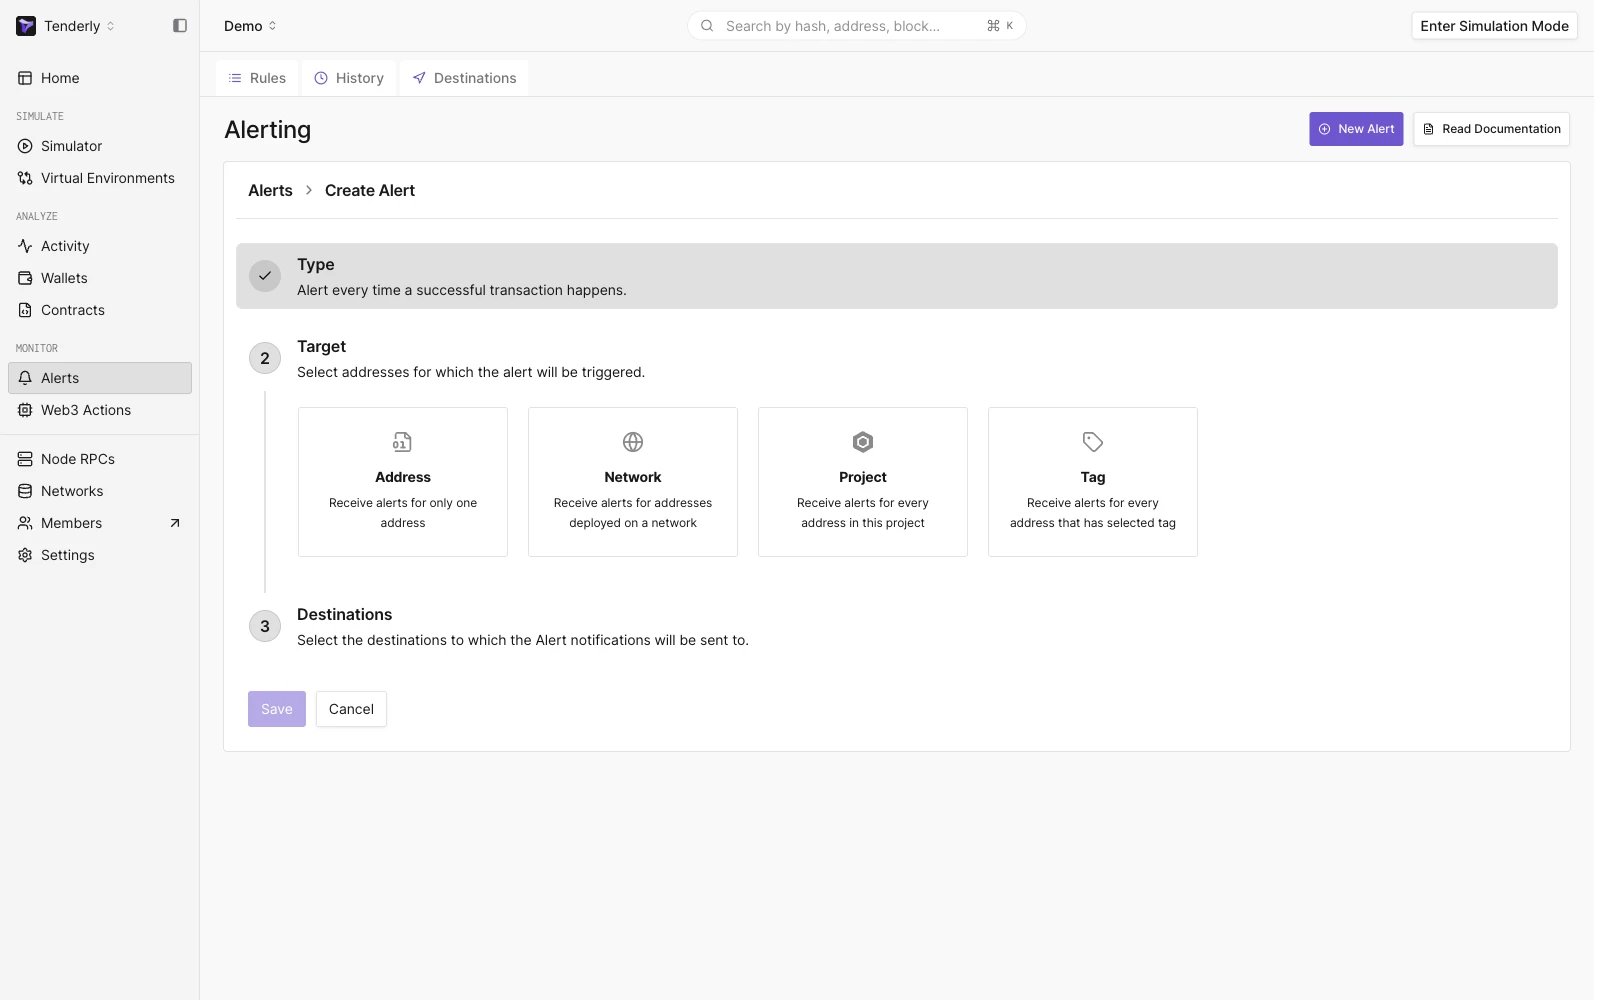
可用的 Alert Targets
步骤 4:将钱包地址设置为 Target Parameter
在 Target 设置为 Address 后,我们需要告诉 Tenderly 要监控哪个钱包地址。Tenderly 会拉取与您项目关联的所有智能合约和钱包,并在下拉列表中显示。如果您尚未向 Tenderly 项目添加任何智能合约或钱包,请按照这些快捷
指南添加 钱包 或 智能
合约。Alerts 只针对项目中的地址进行评估,因此要监控的地址必须添加到项目中。如果添加的地址让项目的
Transactions 视图变得嘈杂,您可以将其从交易列表中隐藏,而不影响 Alerts。
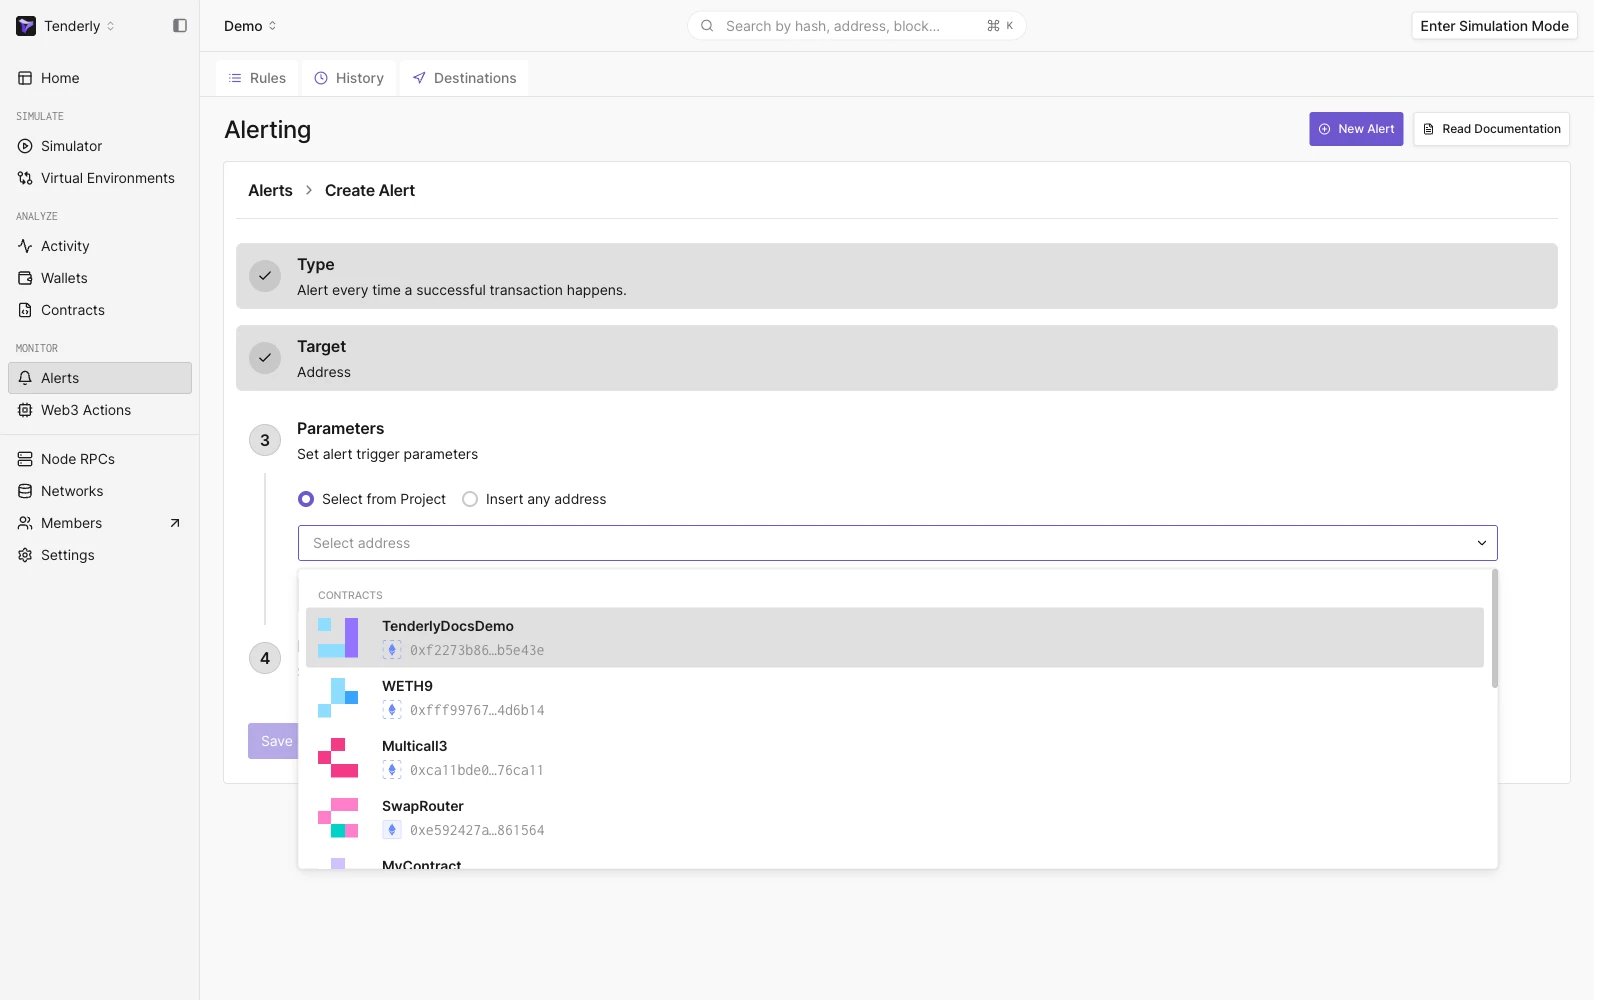
与项目关联的智能合约和钱包列表
步骤 5:选择 Email 作为 Alert Destination
为了保持简单,我们希望接收一封邮件通知,告知有关进出 Tenderly Wallet 的成功事务。 选择 Email 作为 Alert Destination,并填写必要的详细信息,包括邮箱地址。如果您添加的是新邮箱地址,则需要确认您是该邮箱的所有者才能在此接收通知。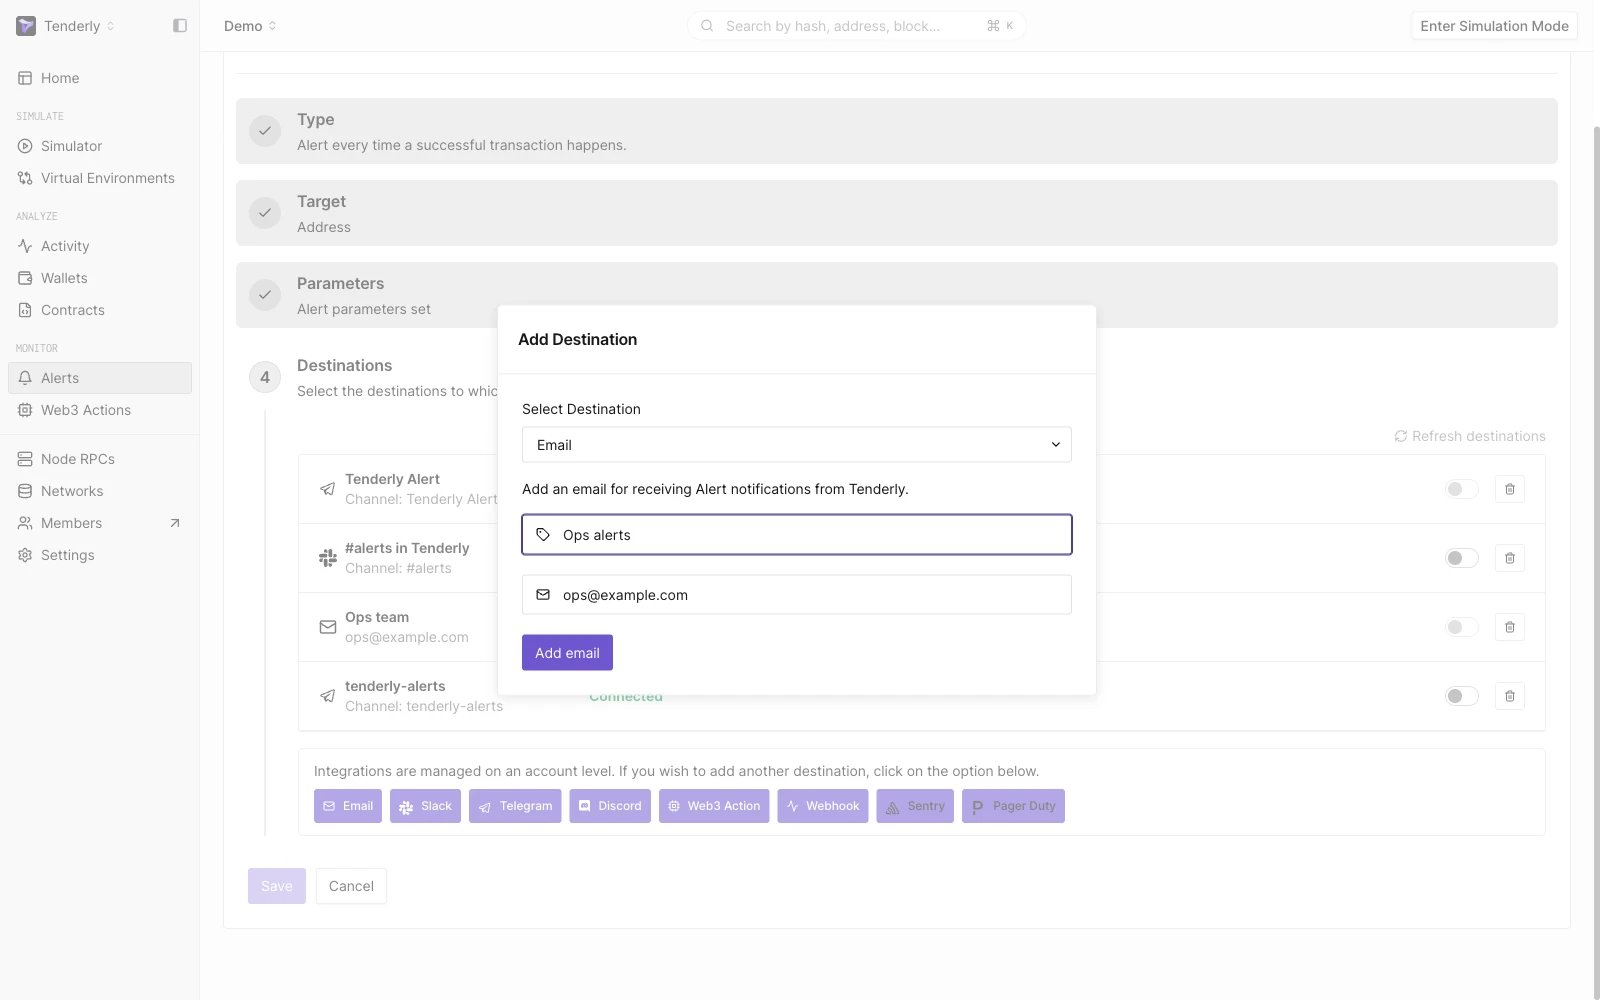
将 Email 设置为 Alert Destination
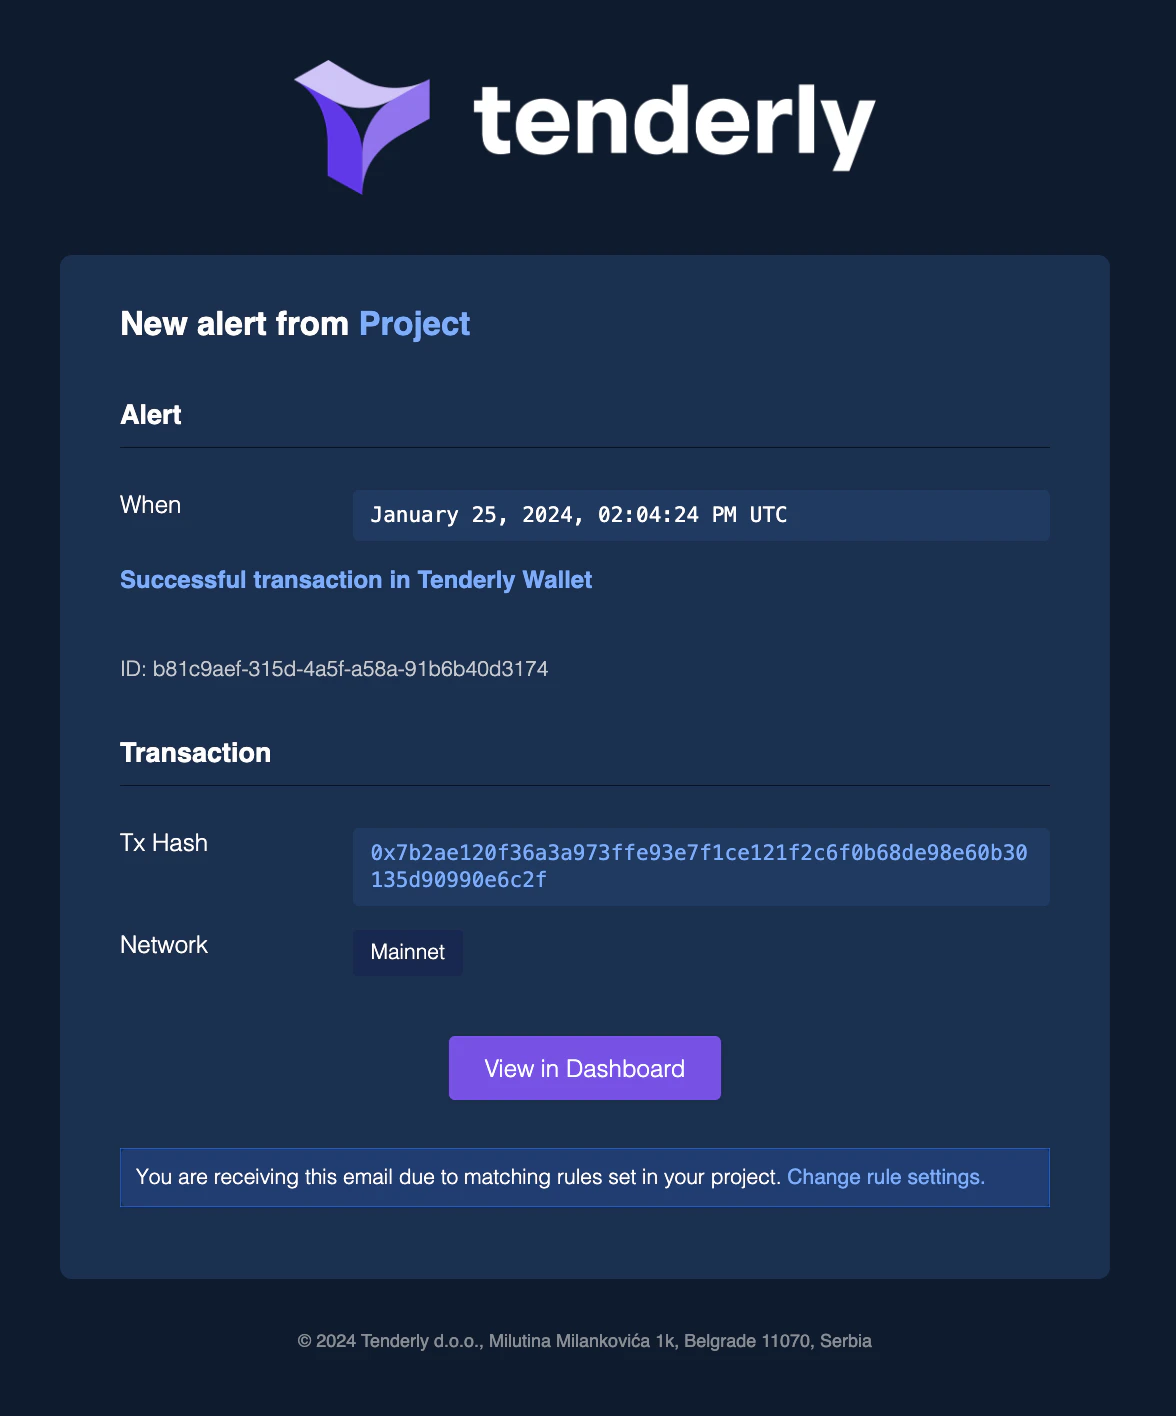
来自 Tenderly 的邮件通知
同一个 Alert 的通知可以发送到多个 Destination。同样,您也可以让
多个 Alert 将通知发送到同一个 Destination。首次
添加 Destination 后,您以后创建的 Alert 也可以使用它。
步骤 6:管理 Alerts 和 Destinations
所有已部署的 Alerts 都可以从 Rules 视图中进行管理。点击某个 Alert 将其打开,即可看到管理选项: Enable/Disable、 Trigger Test Alert、 Duplicate Alert、 Edit 或 Remove。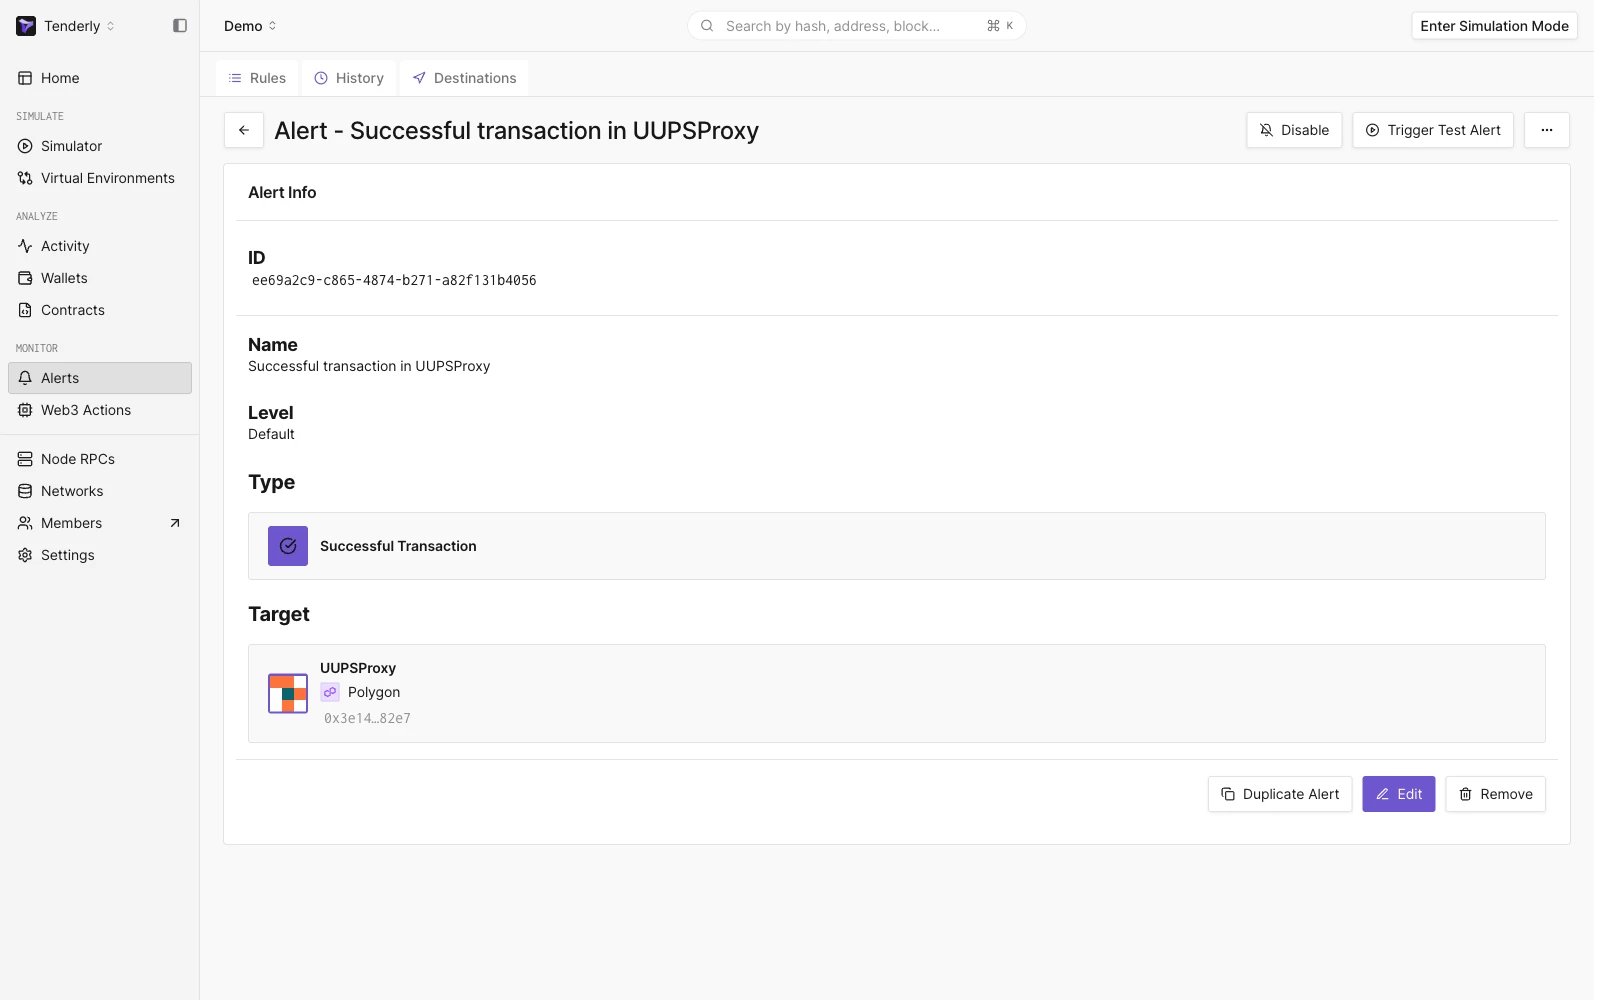
管理现有的 Alert
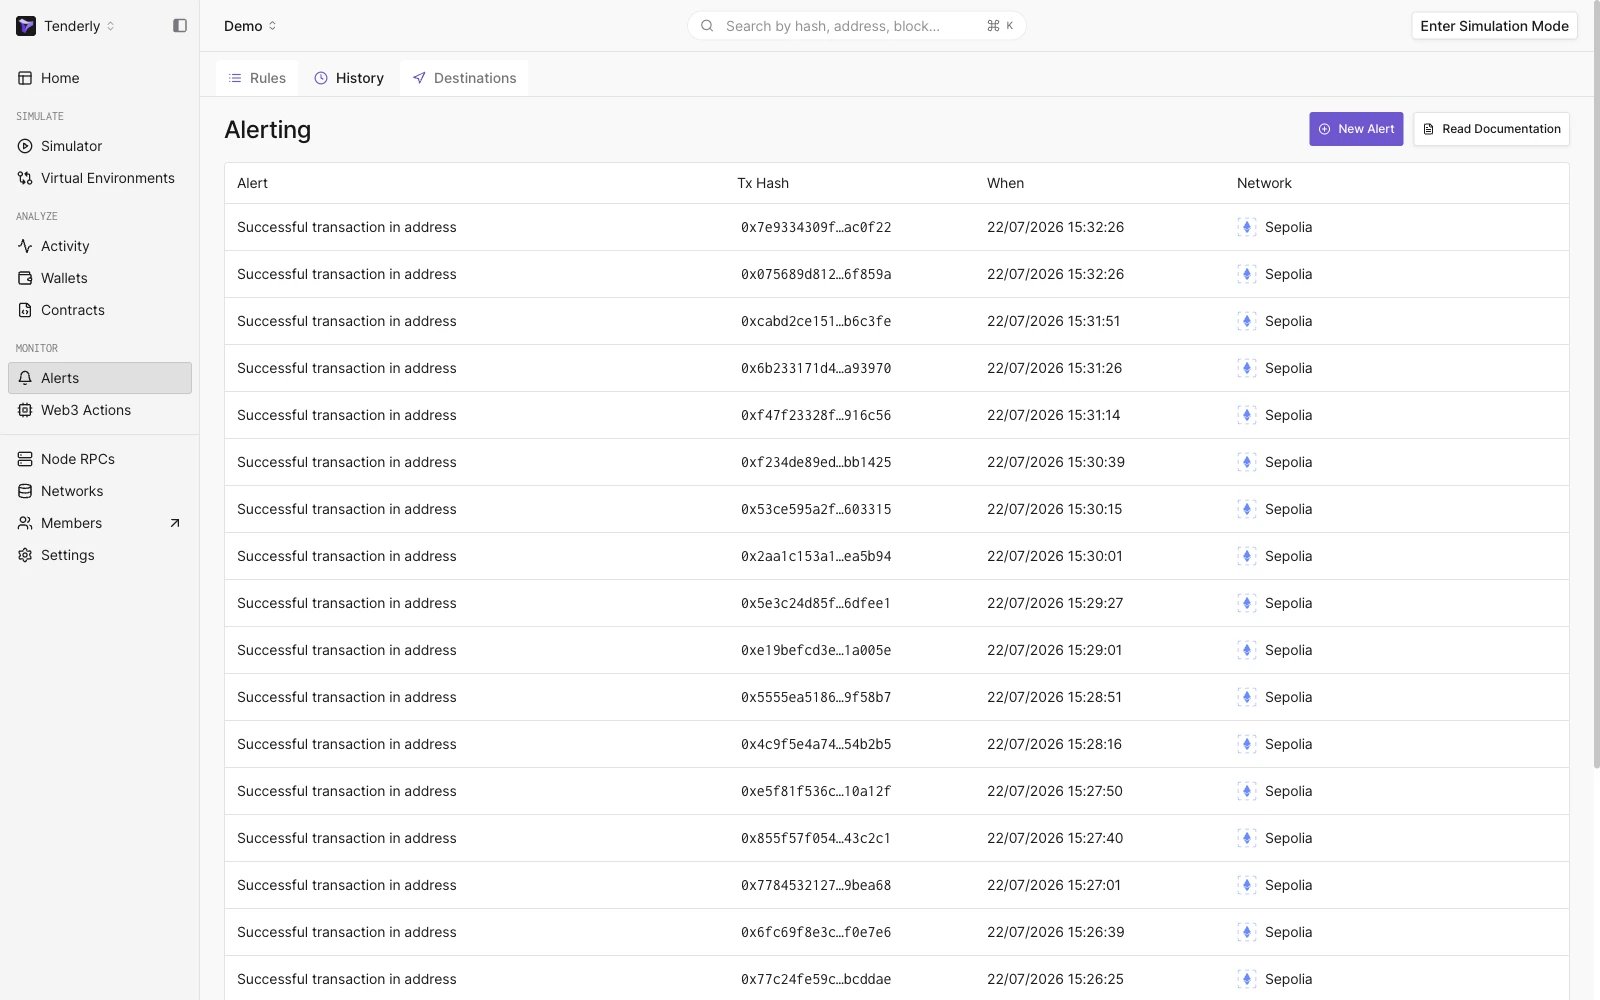
Alert 执行历史
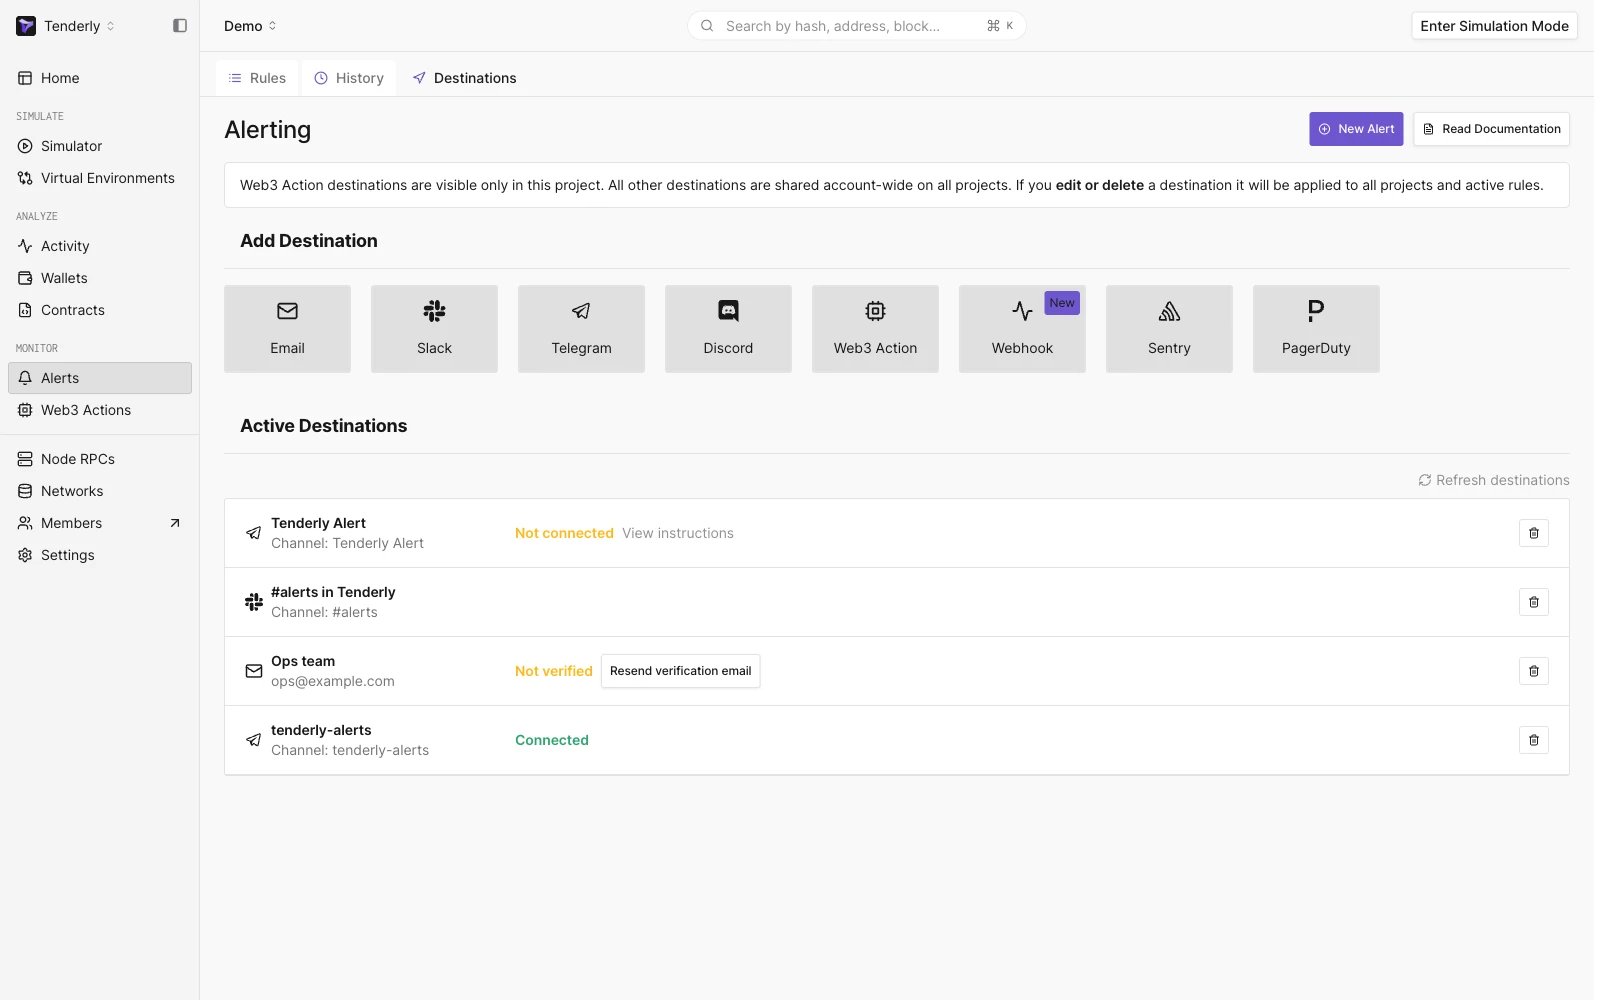
已创建的 Alert Destinations 列表